Lessons from a guy who used to be “Fat, Sick, and Nearly Dead”

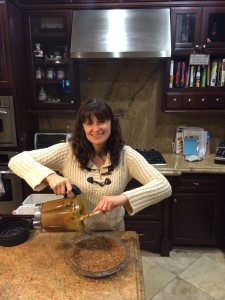
On March 22, 2014, I met one of my all time favorite health guru superstars – Joe Cross, creator of the documentary “Fat, Sick, and Nearly Dead.” Forget Brad and Angelina, meeting Joe was truly a bucket list moment for me! I think it’s obvious from the goofy smile on my face that I was completely star struck by a man who is now famous from doing a documentary about embarking on 60 day juice fast.

IMG_9137


I was soooo excited to show him all of my “Reboot with Joe” goodies including a tote, a travel juice cup, and some of his other books!

IMG_9136 IMG_9135

Joe happened to be in Phoenix that Saturday as part of his book signing tour for The Reboot with Joe: Juice Diet book. I planned my entire day around the book signing. At 9:00am that morning I headed to Barnes & Noble to get my wristband (you know with my A type personality that I needed to be in the first group to get my book signed!!!). I happened to notice that they had chairs set up for his presentation and it was first come, first serve. I knew I had a few errands to run around town, so I did what I had to do and then made sure I was back at Barnes & Noble by 12:30pm the latest. I was so happy to get a seat!!!

IMG_9113

I patiently waited until 2pm for his arrival. I figured a selfie was a good way to kill time! 🙂

IMG_9114

Once he arrived and began talking, I sat in my chair, on the edge of my seat, wide-eyed, and soaking up every moment. I did my best to take pictures and videos of the event. I took as many as my phone could before it gave me the blinking red battery light. I then realized I better quit it because I had to save some battery life for my photo op!!

IMG_9116

One of the things I love about Joe (yeah that’s right, we’re on a first name basis now haha), is that he is such a funny and charismatic speaker! He makes the topic of fruits and vegetables super interesting! And he doesn’t use boring technical words or concepts. His message is so basic and rudimentary that it makes complete sense. He’s not out there to sell a fancy weight loss product. He just wants people to run back into the arms of Mother Nature!!

Mother Nature

As Joe explains, in our current modern day society, we are always looking for the quick fix and the processed food in the pretty box with the alluring advertising. We have abandoned Mother Nature (who has always been there for us humans) and we have completely cheated on her with the “pretty young thing around the corner” as Joe puts it – processed food. According to Joe, “70% of all the disease we suffer from in the modern world is a result of our lifestyle choices” (Cross, page 7). So he figured he had a 70% chance of curing himself of his autoimmune disease, chronic uritcaria, by changing his lifestyle. After only 5 months (60 days juicing, plus 90 days juicing & plant based foods) he did just that  – he eradicated that terrible disease and eliminated prednisone from his life!

Because I am such a fan of Joe and his message, I want to share with you some of the biggest takeaways that I have gained from his book and his presentation at the book signing.


  • Extreme Ways:  Joe joked that the only vegetables he was getting in his diet before embarking on his health journey was the pickles on his Big Mac lol! He agrees that consuming only juice for 60 days was extreme, however, his lifestyle before was even more extreme!! He was sick, unhappy, and outsourcing his health to other people – doctors, pharmaceutical companies, witch doctors, etc! He finally figured out at age 40, after 8 years of being sick, taking medicine around the clock, and weighing 320 pounds, that he had to take responsibility and make a change!
  • Marriage with plants: Plants have made us humans the strongest, most successful species on the planet! Think about the cycle of 02 and C02. We breathe out the C02 and the plants take it in. The plants release 02 and we need that to breathe! The relationship with us and plants has really been a beautiful marriage. Too bad we have been cheating with processed foods – oops! 🙁
  • Nutrients: Macro & Micro:  Joe pointed out the difference between macronutrients and micronutrients. Macronutrients consist of proteins, sugars, salt, fat, and carbohydrates. Micronutrients  are the vitamins, minerals, and phyto nutrients that help our bodies function. The problem is that we tend to be consuming way more macronutrients than micronutrients. Most people are only getting 5% of their calories from micronutrients. For better health, we need to start increasing that number!
  • Fuel vs. Information: Do you think food is fuel? If you said yes, then you are half right! Macronutrients are the fuel that give you energy. Micronutrients are information! For example, vitamin C does not get burned to propel you forward in any way, rather it provides information for your cells to help your body to function properly.
  • Why Reboot: On page 13 of the book he sums up the benefits of rebooting including: reseting your system, jump starting weight loss, boosting your immunity, having clearer skin, making digestion easier, reducing inflammation, and increasing your energy.
  • $$ Spent on Sickcare Healthcare: Healthcare (or sickcare as he calls it) is a $2.7 trillion industry.  So what does that mean? For every dollar spent on the US economy, $0.16 is going to healthcare. And the crazy thing is that 70% of diseases are preventable with proper nutrition!
  • Joe LOVES fiber, but not during a Reboot: During a normal day he juices, blends, and eats. However, during a reboot he prefers to juice only in order to turn off the hunger signals in his body. The first 3 days are the worst for dealing with the hunger signals, but by day 4 the body responds appropriately and you should feel great!
  • Toxins:  Joe explains on page 16 that rebooting can help the body’s ability to reset and in turn assists with the detoxification process. When our bodies reach the maximum detox level that it can handle, the toxins get stored in organs, cells, and tissues instead of being released out. This is dangerous to our health as it contributes to inflammation, diseases, weight gain, and a compromised immunity.


All in all attending the book signing was an exciting and memorable day for me! I will continue to follow Joe, read his books, and utilize his tips and recipes!

IMG_9142


IMG_9141

I hope this post was useful! Let me know if you have questions or comments!! I definitely recommend watching his documentary and/or checking out his books and social media pages!

You can also check out my Facebook page for more videos from the book signing!

Healthy Shepherd’s Pie!

In honor of St. Paddy’s Day and my very Irish roots I was in the mood for some good ole’ Shepherd’s Pie! I thought of ways of making a healthy version and did some google searching! I found a great recipe (http://www.ovenloveblog.com/shepherds-pie-with-cauliflower-topping-gaps-paleo-grain-free-dairy-free-option/) that I adapted!

images

I thought it was brilliant to substitute cauliflower for the usual potato on top!! I thought about using bison meat but could not find it at the store today so I purchased ground turkey instead.  What a delightful and tasty dish! This will be staple in my house when I’m craving that Shepherd’s Pie taste!

Here is the recipe step by step!

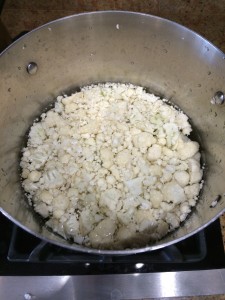
1) Preheat the oven to 400 degrees Fahrenheit. Then boil one head of cauliflower in a large pot. I let it come to a boil and then lowered the heat.

IMG_9067

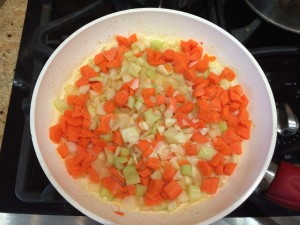
2) While the cauliflower was in the pot I sautéed carrots, onions, celery, and garlic in a pan with vegetable broth.

IMG_9068


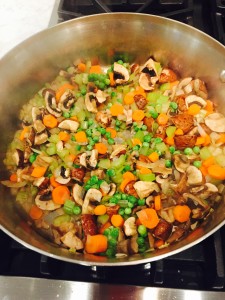
Note: Since writing this original post, I’ve actually added more veggies! Recently I’ve added mushrooms and frozen peas for even more nutrition, flavor, and texture! DELICIOUS!


Shepherd's pie - veggie saute

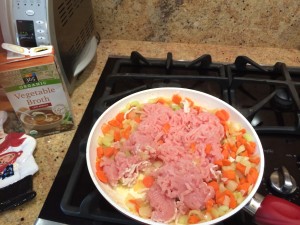
3) After about 5 minutes I added the ground turkey.

IMG_9069

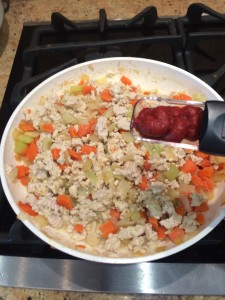
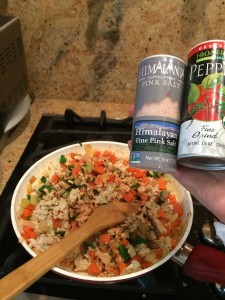
4) After let the meat brown for a few minutes I added a tablespoon of tomato paste,  2 tablespoons of parsley, Himalayan salt, and pepper.

 IMG_9070        IMG_9072

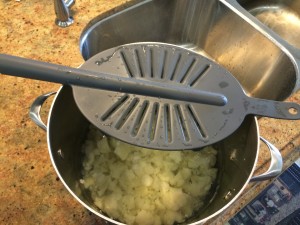
5) I reduced the pan’s heat to a simmer and then drained with the cauliflower.

IMG_9074

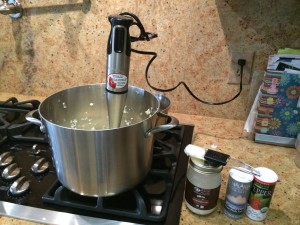
6) Next I added 1 tablespoon of coconut oil, and a sprinkle of Himalayan salt and black pepper to the cauliflower. I then used my immersion blender to blend it all together.

IMG_9075

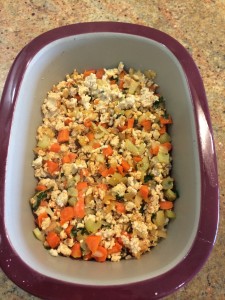
7) Next I added the turkey meat and veggie mixture to the bottom of my baking dish.

IMG_9076

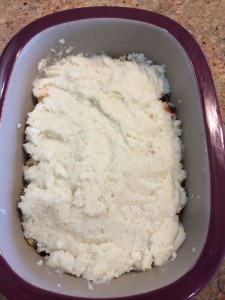
8) On top of that I spread out the mashed cauliflower.

IMG_9077

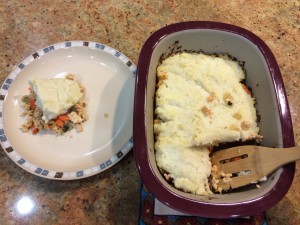
9) It then baked in the oven for 30 minutes at 400 degrees Fahrenheit.

IMG_9079

10) Last step – enjoy!!!

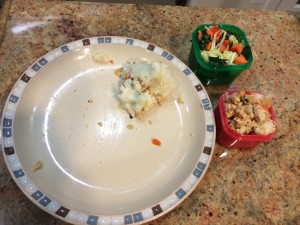
IMG_9081I even made it work for the 21 Day Fix portion control program lol! I added a salad for some extra greens. If you are not familiar with the program, it’s based on portion control. For instance, I am allowed 4 red containers for protein and at least 3 green containers for vegetables. If you want more information on that particular Beachbody program then you can find my email on the Contact Me link and message me! 🙂

IMG_9082


If you try this recipe please let me know in the comments! I’d love to hear from you!!

 Here’s a summary of the recipe:

Ingredients:

• 1 large head cauliflower, chopped into florets • 
1 tablespoon coconut oil
 • 1 small onion, diced
 • 2 celery ribs, diced
 • 2 carrots, diced • 
2 cloves garlic, minced
 • 1.5 pounds ground turkey, bison, or beef • 1/4 cup vegetable broth (to sauté) • 1 tablespoon tomato paste • 2 tablespoons chopped parsley • salt and pepper to taste • 1 cup chopped mushrooms (optional) • 1/4 cup or more frozen peas (optional)


Directions: 

1)   Preheat the oven to 400 degrees Fahrenheit. Then boil 1 head of cauliflower in a large pot. Let it come to a boil and then lower the heat.

2)   While the cauliflower is in the pot, sauté carrots, onions, celery, and garlic in a pan with vegetable broth. Optional: add mushrooms and frozen peas.

3)   After about 5 minutes, add the ground turkey.

4)   Let the meat brown for a few minutes and add 1tablespoon of tomato paste and 2 tablespoons of parsley. Add Himalayan salt and black pepper to taste.

5)   Reduce the pan’s heat to a simmer and then drain the cauliflower.

6)   Next, add 1 tablespoon of coconut oil, and a sprinkle of Himalayan salt and black pepper to the cauliflower. Mash the cauliflower by hand or with an immersion blender.

7)   When assembling, add the turkey meat and veggie mixture to the bottom of the baking dish. On top of that, spread out the mashed cauliflower.

8)   Bake in the oven for 30 minutes at 400 degrees Fahrenheit.

9)   Last step – enjoy!!!


4 Ingredient Paleo Pancakes!

Ok, now in the morning I am usually a major smoothie person. Especially because I love my Shakeology so much (it is my daily dose of dense nutrition you know 🙂 ). However after several requests from the hubby, I decided that I needed to change our morning routine and make some pancakes from scratch. Pancakes with real, whole foods ingredients of course – not instant from the box! 🙂

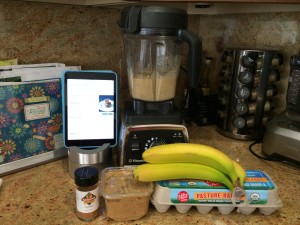
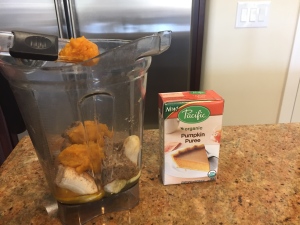
The original recipe can be found here (http://civilizedcavemancooking.com/breakfast/perfect-paleo-pancakes/). To my delight, these 4 ingredient Paleo pancakes turned out amazingly well! One batch calls for 3  bananas, 3 eggs, 1/2 cup nut butter (I used almond butter), and 2 teaspoons cinnamon. All of these ingredients go in a high speed blender or food processor.

IMG_7565

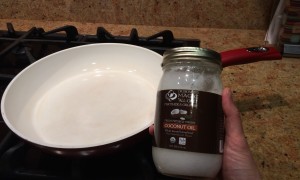
You will want to preheat your skillet and “grease” it with coconut oil. Because coconut oil has a unique composition of fatty acids (90% saturated), it is highly resistant to oxidation at high heats. This makes it an ideal oil for cooking food at higher temperatures.

When purchasing coconut oil, it is best to choose the unrefined or (extra) virgin form. It is even more beneficial to choose a variety that is organic and raw. Refined coconut oils can be compromised during high heat processing and treated with chemicals, destroying the health benefits.

IMG_8100

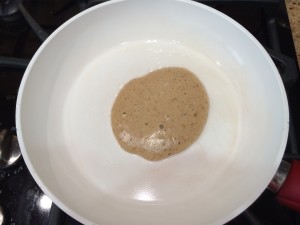
The trick with these pancakes (and luckily I caught this tip from reading the comments) is to make sure you keep the pan on LOW heat. I cannot stress this enough! Out of 10, I kept my dial between 4 and 5. Now they do take longer to make, but trust me when I tell you it is totally worth it so you get the pancake consistency that you are used with a boxed brand or IHOP lol!

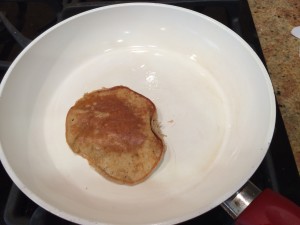
And, just like with typical pancakes, you want to see the bubbles forming before you flip the pancakes.

IMG_7566     IMG_7567

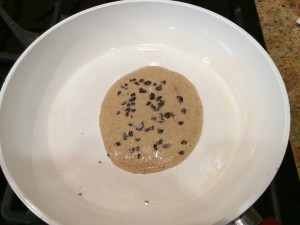
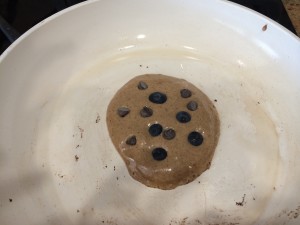
If you want to change up the flavor, you can get creative and add cacao nibs, berries, or nuts. I usually pour the batter in the pan and then slowly sprinkle on my  “extra” so that the base of the batter remains unadulterated and you can make a variety! For example, I added cacao nibs for a chocolatey crunch (seen below on left) and I even tried a chocolate chip/blueberry combination (see below on right). Yum!!

IMG_7568      IMG_4693

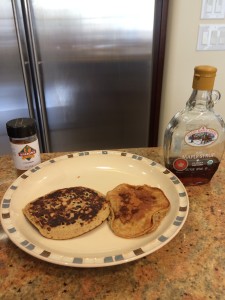
They may have taken a few extra minutes to prepare, but they were so worth it! And they tasted so good that I couldn’t get them to the plate fast enough because my husband was gobbling them up!!

IMG_7569

I even stored the leftover pancakes (I managed to sneak 2 away from my husband’s sight lol) in the frig and then we enjoyed them later in the week just by reheating in the toaster oven.

Top them with pure maple syrup, extra cinnamon, fruit or any of your favorite toppings and enjoy!

If it’s the Fall season, try adding pumpkin puree!! I added 3 tablespoons of organic pumpkin puree and they came out wonderful!

IMG_5113


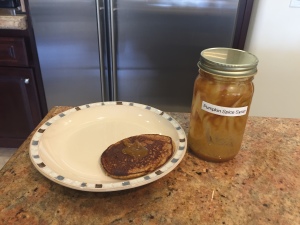
Another Fall season tip, you can add Pumpkin Syrup as a topping! See the recipe for homemade pumpkin syrup in another blog post, “It’s Pumpkin Recipe Time!!
IMG_5114

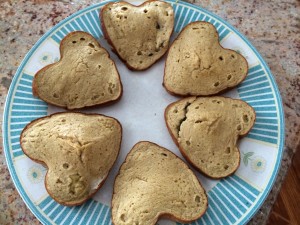
Or you can get really creative like my best friend Monica, and you can take the same batter and turn them into muffins!!

IMG_2585

Please enjoy and don’t forget to let me know how they turn out if you make them!


Bust the Flu Juice!!

My husband and I are starting off the New Year with the tail end of the flu. But not to worry! We are going to bust it with a flu buster juice that I discovered in an organic cafe in Seattle called Chaco Canyon.

Evan Chaco Canyon Flu Buster           Chaco Canyon

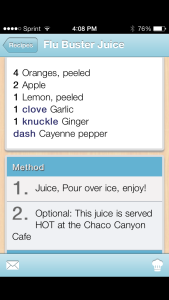
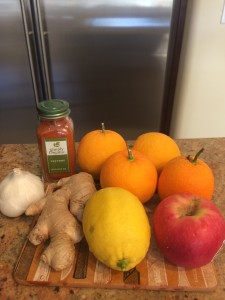
I knew the ingredient list of: apples, oranges, lemon, garlic, ginger, and cayenne pepper based on the menu at the restaurant. So I experimented with the amounts and inputted my new recipe into my MacGourmet App.

IMG_6977

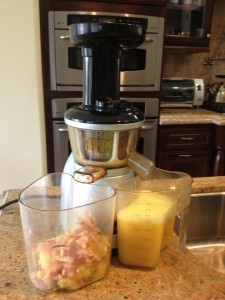
I gathered what I had from the refrigerator and started juicing! Please note the first time I made this I did use 2 apples, but only had 1 available today!
IMG_6975             Flu buster

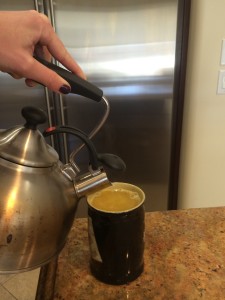
Normally I drink juices cold, but the restaurant serves this one warm. My husband suggested adding a little bit of hot water!

IMG_6976


The juice was a success! It tasted delicious and I know it will help finish off this flu!

The fruits and herbs used in this recipe have a great deal of benefits! Here’s a list of just some of these benefits that make them helpful for busting the flu:

  • Apple: detoxifying, Vitamin C, B-complex
  • Orange: Vitamin C, potassium (electrolyte mineral)
  • Lemon: detoxifying, Vitamin C, maintain pH levels in the body
  • Ginger: anti-inflammatory, antioxidant
  • Garlic: antibiotic, anti-inflammatory, immune boosting
  • Cayenne: blood purifier


It Ain’t About How Hard Ya Hit. It’s About How Hard You Can Get IT And Keep Moving Forward.

IMG_6830           IMG_6849

The title of this post is taken from “Rocky Balboa VI”. I thought it was fitting because I was truly inspired during today’s boxing class at Title Boxing Club. There were 7 of us in the class, including two regulars – a very motivational 12 year old boy named Evan, and his proud momma, Liz. Evan is not just your typical 12 year old boy. As it turns out, he not only kicks the adults’ butts in each and every class, but he does it with courage and strength, while overcoming physical restrictions due to Cerebral Palsy. Let me tell you, from what I saw, he did not miss a beat!!! I’ve been going to boxing classes all week at Title and I have not witnessed one adult put in as much effort as this resilient young man. Just the other day I saw some people clearly goofing around and even playing on their phones during class – really?!! What’s their excuse for being so lazy? Maybe those same people should take a class with Evan and Liz and they would get their act together!

IMG_6851


At the end of class I had the pleasure of chatting with Liz and Evan and learned so much more about how incredibly active he is! Evan is involved with Arizona Disabled Sports (AzDS) and competes in Wheelchair track racing, snow skiing and hand-cycling. He’s even a 4 time Gold Medalist!!! They are both working hard to fundraise for the 5th Annual Run, Walk and Roll 5k/10k on Saturday, January 11, 2014 (www.runwalkrollaz.com). The primary mission of AzDS is to provide a wide variety of sports and recreation opportunities for individuals with all types of disability. You can do your part and join “Team Evan” when you register for the race and also by purchasing a “Team Evan” shirt (www.booster.com/teamevanazds).

AZDS 2013 091      IMG_5429-1011929624-L


Apparently this race has even gotten the attention of Ali Vincent (5th winner of the “The Biggest Loser”)!!!  She’s pictured here in the middle with the red long sleeve shirt from last year’s event.

AZDS group photo Ai Vincent

I’m excited to say that I will be participating in the race too on January 11! When I got home from boxing class, I couldn’t wait to sign up!! I’ve also ordered my “Team Evan” shirt!! Will you be joining us at the race or maybe donating instead?!! You know you want to!!! 😉

PO3710452-front


Healthy Thanksgiving Recipes 2013!

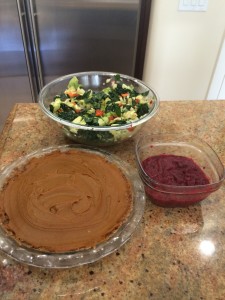
This year for Thanksgiving we went over to Evan’s brother’s house for Thanksgiving! All of his relatives made an excellent effort to purchase high quality, organic ingredients for the rest of the dishes so I was excited for a yummy, healthy dinner! We decided to bring a total of 4 homemade dishes to contribute to our healthy holiday meal including cranberry sauce, kale/butter lettuce salad, vegan-gluten-free-dairy-free-no bake pumpkin pie, and a vegan-paleo-dairy-free chocolate pudding! So why am I making cranberry sauce and not just grabbing a can? Well, here’s a brief and to the point article explaining from Food Babe why, discussing BPA (Bisphenol A) and GMO’s.
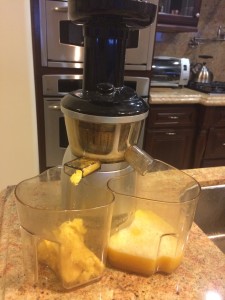
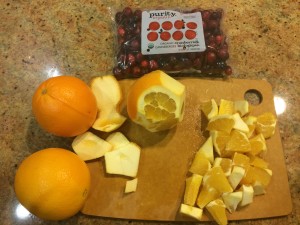
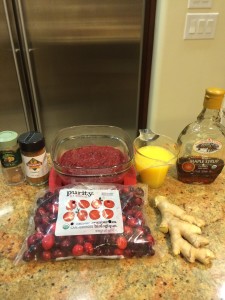
I decided to get 2 of the dishes done the night before to keep my Thanksgiving day a little less hectic, so I focused on the cranberry sauce and the pumpkin pie. The cranberry sauce consists of organic fresh cranberries, orange juice (I have a juicer so I juiced my own oranges), maple syrup, nutmeg, cinnamon, ginger (optional). Here’s the original recipe from Multiply Delicious.

IMG_6155 IMG_6154 IMG_6160


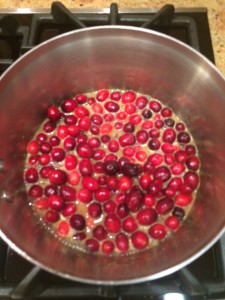
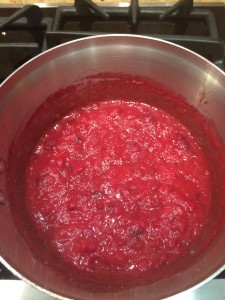
Once you have all of your ingredients ready, simply add to a pot, bring to a boil, and let simmer!

IMG_6156 IMG_6157


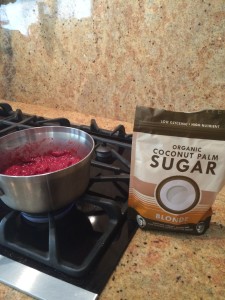
The recipe recommends a simmer of a least 20 minutes or when the cranberries start to burst open. I made sure to keep stirring and to do frequent taste tests. I will admit that I upped the maple syrup to about 3 1/2 tablespoons because I thought it was a little too tart. Could have to do with the fact that I made my own orange juice so the sugar content would be much lower than a store-bought brand. In the morning, I tasted it one more time and decided to add more sweetener – but I turned to coconut palm sugar (1 tablespoon) because it is low glycemic.

IMG_6173


After another quick boil and about a 20 minute simmer – I thought it was finally just right!!

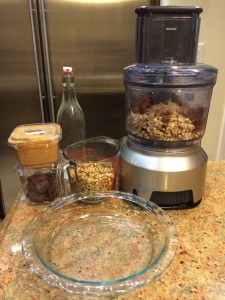
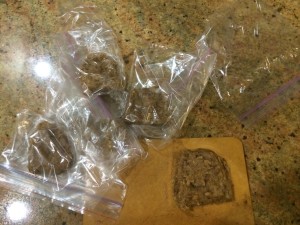
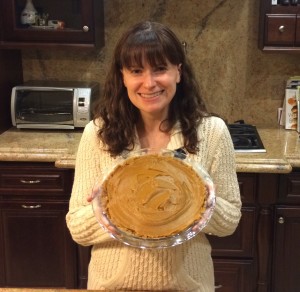
So, on to the pumpkin pie! Evan gave me the idea of using the homemade larabars as a crust for the pie! I thought it was an awesome idea and decided to give it a try! They are simply made with dates, almond butter, and nuts (in this case I used soaked walnuts). I made about 2 batches worth to make sure I’d have enough and it worked out great! I even had leftovers to make 5 bars lol!

IMG_6161 IMG_6165 IMG_6172


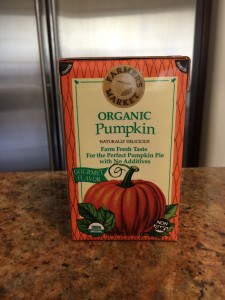
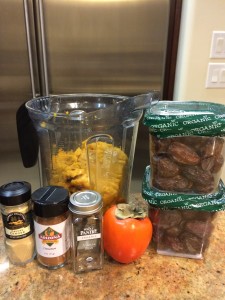
After smoothing my crust onto the pie plate, I moved on the pumpkin filling! I used 2 containers of pumpkin puree, 1 ripe persimmon, about 2 1/2 cups of dates, a scrape of vanilla bean, and a dash of ground ginger and cinnamon. For the pumpkin puree, I prefer to used boxed instead of canned – again for the same concern about BPA.
Organic Pumpkin Puree box         IMG_6167

I wound up filling the Vitamix to the top lol, so not gonna lie, it struggled a bit to blend everything properly so I had to take the lid off quite a few times to mix stuff around. Not to worry though – after the 4th or 5th time it all blended just fine!
IMG_6168 IMG_6169

Once the pie was complete I put it in the freezer since we weren’t going to consume it until the next day. After a long night of cooking and washing dishes, I finally got myself to bed around 2am (Evan and I are such night owls, so it’s actually easier for me to work late into the evening then to get up early lol)!

On Thanksgiving day, I decided to go to the gym in lieu of a turkey trot (gotta love the flexibility with sleeping in longer!) and then spent afternoon making my salad! By 3pm I had all of my dishes completed!

IMG_6174


And of course, Evan made his famous chocolate pudding! It’s made with bananas, avocados, honey, cacao powder, a few pieces of dark chocolate bark, almond milk, and almond butter. It’s soooo delicious – hands down our favorite homemade dessert!

IMG_6175

All in all, it was a healthy, happy Thanksgiving! I’m thrilled to say that all of my dishes had rave reviews  – but I think the pumpkin pie was one of the top favorites!!

Another one of my favorites from Thanksgiving (well in addition to the turkey) had to be my brother-in-law’s simple sweet mashed potatoes! All he did was bake them in the oven, and sprinkle on cinnamon! They tasted like candy! Unfortunately they went so fast I couldn’t snap a photo in time lol!

Here’s to wishing all of you a healthy, happy Holiday Season! 🙂

IMG_6187

Dairy-Free Tuna Salad

Dairy-Free Tuna Salad!

IMG_6117

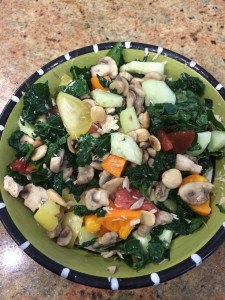
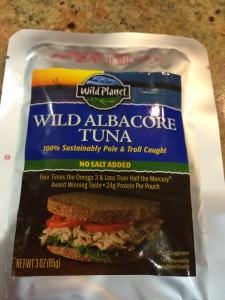
I love having this homemade dish for lunch! As long as I have a 3 oz package of Wild Albacore Tuna in my pantry, this is a guaranteed easy and delicious meal! For all of these ingredients I’d like you to use organic and local whenever possible.

IMG_6145

Ingredients:

  • 3 oz package of Wild Albacore Tuna
  • 1 celery stalk, deveined, chopped
  • 4 tablespoons olive oil (divided)
  • 2 tablespoons vinegar (i.e. champagne, rice, white balsamic)
  • fresh lemon Juice from 1/2 of a lemon
  • 1 teaspoon mustard
  • himalayan salt
  • black pepper
  • lemon pepper (or substitute another seasoning of your choice)
  • 4-6 leaves of kale (or any leafy greens of your choice, i.e.  spinach, butter lettuce, romaine, etc)
  • 2 -3 medium sized heirloom tomatoes (feel free to change the amount based on much you want!), chopped
  • 1/2 of a cucumber, peeled and chopped
  • sauteed mushrooms (I like to sauté about 4 ounces with a little broth in a pan for a few minutes on medium heat)
  • 3 – 4 tablespoons (and more as needed) of low sodium broth
  • 6-8 marcona almonds

Directions:

  • Using low sodium broth (or even water) saute about 4 ounces of mushrooms in a pan over medium heat for approximately 6 – 8 minutes. If you like to multi-task then go ahead and get this started while you prepare the rest of the salad.
  • Open the package of tuna and use a fork to scrape it out into a large bowl. Then squirt lemon juice, about 1 tablespoon of olive oil, and a dash of himalayan salt and pepper onto the tuna and mash it altogether.
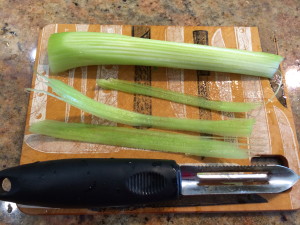
  • Next, add the chopped and deveined celery to the tuna mixture. A simple way to devein the celery is to use a peeler to peel off the top layer of the stalk. This step is particularly helpful for people who do not care for the taste of raw celery.

IMG_5223

  • Either make space in the bowl or remove the tuna and set aside to make room to whisk together my favorite dressing! The dressing is made with the following ingredients: 3 tbs. olive oil, 2 tbs. vinegar, a few squeezes of fresh lemon juice, 1 tsp. mustard, and a sprinkle of himalayan salt and lemon pepper seasoning. I simply use my  fork and whisk away!
  • Next I like to add my greens to the bowl, typically kale. The sooner the kale is in the dressing the better, so the bitterness can be broken down. If you are using kale, remove the leafy part from the stems (either discard or save for another use). As I’m adding more chopped kale to the bowl I like to constantly whisk it around to coat it thoroughly with the dressing.
  • Next I tend to chop up the more water-based veggies to the salad  (again I feel like it helps to break down the bitterness of the kale). So I would typically add the heirloom tomatoes, and then cucumbers before adding root vegetables like carrots or radishes.
  • Before serving I like to sprinkle on a handful of marcona almonds for some crunch! Feel to substitute any nut or seed that you prefer or of course you can omit this step altogether!
  • Serve and enjoy!!!

Servings: 1


If it sounds too good to be true…..

We’ve all heard the phrase, “if it sounds too good to be true, then it probably is.” I’ve been thinking lately about how much this phrase really applies to our modern day society. There seems to be an easy fix for just about every need we have today. Can’t sleep? No worries, just take a pill! Need an afternoon pick-me-up? Just chug down a shot of 5 Hour Energy! Do you want to be heart healthy? Sure, just grab a box of highly-processed cereal with a cute cartoon character and we’ll fix that heart right up with all those “heart healthy grains.” Trying to cut back on sugar? That’s easy, just choose a “sugar-free” artificial syrup to put in your coffee! Watching your calories? Why not go for the lowfat cookies or salad dressings? With these wonderful modern conveniences, all of our problems are solved right? Well, with obesity, heart disease, cancer, diabetes, and many other diseases on the rise – I think not.

Sugar free - chemical shit storm

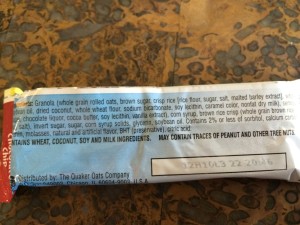
Every day we are so bombarded with tons of information and clever advertising that it’s no wonder that most Americans just accept the status quo and get duped into thinking that there is an easy fix for just about every need. The food industry is first and foremost, a $money-making$ business. These big companies that comprise the majority of commercials we see on TV are not looking out for your health. And unfortunately, a lot of what we see on the front side of food packaging labels are really outright lies. It is the responsibility of the consumers to be diligent about reading the entire package. To really get a clear picture of what you are eating, pay attention to serving size, the ingredient list, and where the item is coming from, etc.

IMG_6121

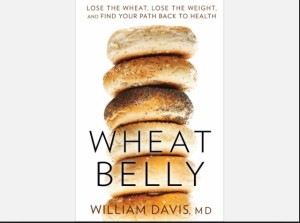
What about all of these trendy catchphrases such as “lowfat,” “sugar-free” and “gluten-free” that confuse people into thinking they are making healthy choices? Gluten-free in particular has really become a popular topic recently and most people have no idea what that means or if they should be consuming it or not. I recently had a discussion with friend who declared that she wants to start eating gluten-free. When I asked if she had a known intolerance to gluten, she looked at me and said, “oh, I don’t know?” I told her that if she wanted to find out she could get tested or better yet eliminate it for at least 30 days and to see how she feels as a result. Unless you have a gluten intolerance or celiac disease, there are no benefits to consuming gluten-free processed food products. According to Dr. William Davis, a cardiologist and author of the book, Wheat Belly, most of these products are made with starches (i.e. potato starch or tapioca starch) that will raise blood sugar levels just as high or in some cases even higher than products made with gluten. This of course, can lead to diabetes among other inflammatory causing diseases.

IMG_6122

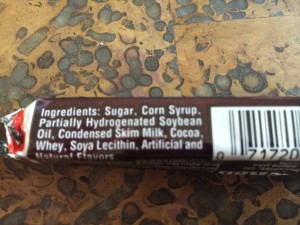
I implore consumers to not get swayed by catchy “sounds too good to be true” phrases such as “lowfat,” “sugar-free,” and “gluten-free.” While it sounds like a great idea at first glance – just think about what is being substituted instead. Companies still need their products to taste good and to still pass as a real looking cookie or piece of bread for example. So think about what kind of chemical additive or high-glycemic ingredient are they using to put back into the food? Products that claim to be free of High Fructose Corn Syrup most likely still contain another form of sugar (maltodextrin, dextrose, and sorbitol for example are among the list of 50 other names for sugar: http://www.dietriffic.com/2009/03/26/names-for-sugar/). Also, watch out for the free of trans fat labels because you might still catch hydrogenated or partially hydrogenated oils on the ingredient list.

IMG_6120

So what’s the answer? I think it is to stick to foods in their purest, most whole form. Try to make your own protein/granola bars instead of buying ones with loads of scary looking ingredients. Get away from boxed foods as much as possible at the grocery store. At a restaurant, swap that trendy, more expensive gluten-free bun for a lettuce wrap instead. When in doubt, repeat the mantra “if it sounds too good to be true, then it probably is” and I hope this helps the decision-making process!

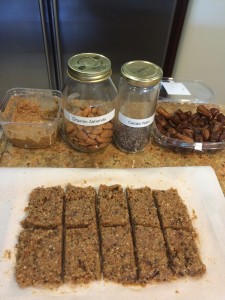
Here’s an example of homemade “larabars” that you can make at home with 4 to 5 simple ingredients! Original recipe here: http://www.100daysofrealfood.com/2012/07/01/recipe-homemade-larabars-4-ways-including-nut-free/. For this batch I actually modified the Cashew Cookie bar by swapping soaked almonds + 2 tablespoons of cacao nibs!

IMG_5927IMG_5929

Fall 2013 Weight Loss Journey with Team Beachbody

2013 has really had it’s ups and downs for me. Unfortunately one of my ups was my weight. It just so happens that I did a significant amount of travel this year and I guess I had way too much fun haha! It is ironic to me that the very year I start my blog and Facebook page, is also the year that I hit my highest weight ever for me personally. I realize now that it’s okay though because I have learned from my mistakes and I have experienced a great deal of success this past Fall!

My last trip was to New York in September to visit friends and family. I knew that once I got off the plane on September 19 that things were going to change. I was going to be focused, dedicated, and work extremely hard to get myself back into shape. I had a few incentives to keep me going including feeling better in my own clothes, looking fabulous in my Halloween costume, being ready for my Women’s Half marathon November 3, and to be in a healthy state for my annual physical at the doctor.

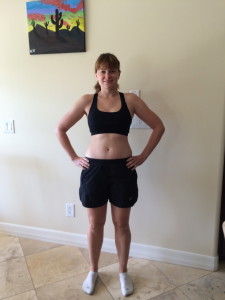
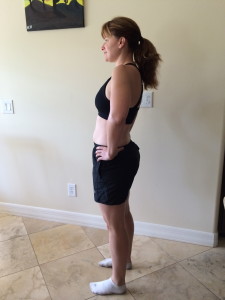
When I got on the scale on September 20, I weighed in at 144 pounds. I am 5’4 which meant my BMI was 24.7, indicating I was is in the Normal category for adults my height. And for my height, a normal weight range would be from 108 to 145 pounds. So by now some of you may be thinking – what’s the big deal? Isn’t normal perfectly fine? For a majority of people, it absolutely is and there is nothing wrong with that! So why did I need to lose weight and change my ways? I know that my weight at that time wasn’t that bad, but I was at the top of the normal range and was only 1 pound away from being considered in the overweight category. I know that I feel comfortable being in the mid to high 120’s. It’s a personal preference, its keep me feeling good in my clothes and comfortable in my own skin.  I wanted to really nip my weight gain in the bud, just so it wouldn’t continue to get worse.

Here’s a picture of me from my New York trip on September 16th.

IMG_5060

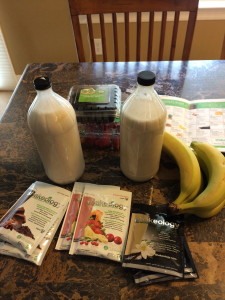
So how did I reach success these past 7 weeks? A variety of things actually! First of all, my friend Corine Green aka Zucchini Runner (another blogger like myself, check her page here: http://zucchinirunner.com) got me involved in one her Shakeology Challenge Groups via Facebook. She sent all of the 6 group members a week’s worth of samples of different Shakeology flavors. She also sent us a recipe packet and lots of great information on Shakeology – which I have learned is an incredibly nutrient dense meal replacement. The company behind Shakeology is Beachbody. Beachbody has also put out many other popular products such as Turbo Jam, P90X, and Insanity, among others. They searched the planet (literally) for 70 different super foods from only sustainable sources. There are a variety of flavors (vanilla, strawberry, greenberry, and chocolate) and they have non-vegan and vegan options.

IMG_5126


I really enjoyed the support from the Facebook Challenge Group hosted by Corine which lasted from September 23 – 30. We had a private group where we could share our recipes, successes and mistakes, and really keep each other accountable. It got me started on the right track again! I was making healthy meals again at home, keeping a food journal, and working out consistently.  I was eager to continue my healthy habits and just so happens that Corine informed us of another Shakeology Challenge group that was going to start on October 7th! It was a 30 Day Sugar Detox!! I was so thrilled to continue that I immediately signed up! This time our group had over 60 members! By the time the 30 Day Sugar Detox Challenge started I was down to 141 pounds. Here are my photos from October 7th:

IMG_5215 IMG_5216 IMG_5217


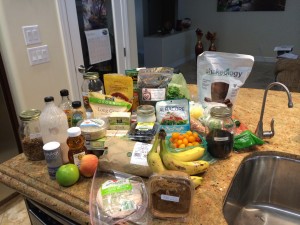
To help us prepare for the 30 Day Sugar Detox the group leaders sent us a shopping list and a meal plan for the week. Here’s an idea of some of the goodies that I purchased to prepare:

IMG_5213

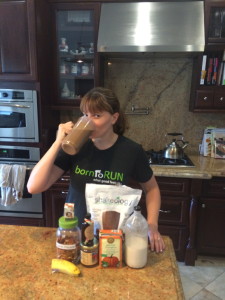
Here’s me on Day 4 (October 10th) enjoying a Pumpkin Shake for breakfast! Using my Vegan Chocolate Shakeology, I blended, half banana, about 10 pecans, 1 teaspoon Pumpkin Spice Blend, 1 teaspoon homemade vanilla extract (thanks Jennifer V!), 1 teaspoon local raw honey, 1/2 cup pumpkin puree, ice, and homemade almond milk! YUM!!!

IMG_5242


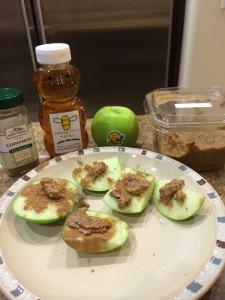
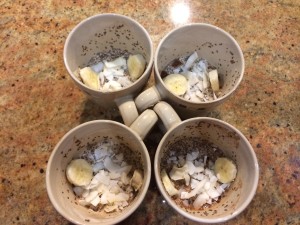
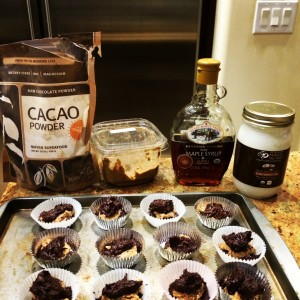
Now even though it was a Sugar Detox, we were still allowed to have small amounts of raw honey and maple syrup to make our own treats. The main focus was to avoid the hidden sugar in a great deal of processed foods and even to avoid sugar substitutes such as aspartame. Here are some of the yummy examples that I made for dessert during the 30 days which includes apple slices with almond butter, chia seed pudding, and homemade peanut butter cups:

IMG_5314 IMG_5317 IMG_5665


During the 30 Day Detox Challenge I had a blast sharing and learning with the group! I made daily posts on my Facebook page to keep myself accountable to my followers and I also shared as many articles and recipes as I could. For me it was SO MUCH FUN!! Corine could see that I was having a blast with the challenge group and she contacted me about being a Beachbody Coach. At first I thought I wouldn’t have the time. But between her belief in me and the success I was feeling with getting healthy I decided to give it a try! I’m still a brand new coach and I’m learning all about Beachbody, but I am so eager to see where it takes me! I am trying to grow my Facebook page and my blog, and I feel that becoming a Beachbody Coach will only propel me into the right direction!

So how did I do at the end of my 30 Day Sugar Detox? I feel great inside and out! I accomplished all of my goals! Check out my Halloween costume (so you be the judge)!

IMG_5449

Oh and I actually participated in not one, but 2 races the first weekend of November! First was the ROC (Ridiculous Obstacle Challenge) 5k Race (even Evan participated!!) and the Women’s Half Marathon.

IMG_5801 IMG_5833 IMG_5849

The Women’s Half Marathon was a huge success! I ran my 2nd fastest time ever at exactly 1:48:00 minutes! Hopefully for my next one I’ll be ready to break my PR and get under 1:45:00 minutes!

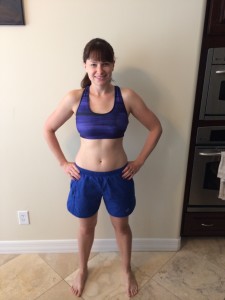
Here are my final results at the end of the 30 Day Sugar Detox Challenge:

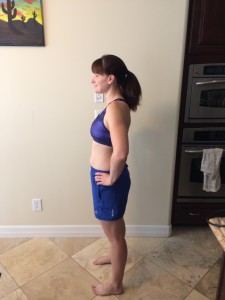
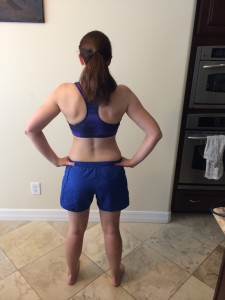
IMG_5887 IMG_5890 IMG_5894 IMG_5896

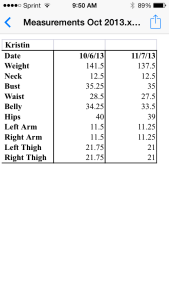
Here are also my measurements:

IMG_5898


I am thrilled that I have lost 7 pounds since the 3rd week in September! I know that my journey is not over and I will be facing upcoming challenges that have to with travel again, but this time I feel more prepared and very focused to continue my results! I will be bringing my bag of Shakeology, my Magic Bullet blender, and my workout gear with me each and every time I go away so that I know I’ll keep on track even when I’m on vacation. I want to make sure that I have the right amount of fun from now on haha!

Thanks so much for taking the time to read this post about my most recent weight loss success! If you want advice pertaining to recipes and/or exercise or Shakeology, please do not hesitate to contact me and follow me via my Facebook page: https://www.facebook.com/CookAndRunWithKristin.

Here is my Shakeology website where you can order the product directly from me:  http://myshakeology.com/cookandrun

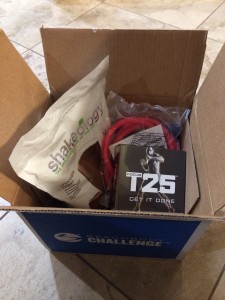
As a new coach I actually purchased what Beachbody calls a challenge pack! I’ll be getting Shakeology shipped directly to my door each month and I also received an exercise DVD set called Focus T25. T25 offers an hour’s results in only 25 minutes so I’m excited to try it!

IMG_5886


How to Make Nut Milk!

Make your own milk at home!! I make nut milk about 2-3 times a week so it’s become routine. I’ve been avoiding store-bought brands because of the preservatives they add! Always use organic, raw nuts (not roasted)!
Step 1) Soak your nuts! Use clean, purified water because the water gets absorbed into the nut. I have walnuts in this picture. They need at least 4 hours to soak in water. Almonds and pecans should soak for at least 8.
At the beginning of the soaking process I add about a capful of Food Grade Hydrogen Peroxide! The nuts immediately foam (reminds me of when I put peroxide on a cut!). I like to make sure they soak in the peroxide for at least 20 minutes. This helps to kill germs and bacteria, and a as result your milk will be better for you and should last longer in the fridge! I must emphasize that you stick to Food Grade. Don’t buy the stuff in the brown bottle as it may contain metals that are not good for you! I found this particular bottle at Whole Foods, but feel free to shop online for better deals!

image1

After about 20 minutes, I rinse off the foamy water in the sink and put clean, purified water back in the bowl. Note: I put enough water in the bowl to just cover the nuts.
You can decide to soak your nuts in bulk (i.e. if I purchase about 2 pounds from the grocery store, I’ll come home and soak all 2 pounds at once) or you can decide to just soak enough to make your milk. Once you soak the nuts, the clock starts ticking on when they will go bad (so store in the fridge for about a week).

image2

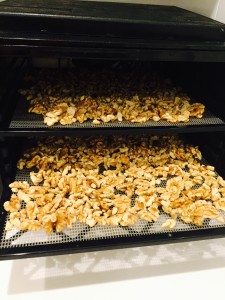
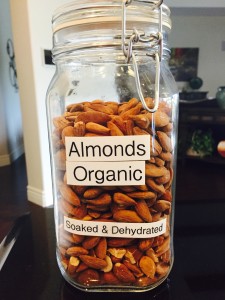
When I do soak my nuts in bulk, I preserve them by putting them in my dehydrator at 105F for 24 hours. then I put them in a jar for storage!
Walnuts in dehydrator
Almonds in jar
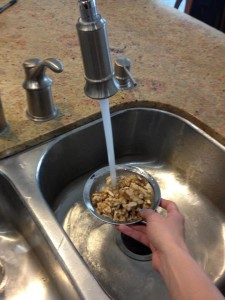
Step 2) Rinse off the nuts in a colander to remove the digestive inhibitors. The water will turn from brown to clear.

step2

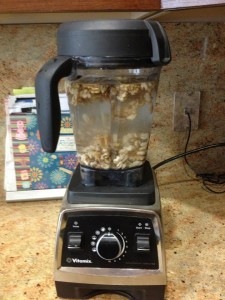
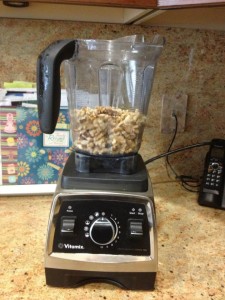
Step 3) Put the nuts in a Vitamix blender (or other high-powered blender of your choice) to pulverize them. I originally had soaked 2 cups of walnuts which turned into about 3 cups post-soaking!
step3
Step 4) Add water to the Vitamix. (for every 1 cup of nuts that have been soaked, I add 4 cups water).
step4
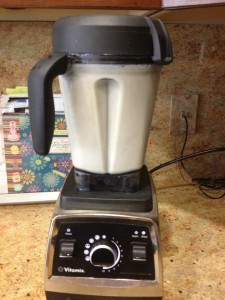
Step 5) Blend in Vitamix for 30-45 seconds. I discovered that I can hit the Smoothie button and it will run for itself for about 45 seconds.
step5
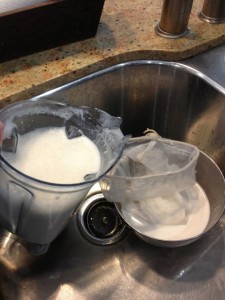
Step 6) After blending strain the liquid through a nut milk bag in a bowl. I got my nut milk bag for $10 plus free shipping from Elaina Love’s Pure Joy Planet! http://www.purejoyplanet.com/?Click=4989
step6
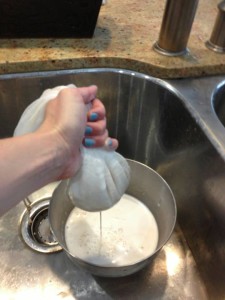
Step 7) Squeeze the nut milk bag over a bowl. I got my nut milk bag for $10 plus free shipping from Elaina Love’s Pure Joy Planet! http://www.purejoyplanet.com/?Click=4989
Step7
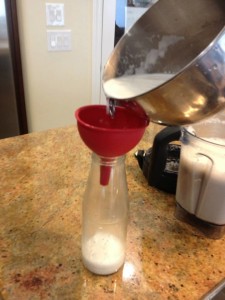
Step 8 ) Pour the nut milk into a jar/container! I save jars glass jars from sauces and peel off the labels!
step8
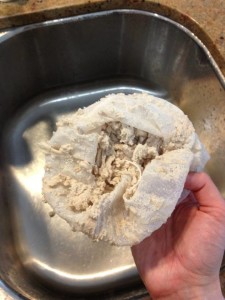
Step 9) You will have walnut or almond “pulp” left. You can choose to discard the pulp or save it in a bag and store in the freezer for other recipes. I got my nut milk bag for $10 plus free shipping from Elaina Love’s Pure Joy Planet! http://www.purejoyplanet.com/?Click=4989
step9
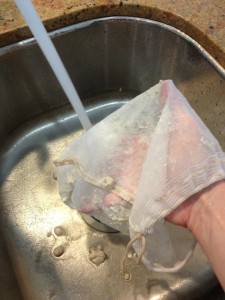
Step 10) Rinse off the bag in order to finish straining your nut milk. I got my nut milk bag for $10 plus free shipping from Elaina Love’s Pure Joy Planet! http://www.purejoyplanet.com/?Click=4989
step10
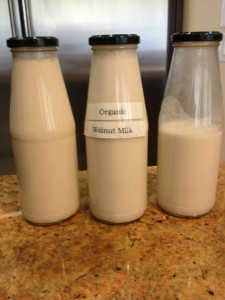
Step 11) Store your nut milk in a glass jar in the fridge for up to 5 to 7 days.
step11
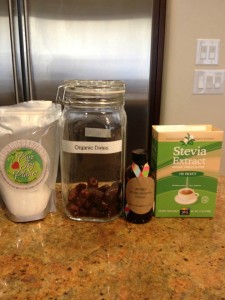
Optional: You can flavor or sweeten your nut milk with xylitol, dates, vanilla extract, or stevia. Also, you can add raw cacao when you blend to make chocolate milk!
step12
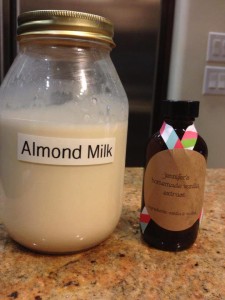
To make your nut milk truly from scratch you can even add homemade vanilla extract! Thanks Jennifer!
step13
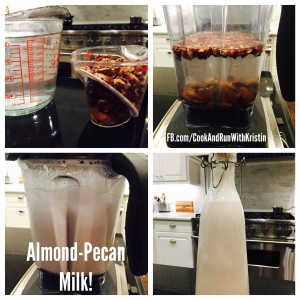
Sometimes I even get creative and do a combination milk! Here I have 1/2 cup almonds, and 1/2 pecans (both already soaked)!
Almond Pecan Milk