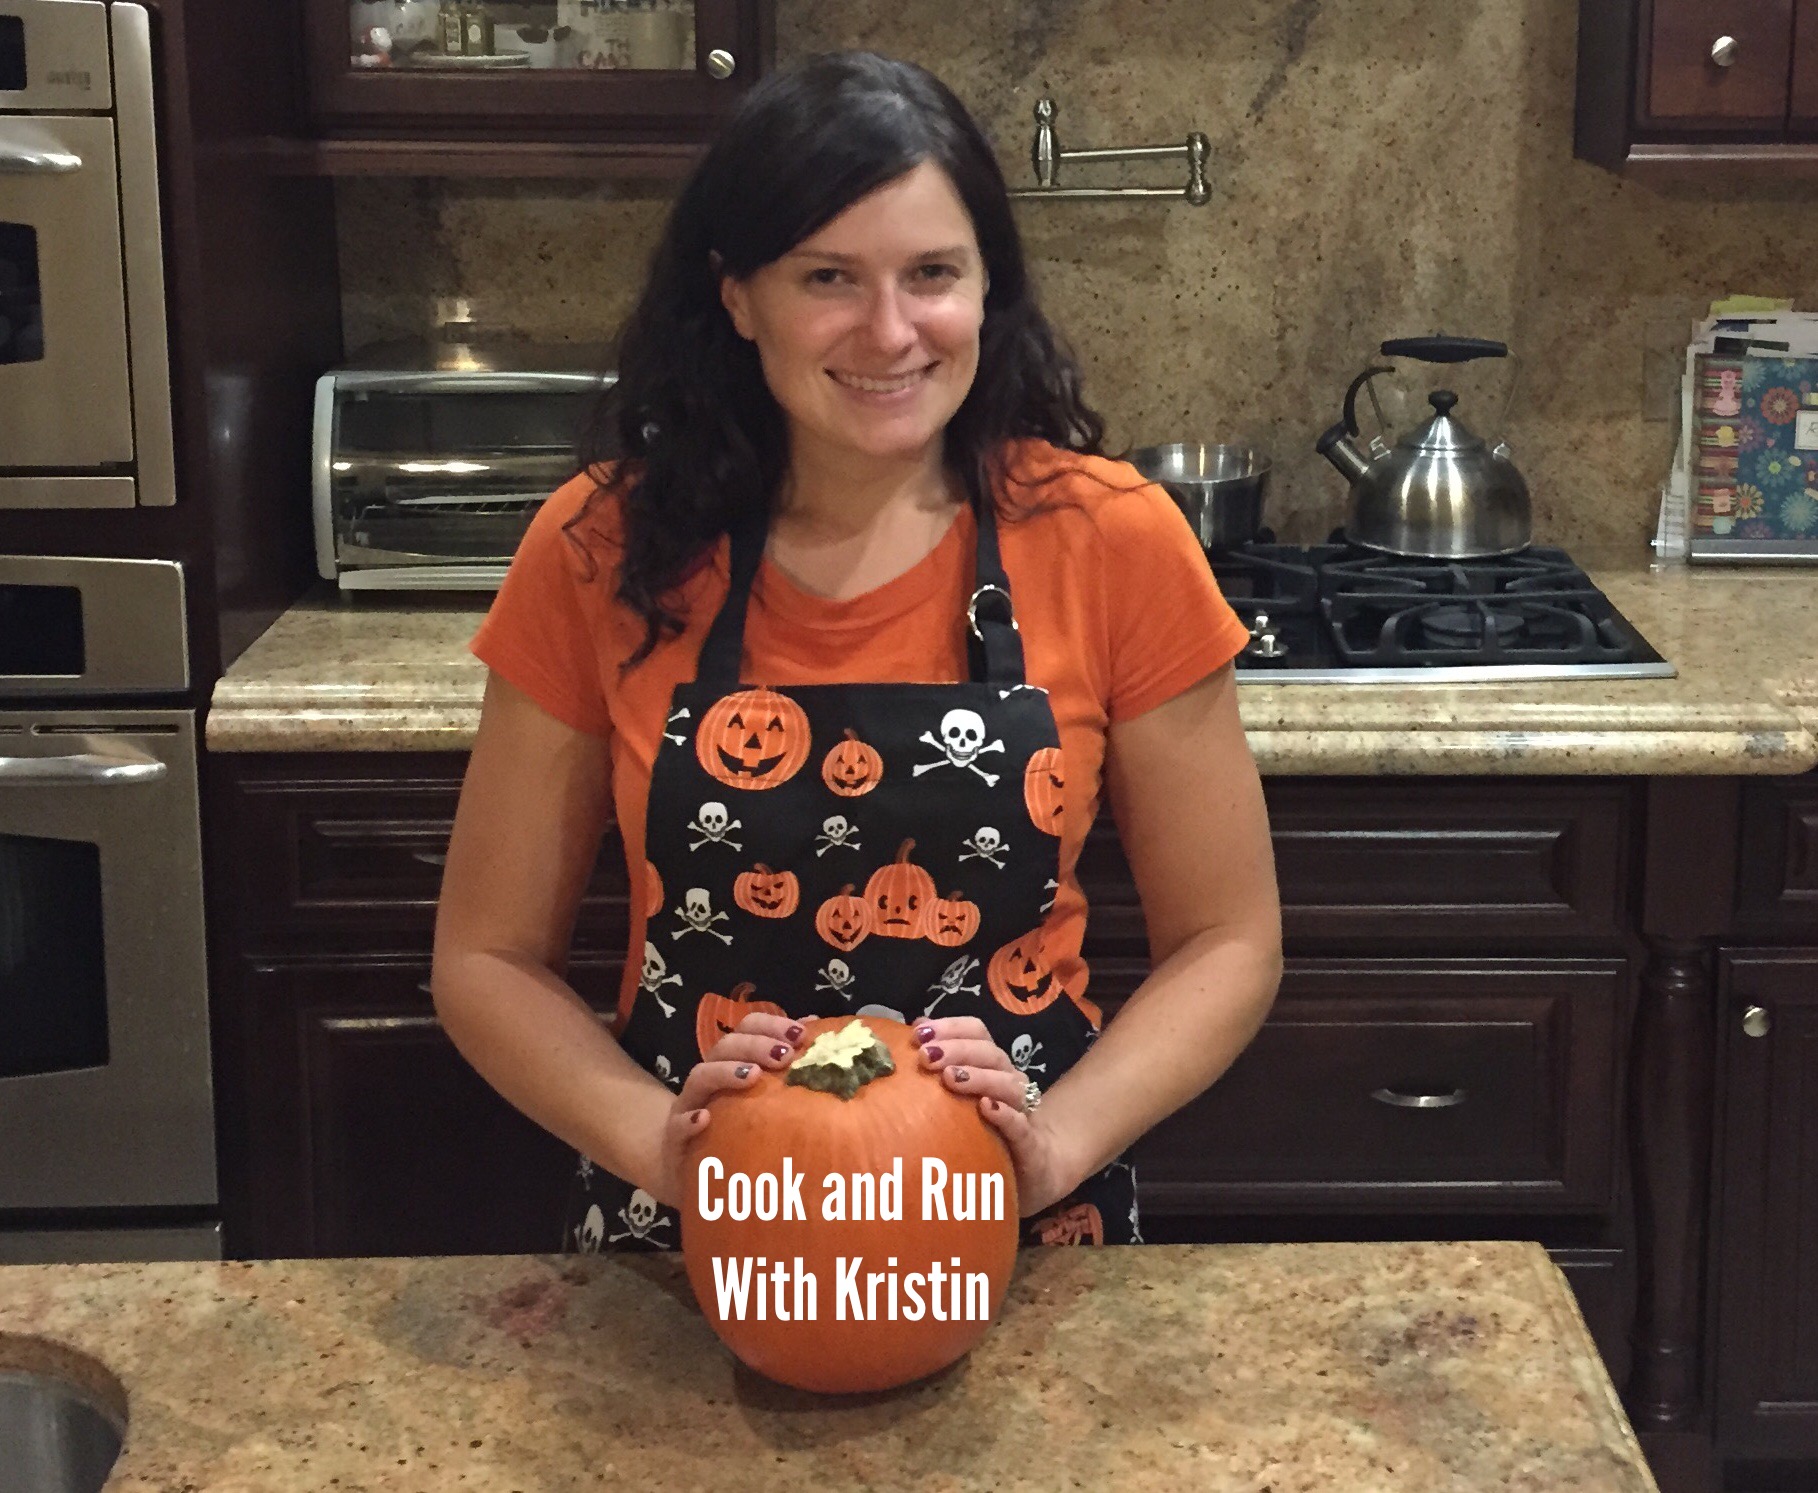
Category Archives: Healthy Recipes!

Shrimp Not-So-Scampi

Hello there!

It’s been a while since I wrote on the blog, but last week I had put together a simple and tasty dinner at home and wanted to share!! One of the reasons I haven’t written on the blog in so long has to do with the fact that I have been traveling quite extensively! It’s been a LOT of fun!! As a hardcore foodie though, I may have had TOO much fun overindulging with the local food and beverages of the places I have been! I can definitely get trapped in the “When in Rome…” feeling when I’m on vacation.

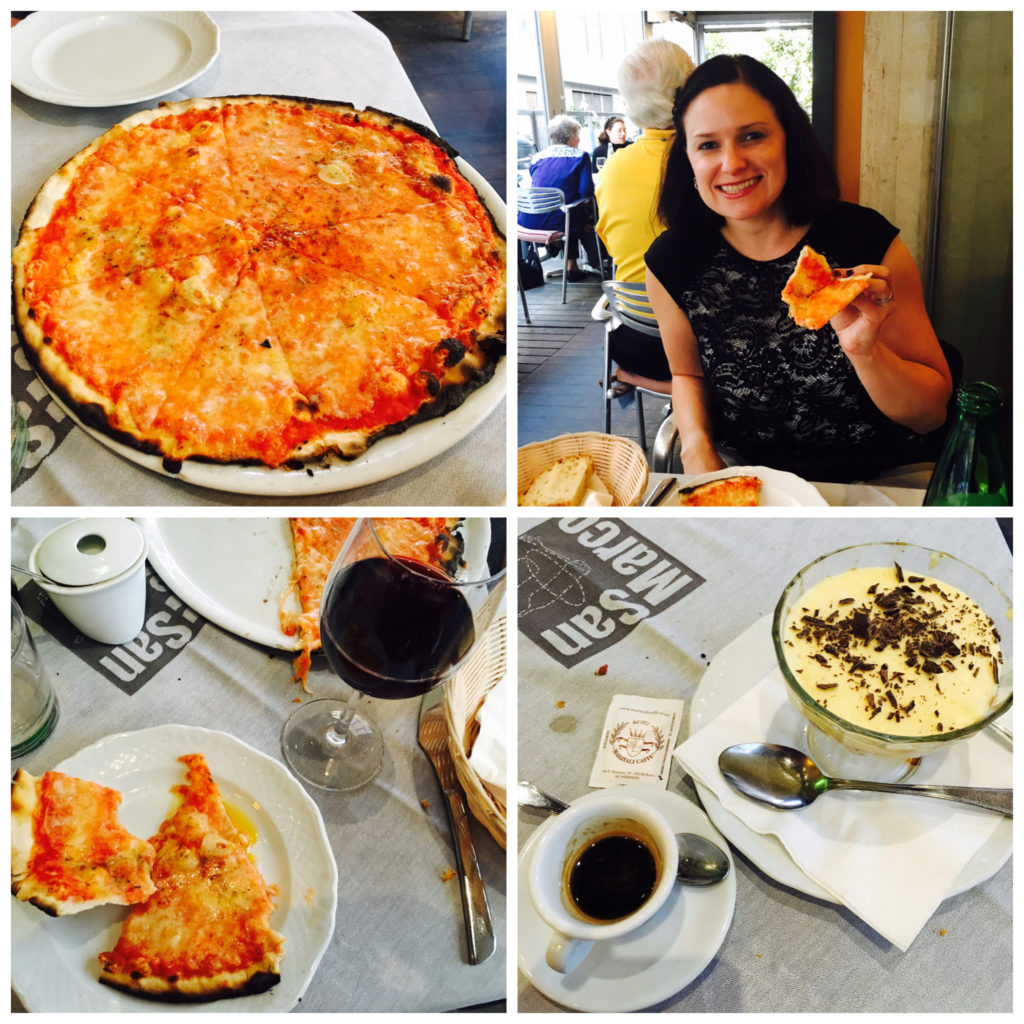
I actually just used that quote above figuratively and literally! Here’s me in Rome back in June enjoying pizza, wine, and tiramisu – yum!!! 🙂

Pizza in Rome collage

To an extent, it is OK to indulge and have fun while on vacation, but I know that for me, it’s important to get back on track when I do get home again and return to my normal routines of making healthy, home cooked meals!

One of the first meals I wanted to make was what I call Shrimp Not-So-Scampi! I consider it the healthiest version of sautéed shrimp over noodles I can think of! This meal is paleo-friendly, gluten-free, dairy-free, and pretty much guilt-free! Another bonus – this meal doesn’t take that long to make! And you can do some prep ahead if you like!

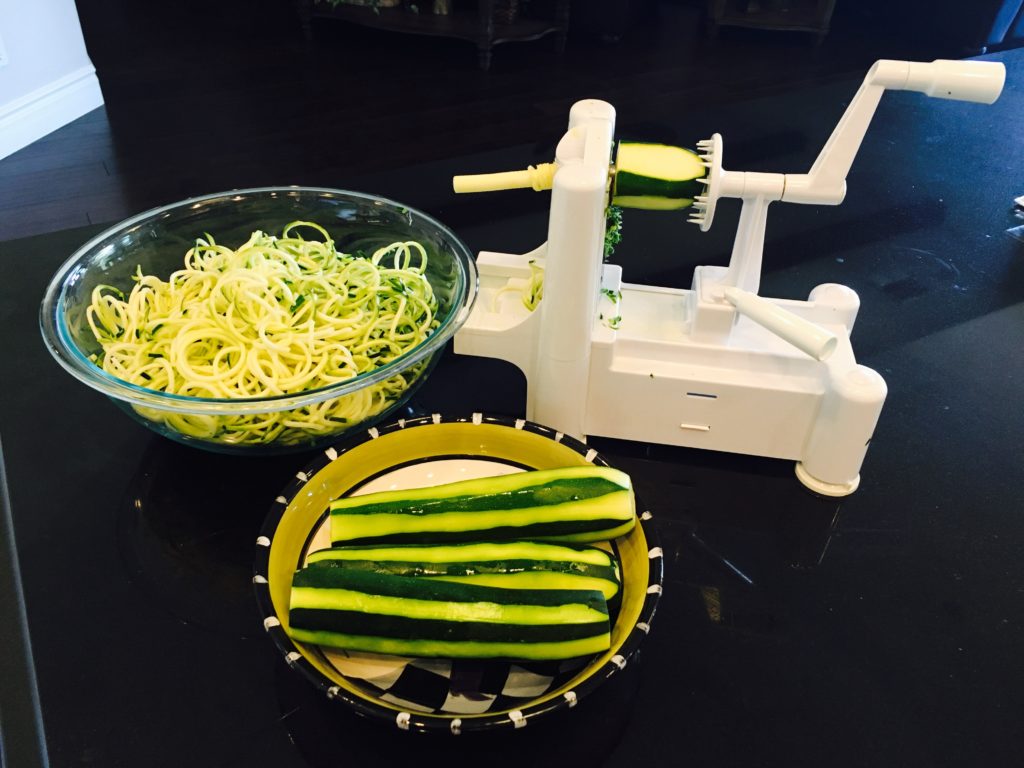
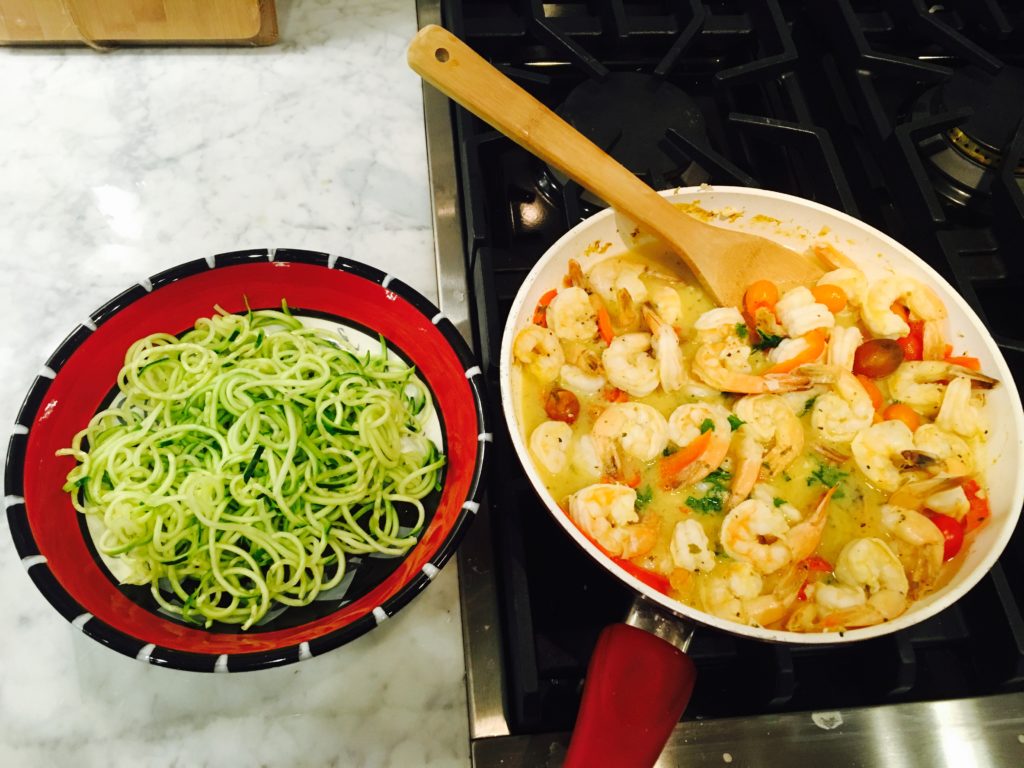
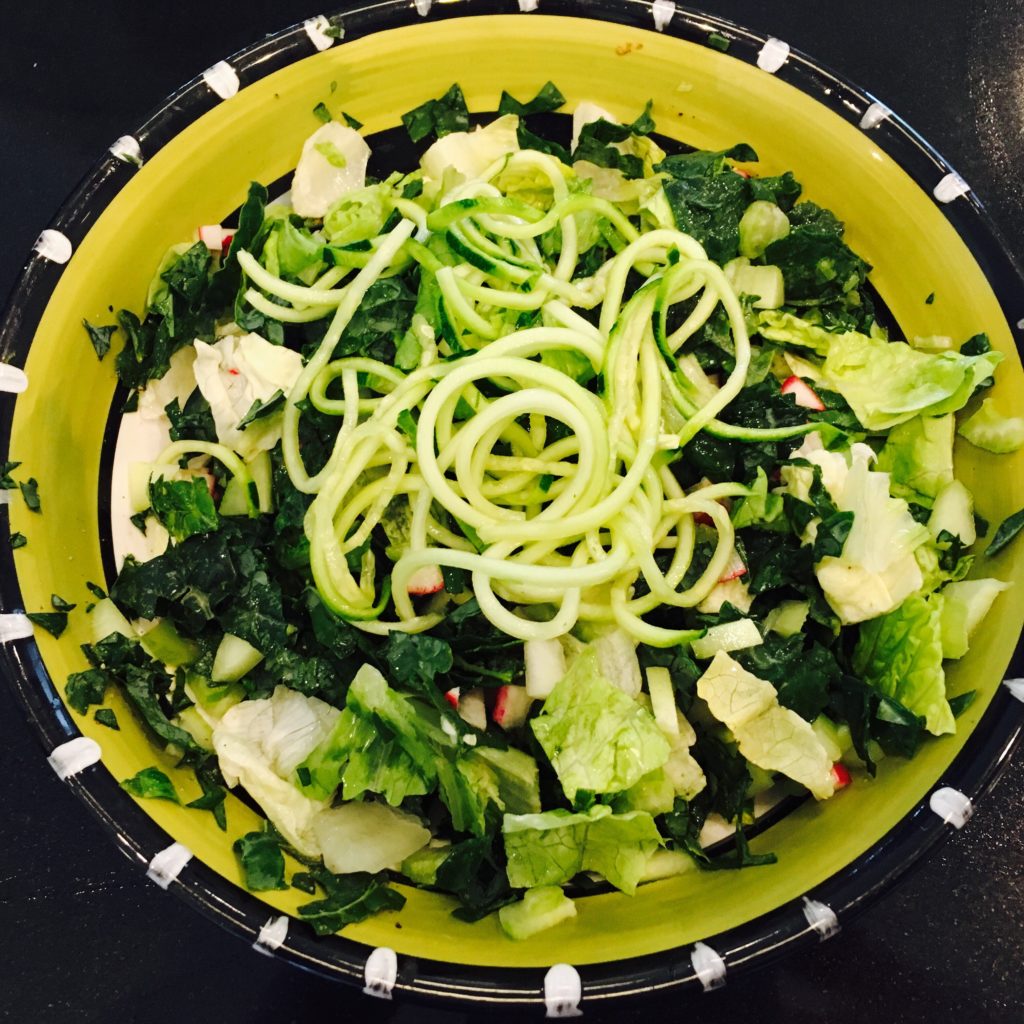
At the beginning of the week, I went ahead and spiraled about a dozen green zucchinis so I would have “pasta” or zoodles ready to go to for the next several days! I tend to do a striped peel on the zucchinis before I spiral them. The peel helps to keep the texture of the zucchini noodles intact and has a lot of nutritional value (including fiber) so there are benefits to leaving the skins on. I like to fool myself though (and especially friends and family who are more mainstream-eaters) that these are pasta noodles instead of vegetables, so sometimes the less green you see, the better lol.  It’s really a personal preference thing so do it how YOU like it!

Zucchini spiral in action

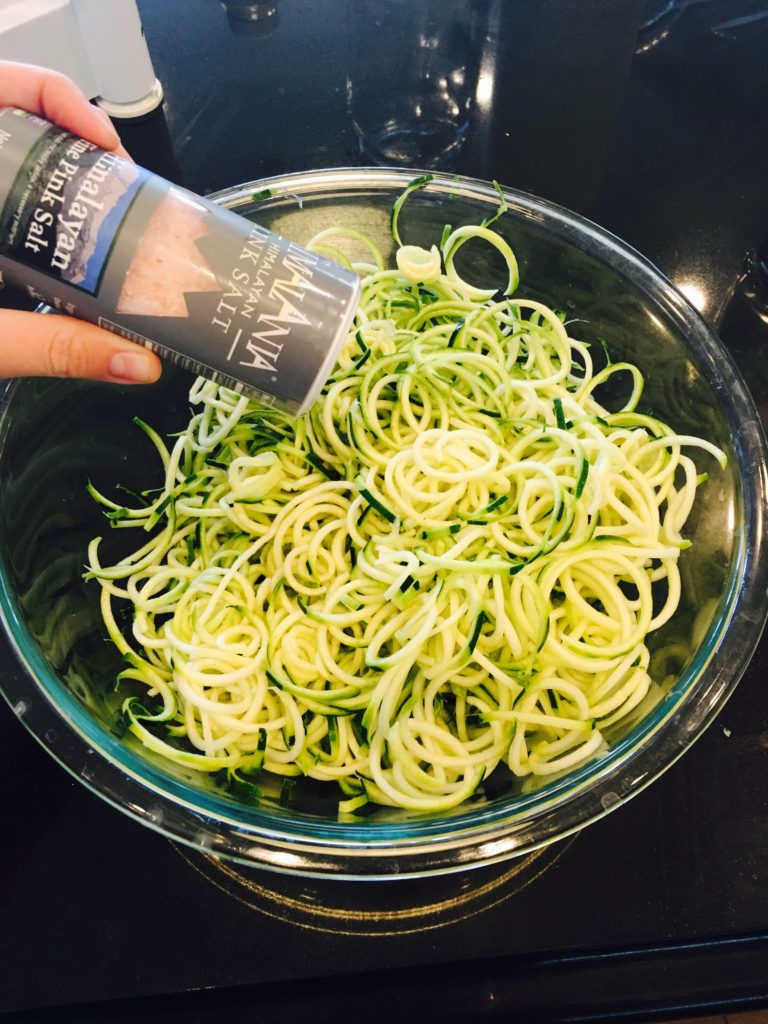
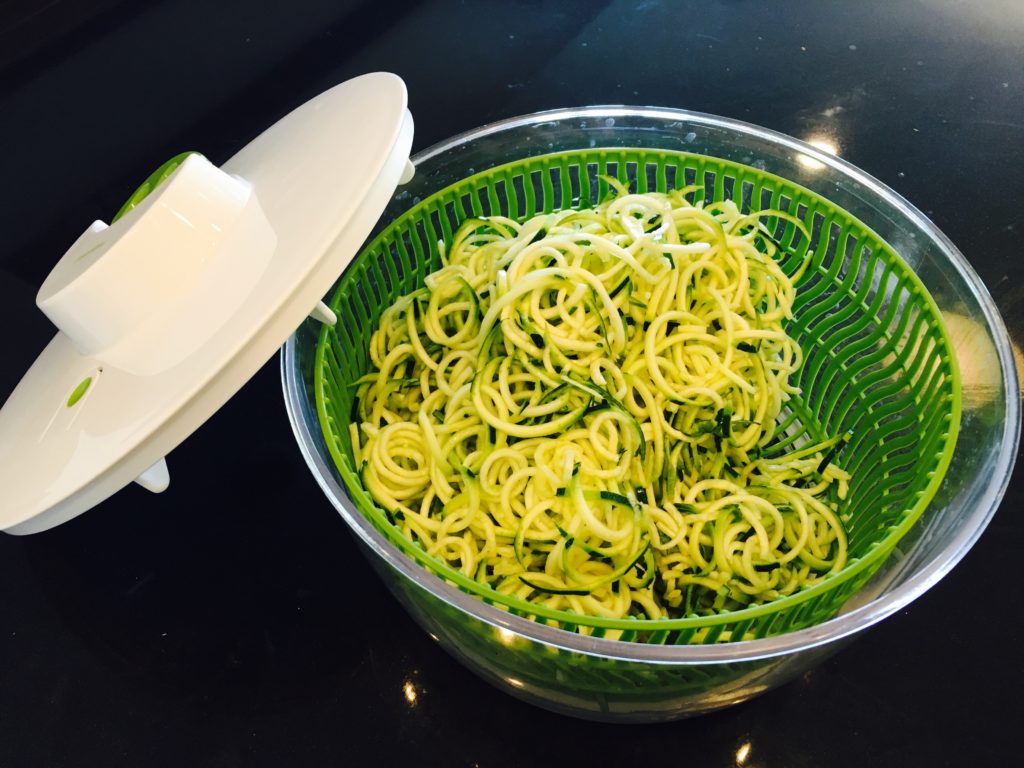
Quick tip: If you want to soften the zucchini noodles and extract some of the water inside of them, you can pour some salt on and then spin the zoodles through a salad spinner.

Salt on zoodles


Zoodles in salad spinner

So that’s what I mean by doing some prep ahead! If you buy a good amount of zucchinis and you’re going to take the time to spiral one or two, you might as well spiral a big batch all at once!

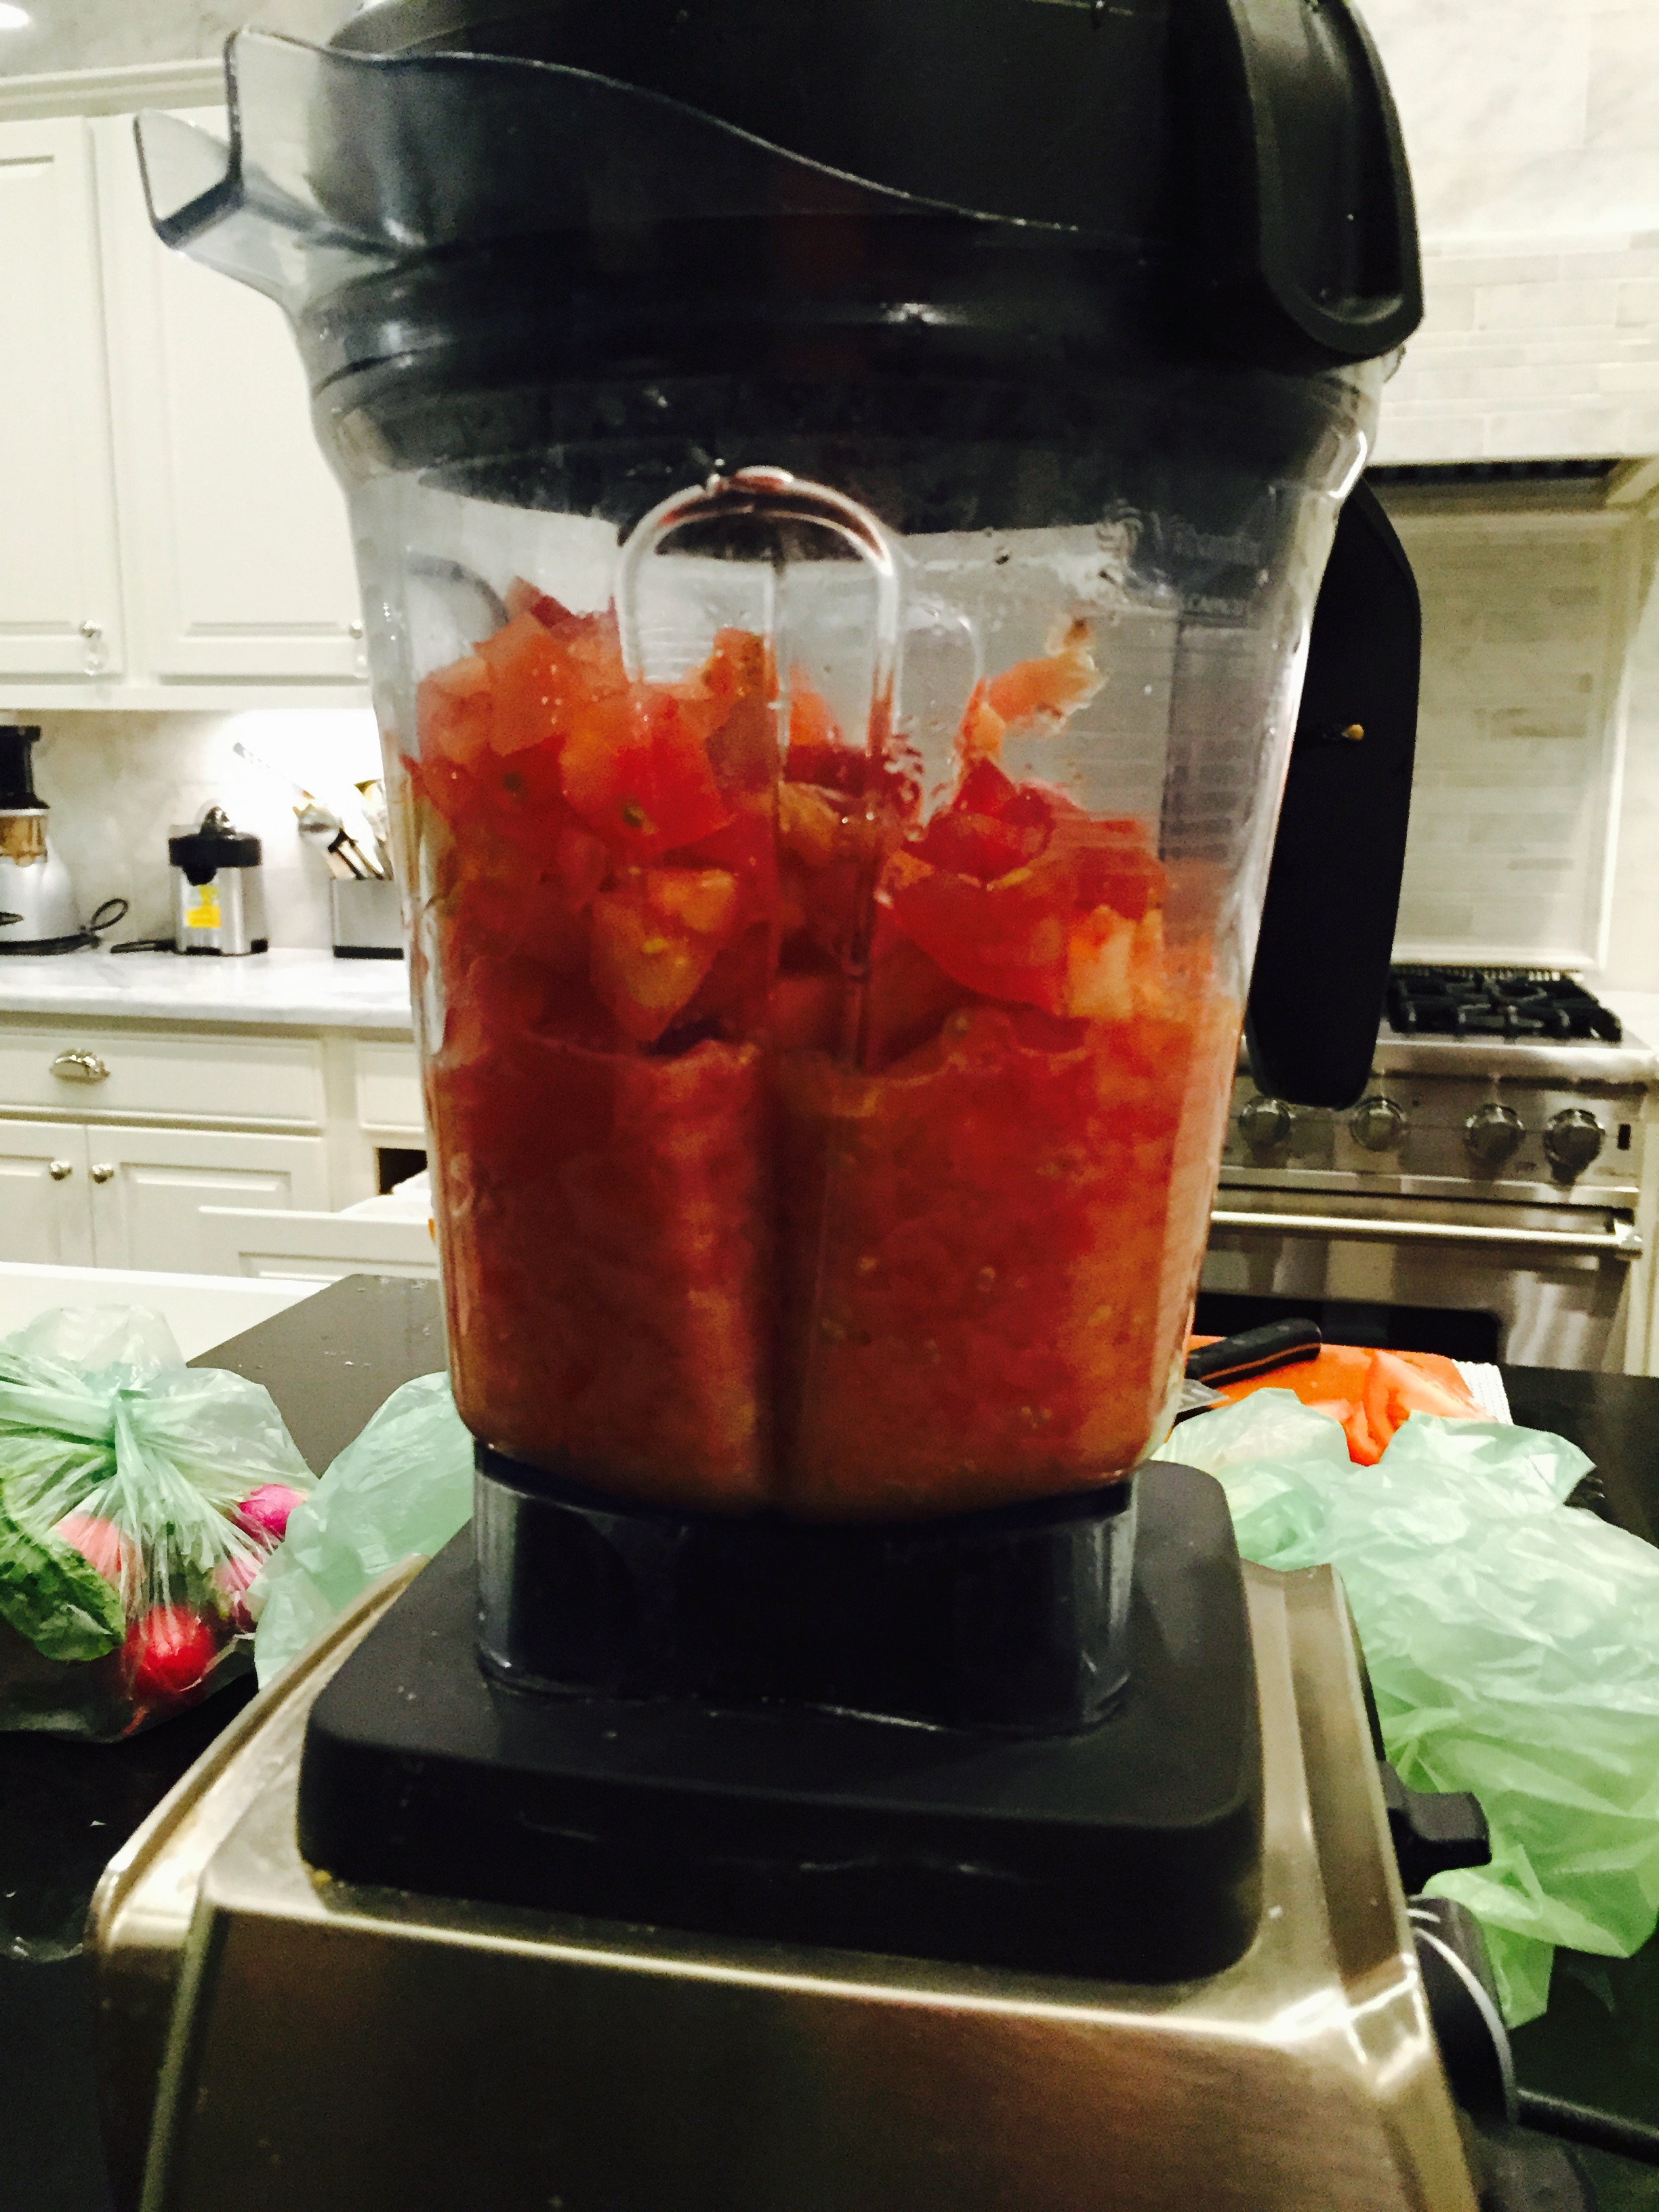
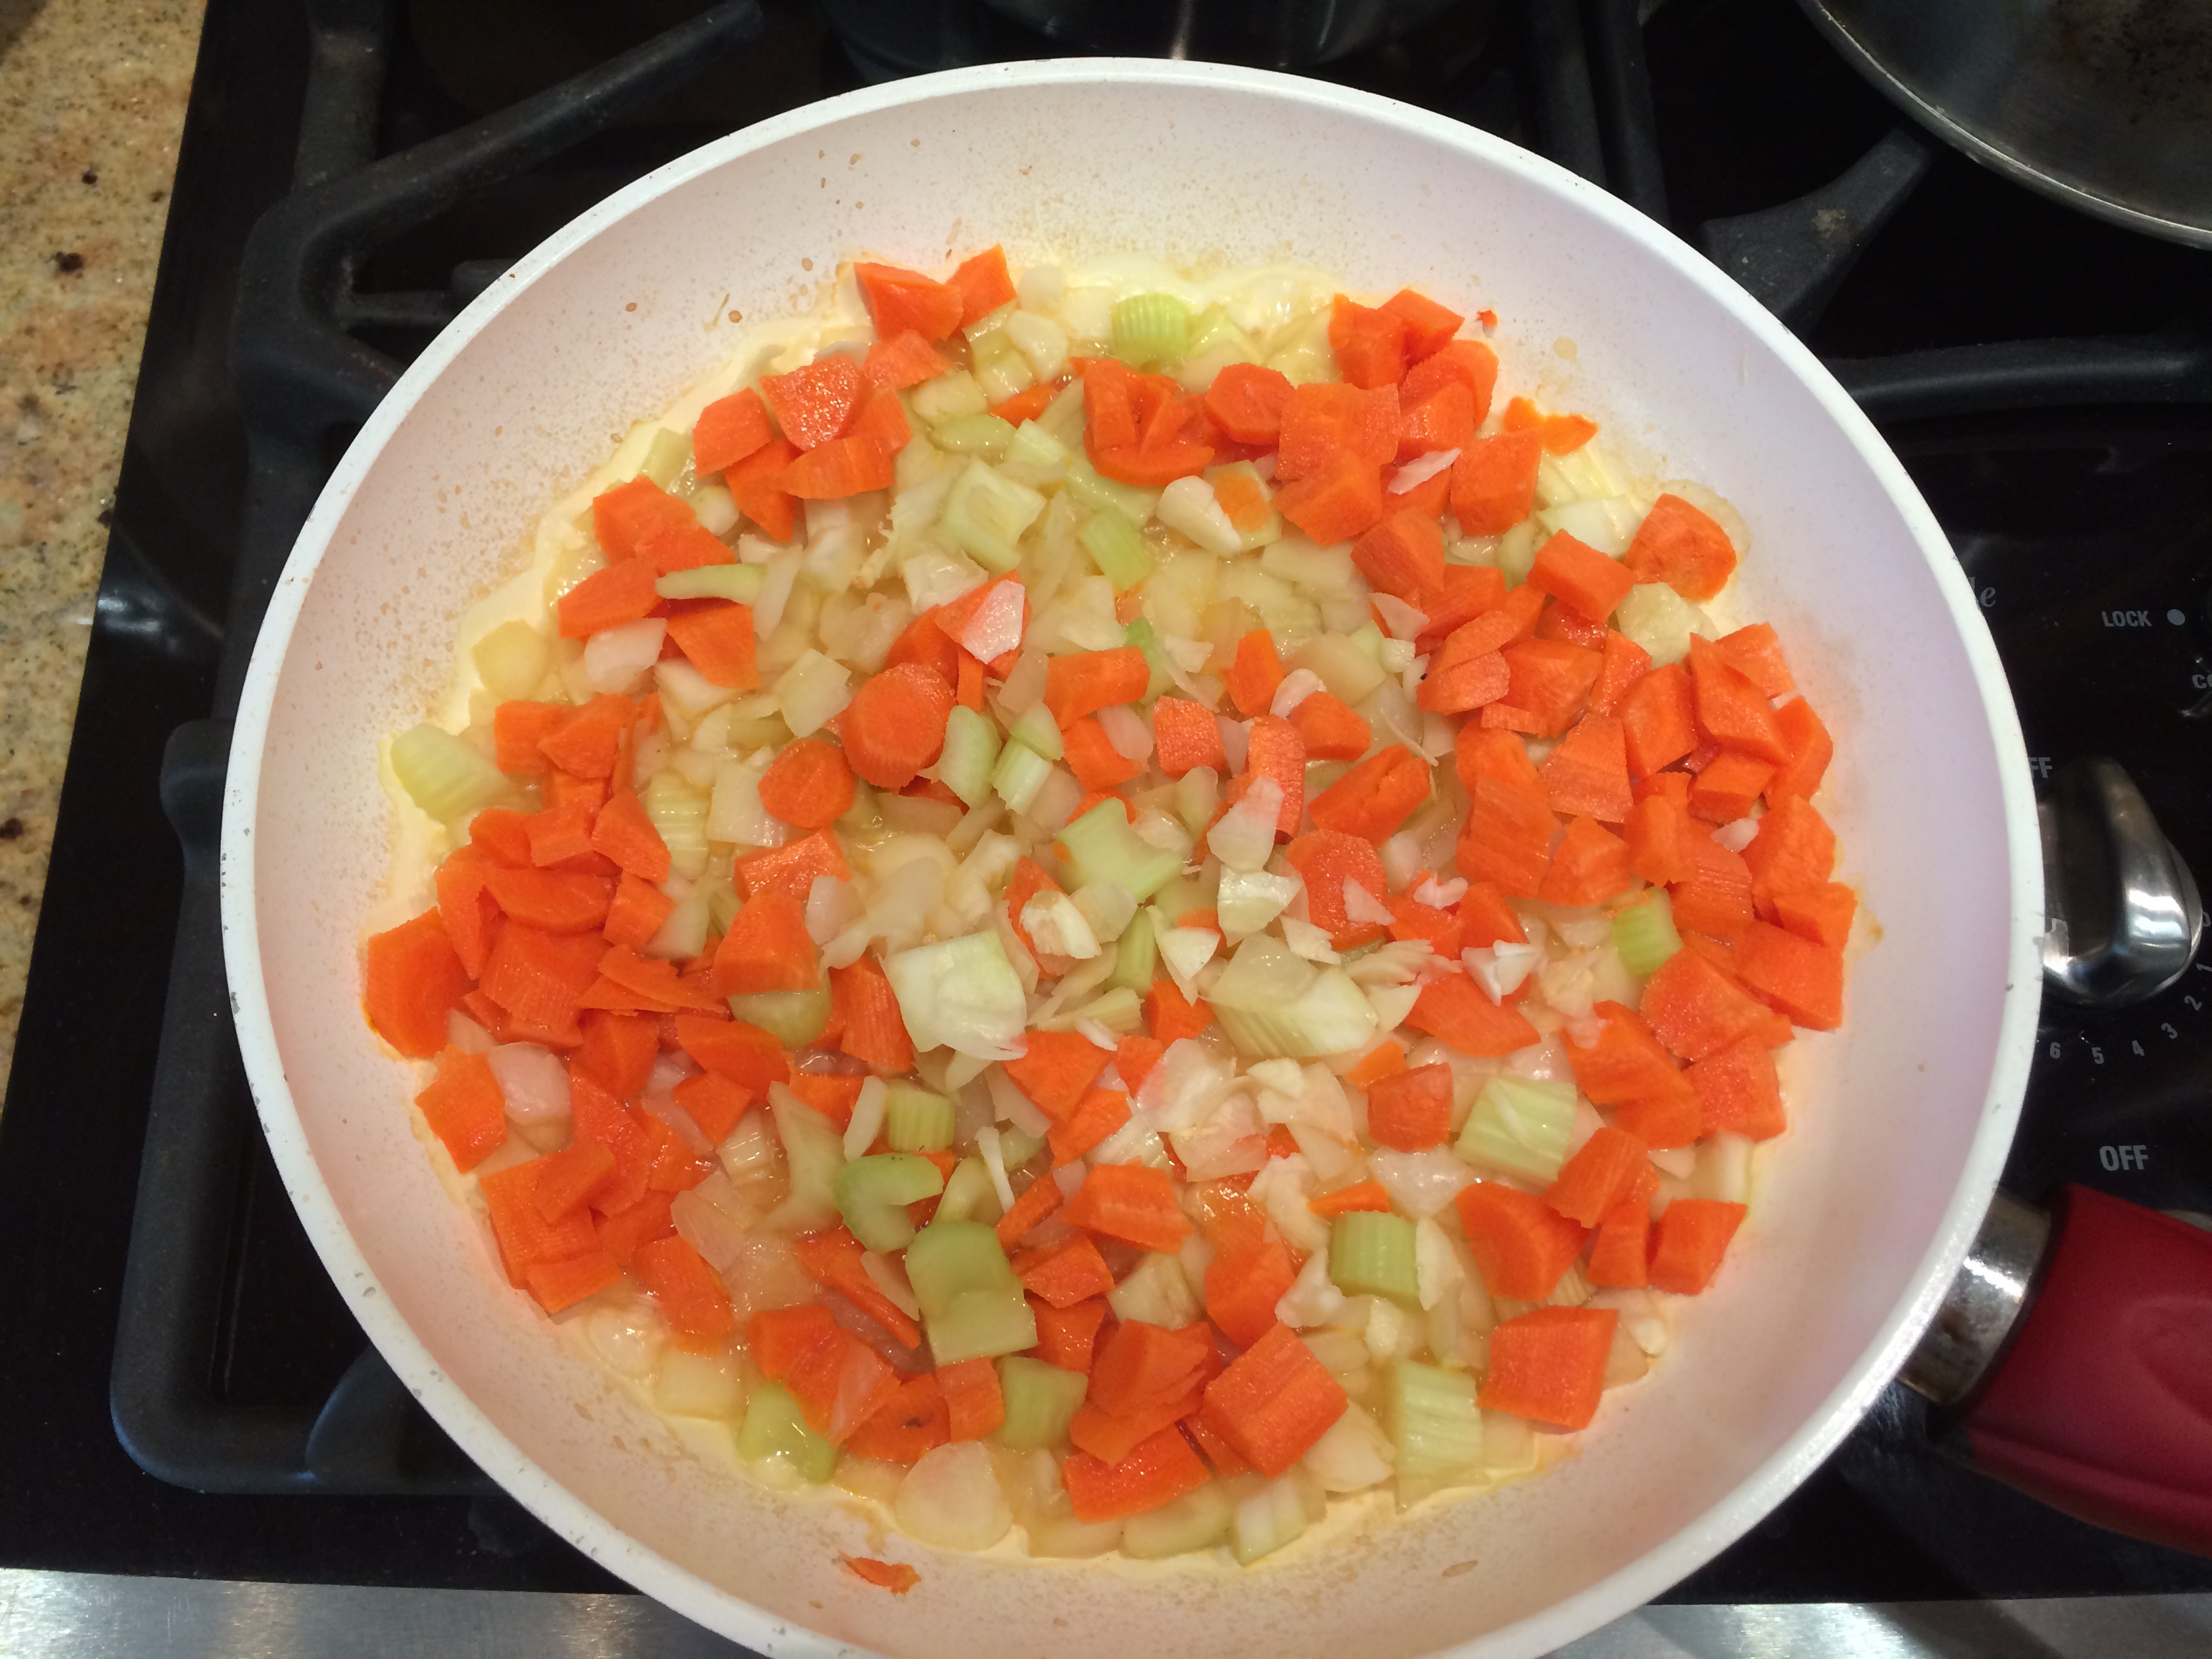
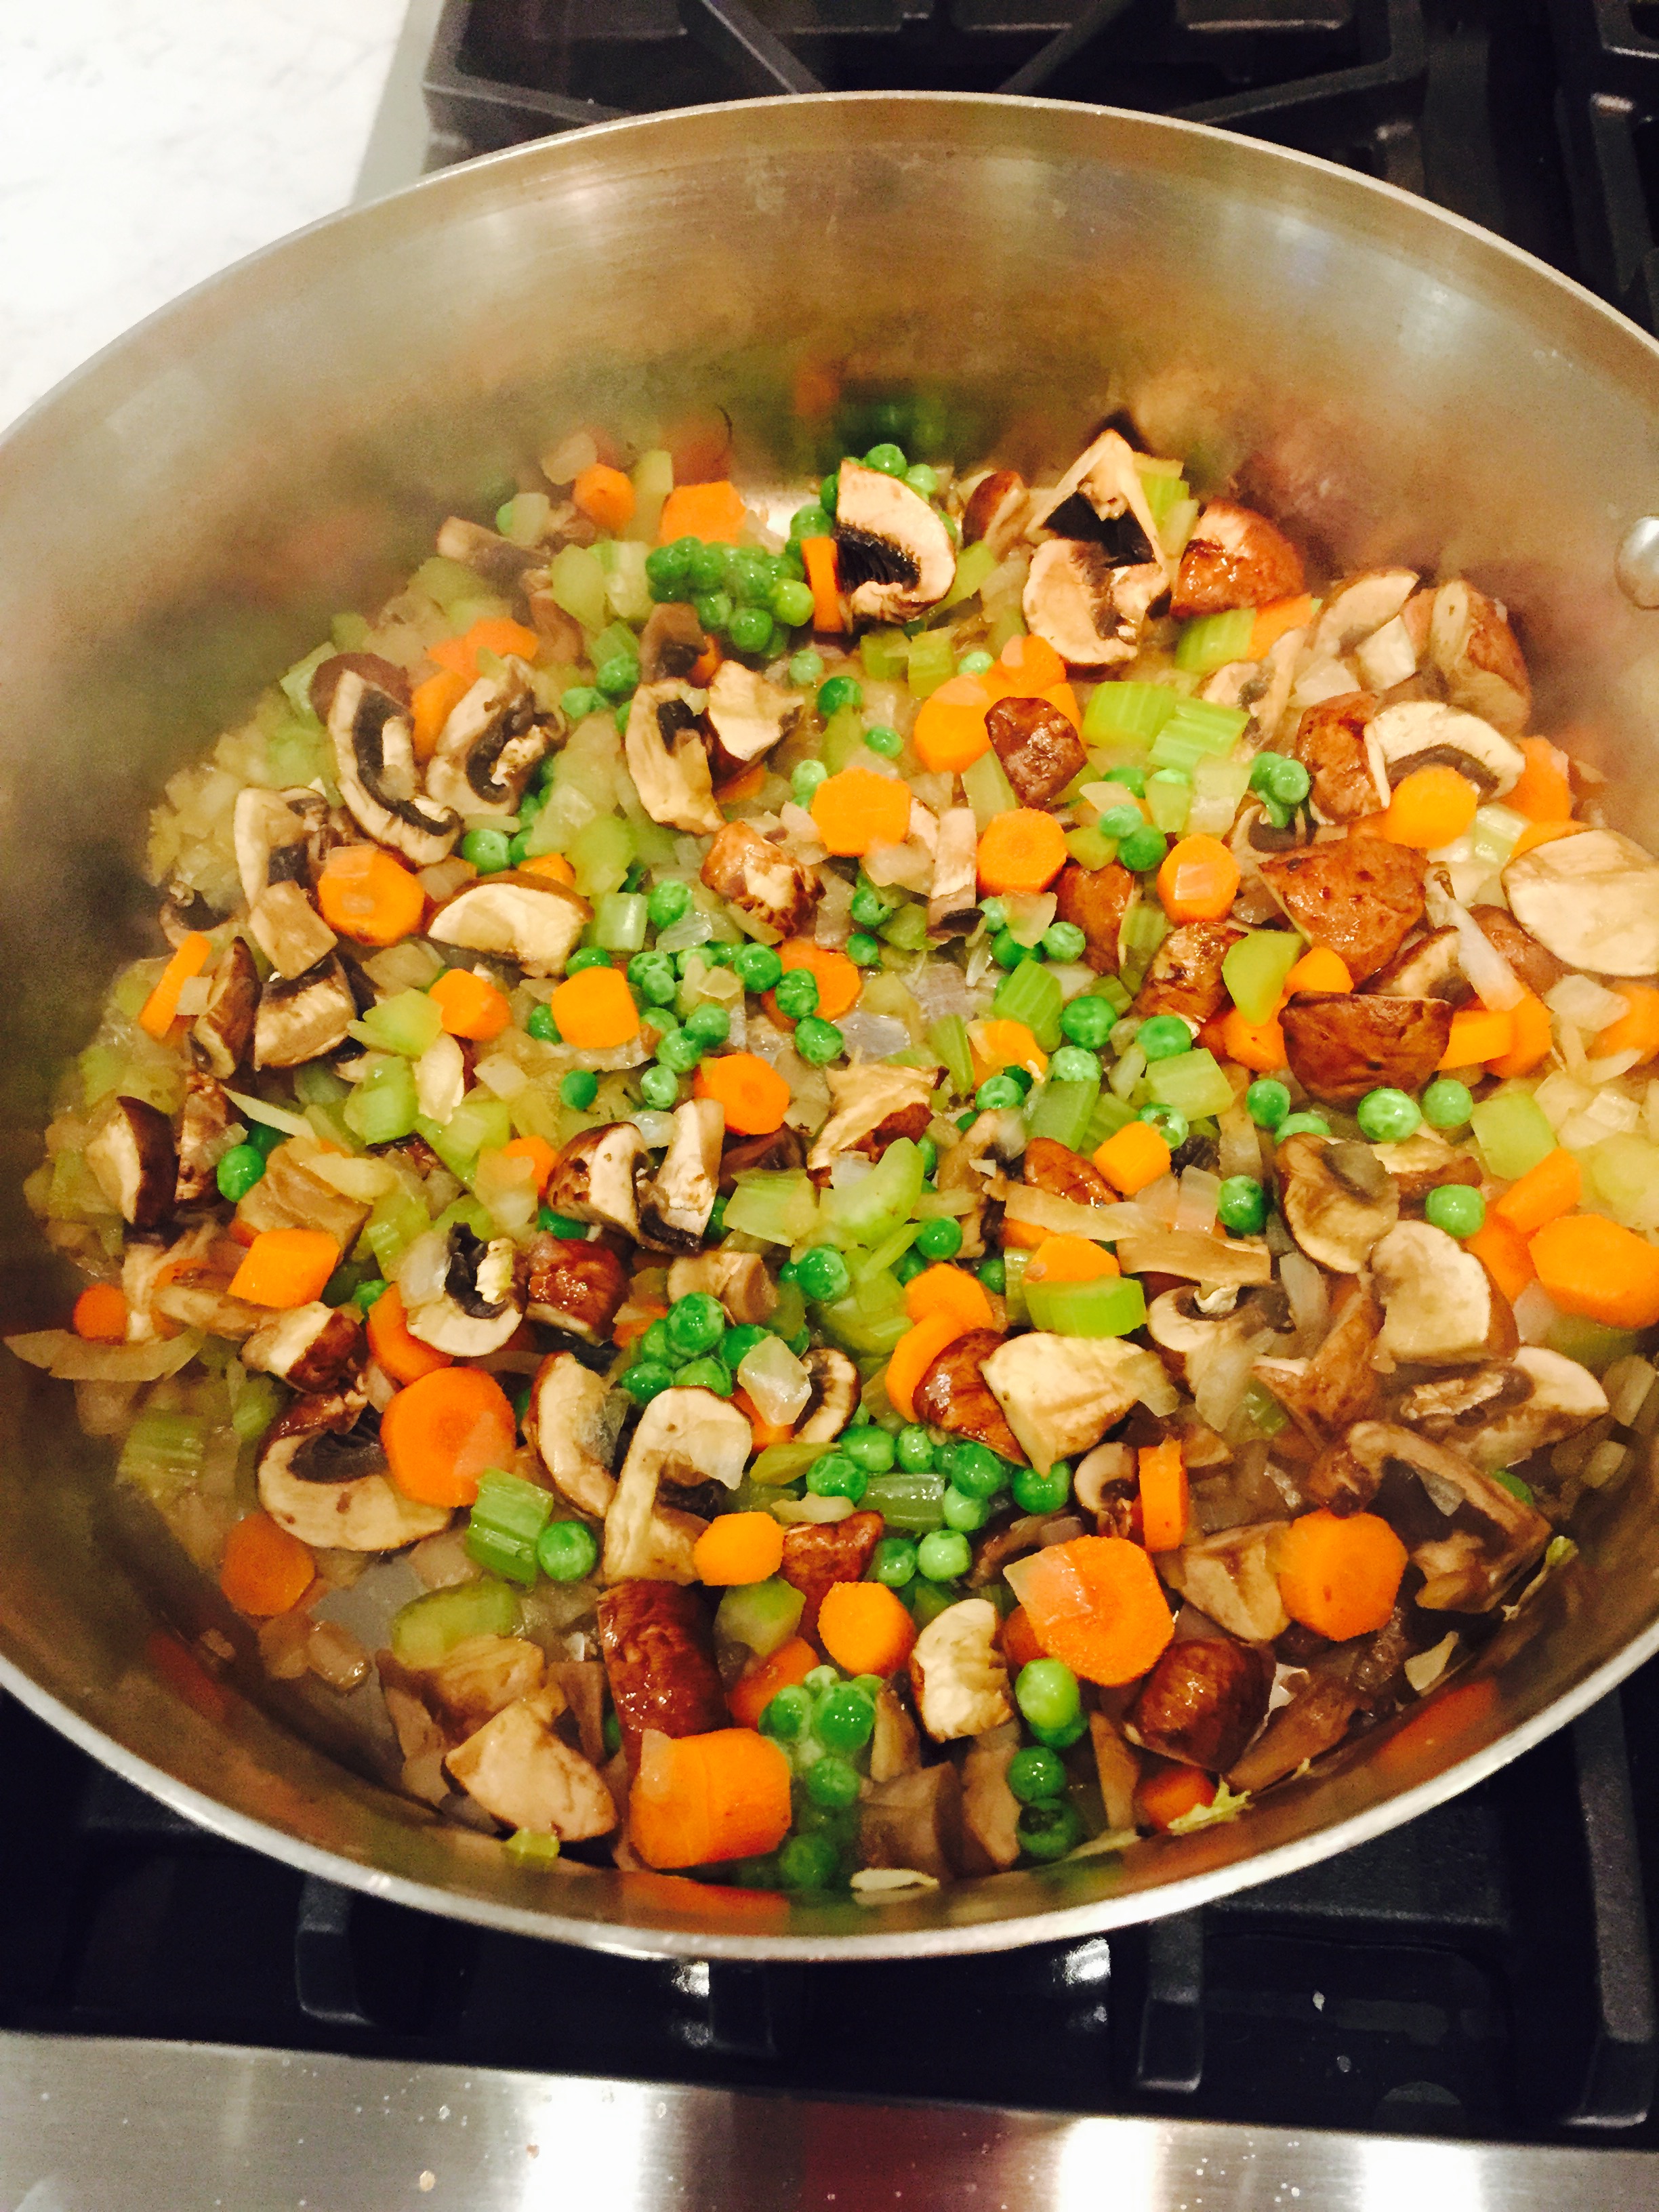
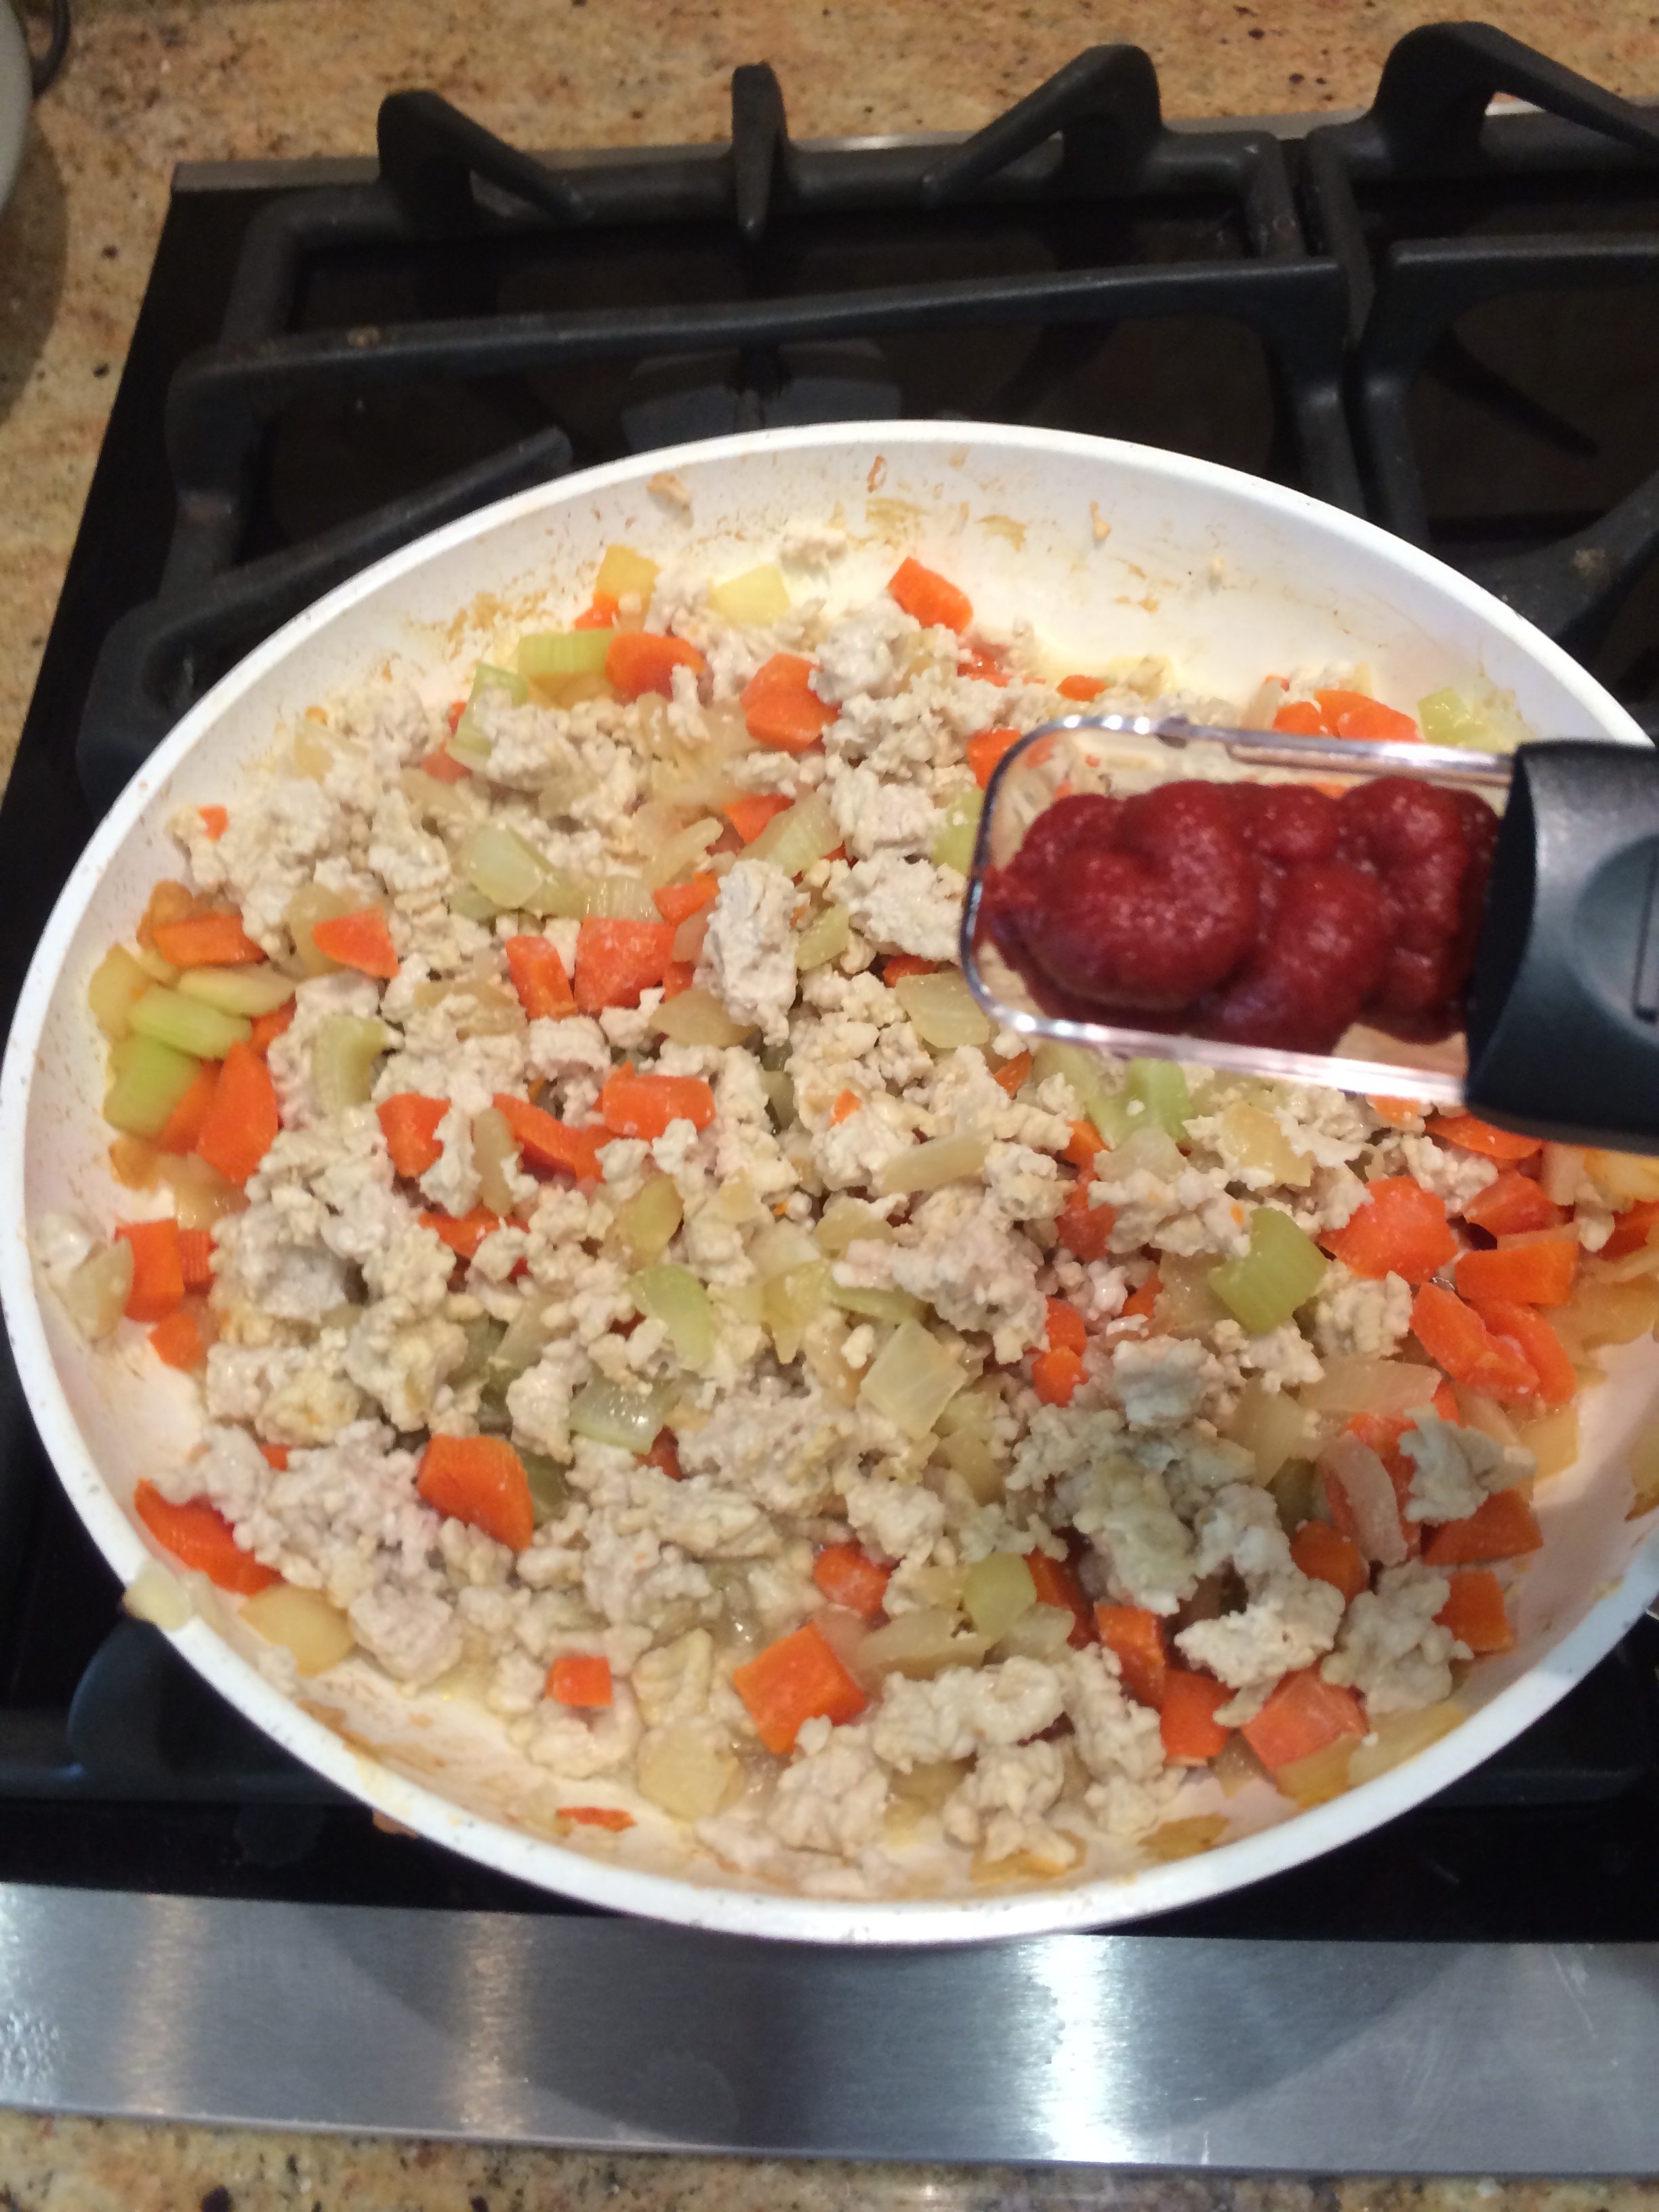
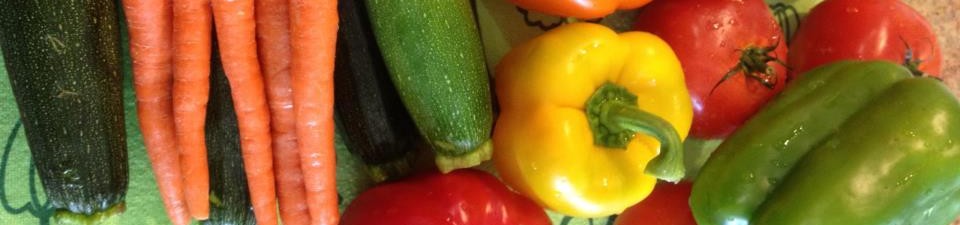
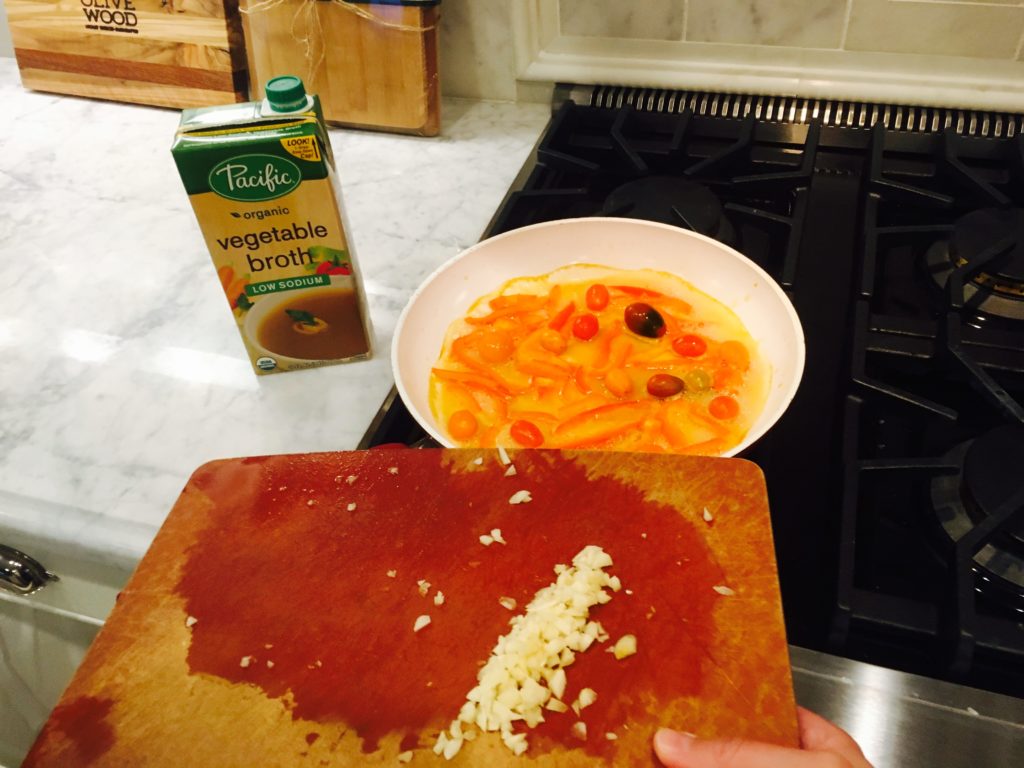
Next, I looked in the fridge and saw we had tomatoes, red bell peppers, and garlic, so I decided to chop them up and start sautéing them over medium heat. Feel free to play with the amounts of chopped veggies you want to add. I grabbed a handful of heirloom cherry tomatoes, 3 cloves of garlic, and about half of a red bell pepper.

Pic 1


Pic 2

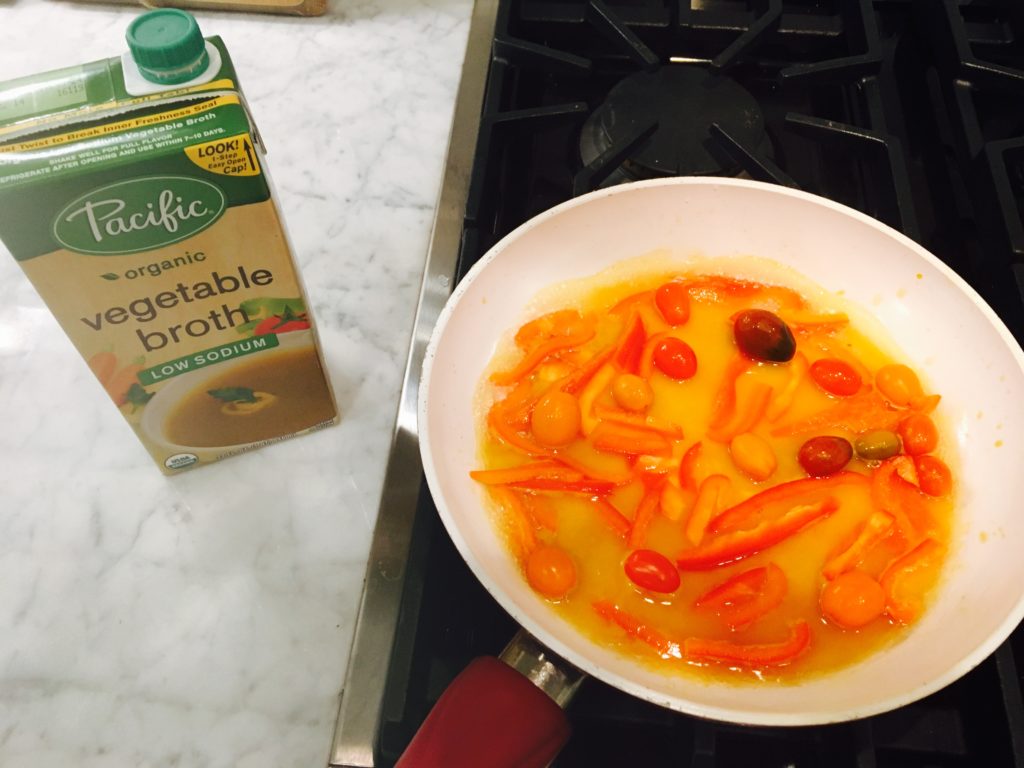
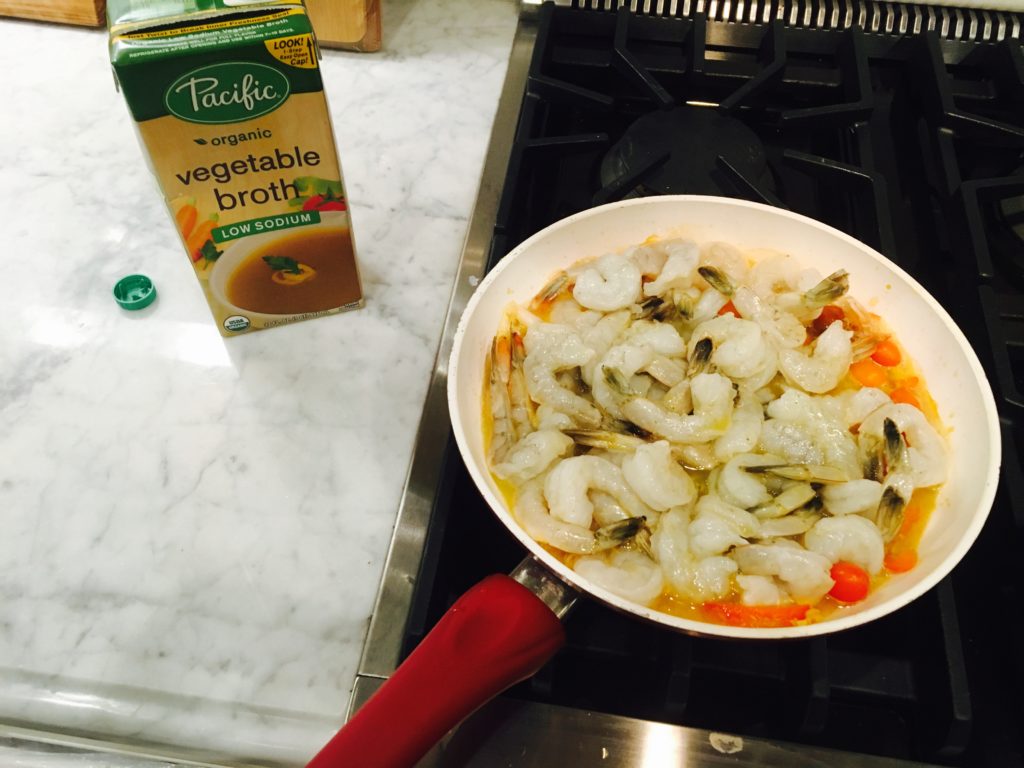
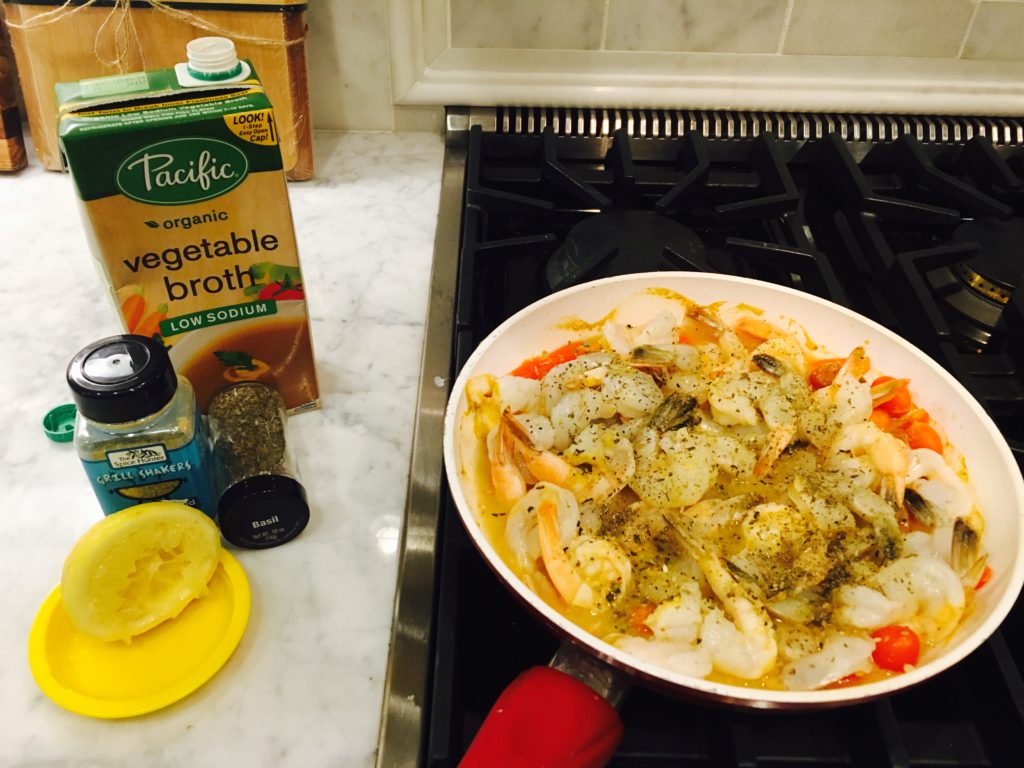
Oh by the way, I prefer not to cook with oil when I can, so I like to use a low sodium vegetable broth and it works great every time! If the liquid starts to evaporate, just keep the container nearby and give it a little refill.

Pic 3

Next I added about a 1.25 pounds of sustainable, raw shrimp to the pan and cooked for about a minute.

Pic 4

After that, I was ready to add about 2 TBS of lemon juice, and a sprinkle of seafood seasoning and basil to the pan. If you have fresh basil handy though, I would go with that!

Pic 5

I had some fresh parsley available so I added that as well!

Pic 6

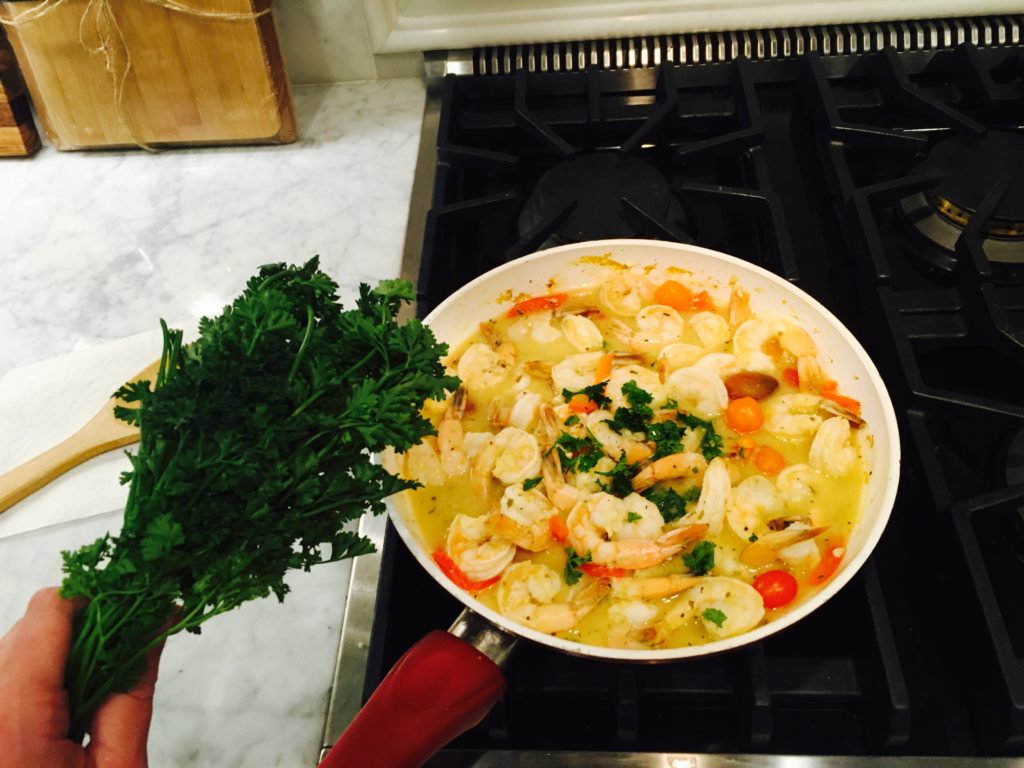
Once I added all of my ingredients, I let the pan simmer until the shrimp was cooked through. The flavors do a really good job of combining during this time.

Pic 7

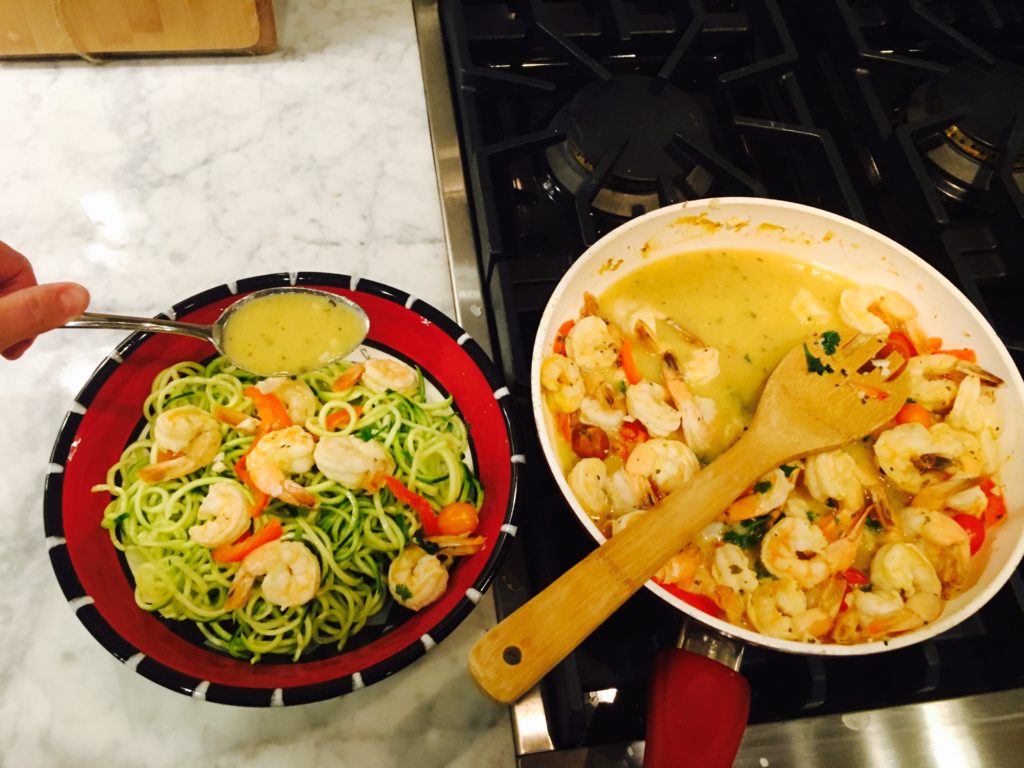
After a few minutes, the shrimp and vegetable saute mixture looked ready to go! I brought my bowl of zoodles over and scooped the mixture on and drizzled a fair amount of the juices that work as a great sauce!

Pic 8

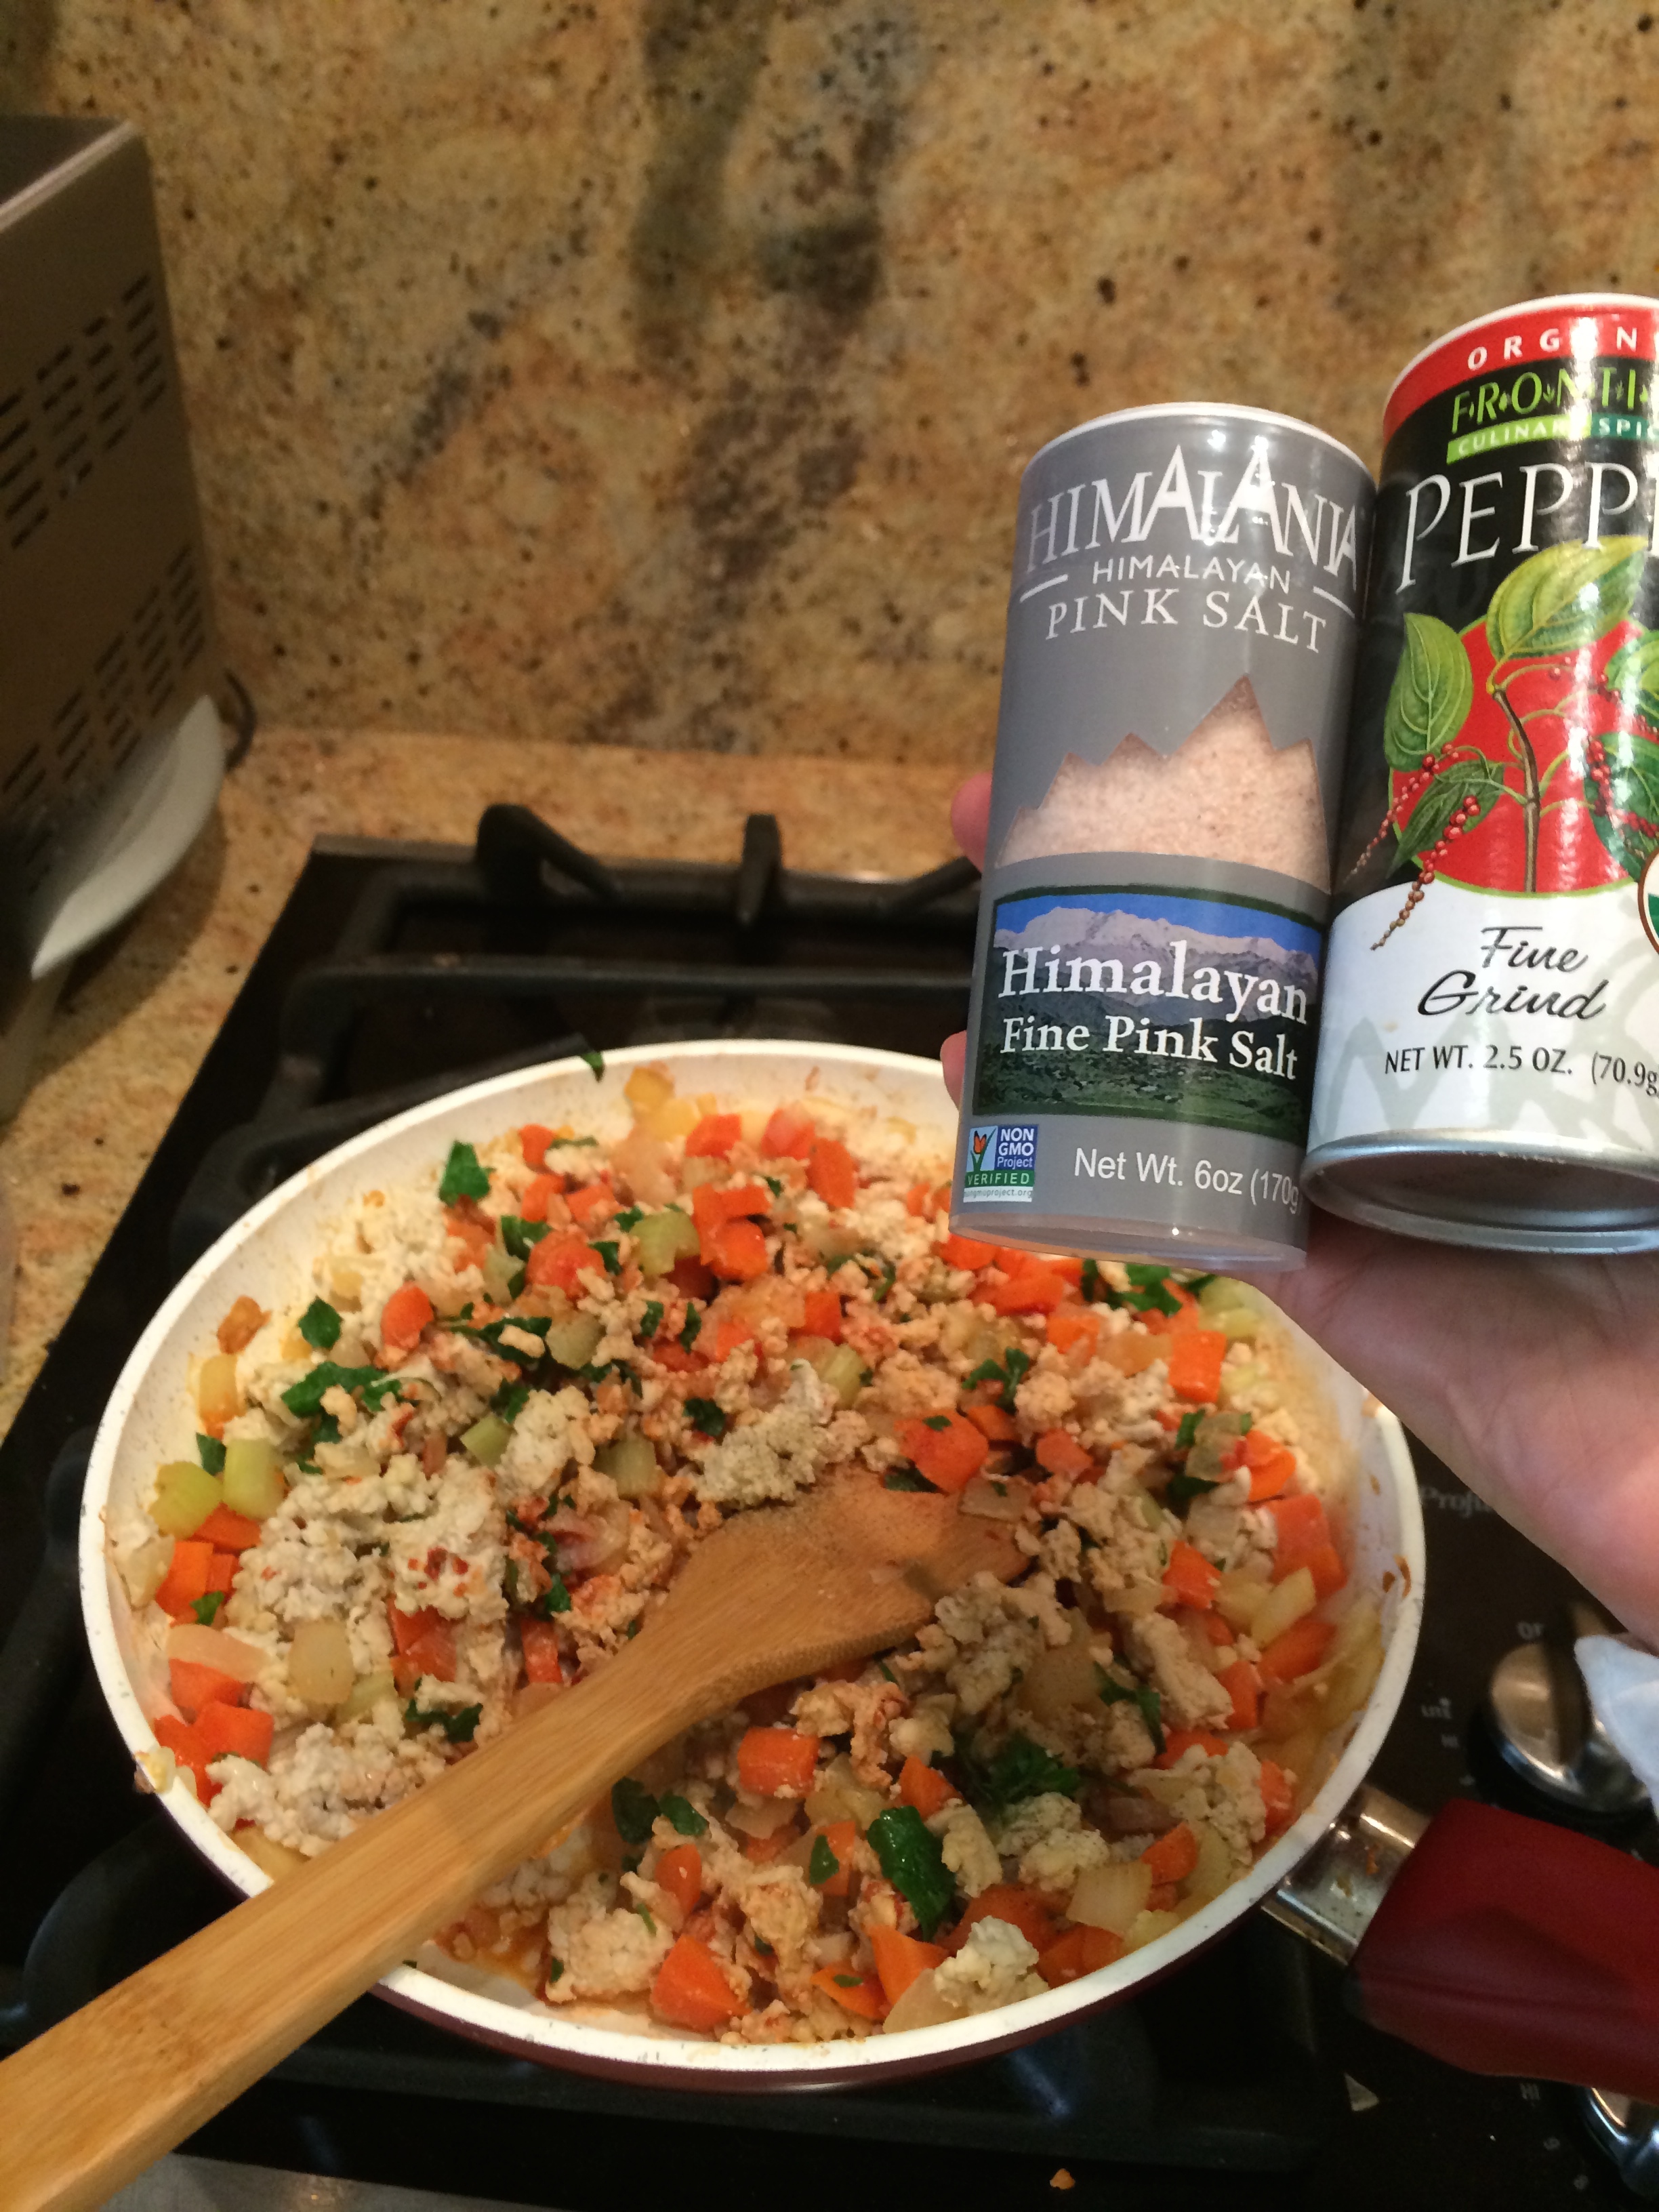
In addition to the seafood seasoning mix above, I encourage you to play with other spices including black pepper, himalayan salt, lemon seasoning, and even red pepper! Use the spices and seasonings that work for YOU!

Pic 9

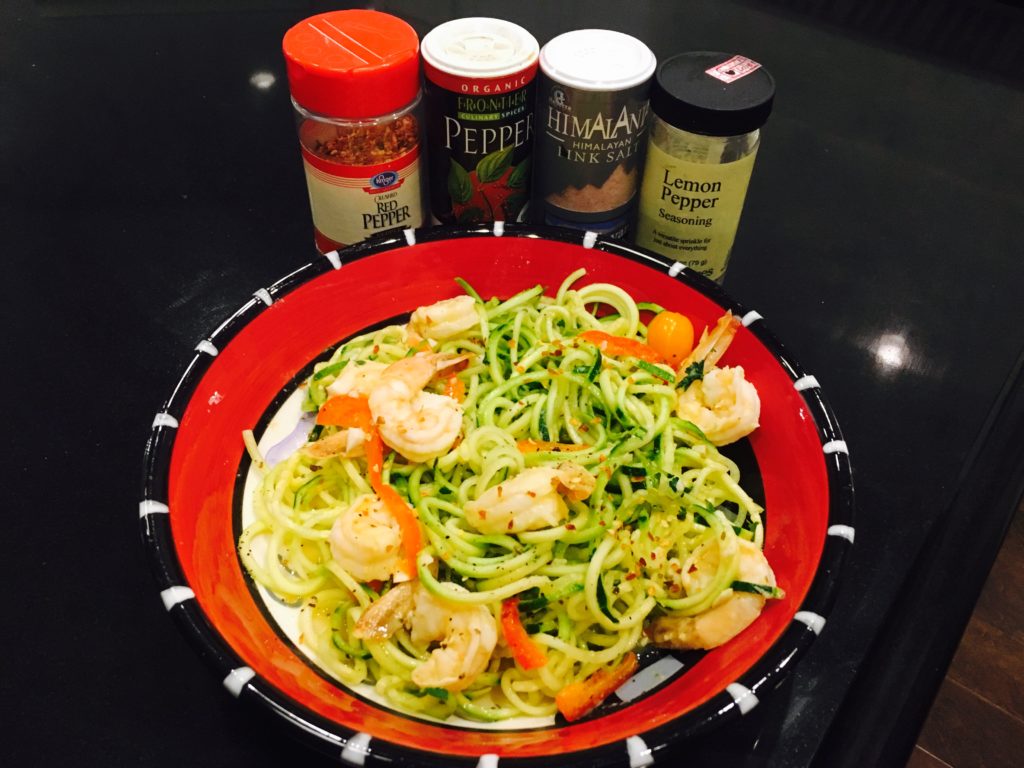
Ahhh, my final dish in all it’s glory!!! This is seriously one of my favorite dinners!!!

Pic 10

This dish made for really good leftovers too. I stored the zoodles and the shrimp-veggie mixture in separate containers in the fridge. When I was ready to have the dish again, I started with the shrimp-veggie mixture in the pan on low heat and then very briefly toss in some zoodles to warm up them as well. Comes out DELISH!

By the way, if you aren’t a fish person, try roasting or sautéing chicken and following the same above! If you don’t eat meat, then make it a very veggie-heavy dish and get creative with your sauces!

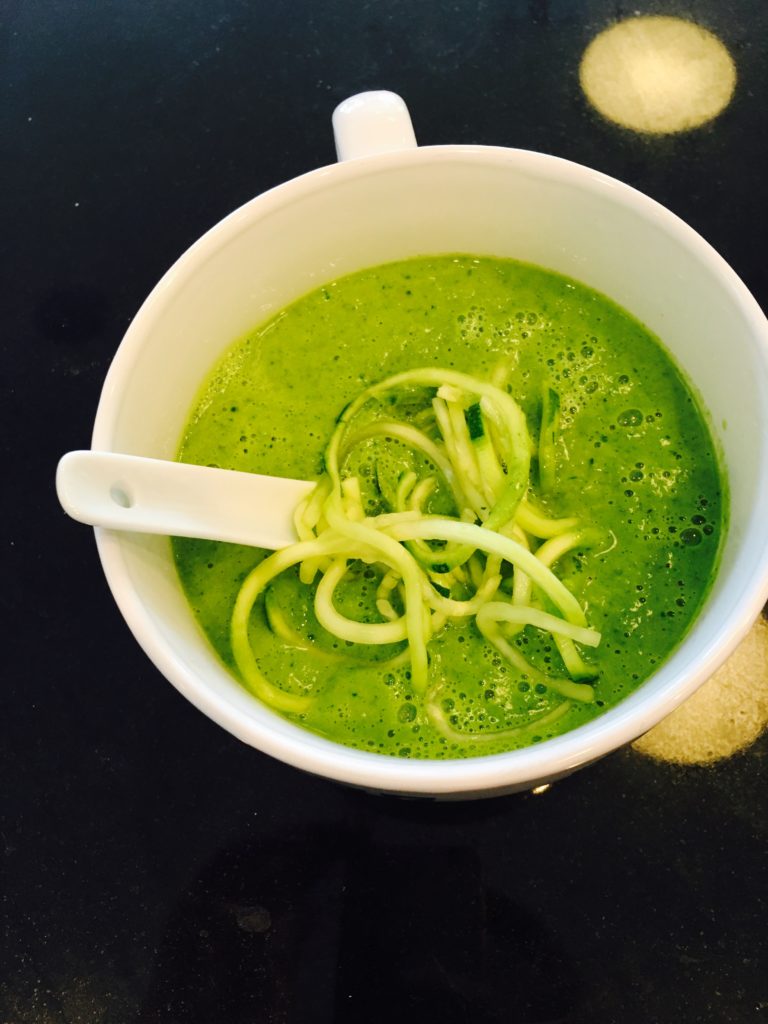
I hope this quick, but visual blog post inspires you to whip up an easy, healthy, and delicious meal at home! I have found that zucchini noodles make an amazing substitute for real pasta and I think they work with just about anything – including toppings for soups and salads!

Spinach soup with zoodles

Green salad with zucchini noodle topping

So tell me, have you tried zucchini noodles?! What’s your favorite way to eat them?

And if you haven’t tried them – will you NOW?!


It’s Pumpkin Recipe Time!!

Fall is officially here, which means it’s time to for cooler temperatures, Halloween shenanigans, and of course pumpkin-flavored EVERYTHING!!

image1

As a major time saver for these recipes, I purchased organic pumpkin puree from Whole Foods. Kudos to those who want to roast and blend a real pumpkin! I’ve done it before many times with squash to make butternut squash soup, so I know it can be done. But every once in a while, containers like the one pictured below can really help! Also note that it’s in a carton and not a can. I try to avoid cans as much as possible because of BPA (Bisphenol A) concerns. According to the Mayo Clinic, “Some research has shown that BPA can seep into food or beverages from containers that are made with BPA. Exposure to BPA is a concern because of possible health effects of BPA on the brain, behavior and prostate gland of fetuses, infants and children.”

No worries if you can’t find this and have to use a can. In those cases, try to purchase organic and see if the can actually lists “BPA-Free” on the label.

IMG_4814

Below you will see 5 different recipes including pumpkin as an ingredient! There is also a bonus recipe for homemade chili sauce – YUM!

ENJOY!!

1) Pumpkin Syrup Recipe (great for coffee or as a topping)

So, are you going to head to Starbucks for a pumpkin latte? I’m here to tell you that you don’t have to! What if I told you that you can AVOID the artificial, GMO, and sugar-laden ingredients  that Starbucks has to offer?!! I’ve got a recipe for you that you can make at home!! Not only will it be free of toxins and junk, it will also TASTE better!! 🙂


IMG_4419

This was adapted from my Vitamix Recipe book. I modified or “healthified” as I like to say!

Ingredients:

  • 1 ¼ cups water
  • ½ cup Pumpkin Puree, fresh or canned
  •  cup Coconut Nectar (or Coconut Palm Sugar)
  • ½ teaspoon Vanilla Extract
  • 1 teaspoon Ground Cinnamon
  • ½ teaspoon Allspice (ground)
  • ½ teaspoon Ginger (ground)

Directions:

1. Place all ingredients into the Vitamix container in the order listed and secure lid. 

2. Select Hot Soup program. 

3. Switch machine to Start and allow machine to complete programmed cycle.

***For those without a Vitamix or other equivalent blender use a saucepan on the stove!

Stove Top Directions: In a medium saucepan, add water and the coconut nectar (or sugar if using instead). Simmer on medium-low heat until the nectar (or sugar) dissolves, about 4 minutes. Turn the heat down to low and whisk in cinnamon, ginger, allspice, and pumpkin puree. Simmer for 8 minutes, stirring occasionally. Do not allow the mixture to come to a boil. Remove from the heat and strain through a mesh strainer lined with cheese cloth or a clean tea towel. Allow the syrup to cool to room-temperature before stirring in the vanilla extract. Store in a mason jar or airtight container. The syrup will last for 1 month in the refrigerator.

IMG_4418

Please note, this syrup also works on PANCAKES!! Check out the recipe for Pumpkin Pear Pecan Pancakes, on my friend Corine’s page, Zucchini Runner!

For very simple, Paleo pancakes, you can also check out a previous post of mine, “4 Ingredient Paleo Pancakes!,” where I’ve added pumpkin puree as a 5th ingredient and also used the pumpkin syrup as a topping!

IMG_5113 IMG_5114


2) Chili Sauce & Pumpkin Chili (2 recipes for the price of one! lol)

The Pumpkin Chili recipe calls for chili sauce. Instead of purchasing store-bought, I went ahead and figured out how to make my own using the same method as my homemade ketchup. I tweaked the ingredients to made sure it would come out like chili sauce!

Chili Sauce:

IMG_4762

Ingredients:

  • 1 container Strained Tomatoes
  • 1 Onion, peeled, quartered, root end left intact
  • ½ cup Apple Cider Vinegar
  • ½ cup Coconut Palm or Brown Sugar
  • 3 tablespoons Tomato Paste
  • 3 tablespoons Himalayan or Real Salt
  • 1 teaspoon Garlic powder
  • 1 teaspoon Mustard powder
  • 1 teaspoon Onion powder
  • 2 teaspoons Cayenne pepper, (or to taste)

Directions:

1. Place the tomato sauce, onion, vinegar, sugar, tomato paste, salt, and spices in a medium saucepan.
2. Bring the mixture to a boil and then reduce head to simmer, stirring occasionally, until thick, about 1 hour.

I love recipes that just simmer in a pot!

IMG_4764

After the chili sauce is made, you are ready to make the Pumpkin Chili! As a time saver, consider making the chili sauce ahead of time. And don’t forget you can always freeze small amounts for future use! I went ahead and saved the onion from the chili sauce! Please note: this is chili has a KICK! Feel free to modify the amount of chili sauce you add and/or chili powder!

Chili sauce

Pumpkin Chili Recipe:

IMG_4790

Ingredients:

  • 1.5 lb. ground turkey
  • 2 containers of 16oz pumpkin puree
  • 1 (26.46) container diced tomatoes (I like Pomi)
  • 1 container pinto or kidney beans, drained
  • 1 (6 oz) bottle of chili sauce (*see chili sauce recipe)
  • 1 cup broth
  • 2 Tablespoons of chili powder
  • 2 teaspoons pumpkin pie spice
  • 2 teaspoons coconut palm or brown sugar
  • 1 ½ teaspoons salt
  • 1 teaspoon pepper
  • 4 carrots, peeled and chopped
  • 2 celery stalks, chopped

Directions:

1. In a skillet, brown the turkey (instead of using oil, I like to use broth).
2. In a separate large pot, add in all the remaining ingredients and stir well to mix.
3. Bring to a boil, then reduce the heat.
4. After the turkey is browned, add to the large pot. Let all of the ingredients simmer for at least 30 minutes.

I used ground turkey, but feel free to substitute with bison or ground beef!

IMG_4785

Check it out – I reused the onion that sat in the chili sauce! Not gonna lie, it was a bit messy to dice LOL!image

IMG_4788

IMG_4789


3) Pumpkin Shakeology Shake

Not all things pumpkin have to be warm!! For a cool refreshing smoothie, check out my Pumpkin Shakeology Shake! Please note the amounts listed are for my 20 oz Magic Bullet cup. If you are using a bigger or smaller cup, please adjust accordingly!

IMG_4441

Ingredients:

  • 1 scoop Vanilla or Chocolate Shakeology
  • 1 teaspoon Pumpkin Pie Spice
  • 1 teaspoon Vanilla Extract
  • 1 ½ cups Water/Almond milk combo
  • 10 walnuts (can sub pecans)
  • ½ cup Pumpkin Puree (or more to taste)
  • ½ Frozen Banana

Directions:

Please note: These are the measurements for a 20 oz magic bullet cup.
1. Place all ingredients in a blender and blend!

4) Pumpkin Bars (Refined-sugar-free, gluten-free)

I have to credit @mianutrition on Instagram for this recipe! These are a perfect treat for those watching their sugar!

IMG_4817


Ingredients:

  • 1 container Pumpkin puree
  • 1 teaspoon Cinnamon
  • ½ teaspoon Ground Ginger
  • 2 teaspoons Pumpkin Pie Spice
  • 1 teaspoon Baking Powder
  • ½ cup Coconut Flour
  • ¼ teaspoon Vanilla
  • 2 Eggs

Directions:

1. Mix dry and wet ingredients separately, then together.
2. Spread evenly in a greased 8×8 baking dish and bake at 350 degrees F for 35-40 minutes.

To grease my pan, I like to used coconut oil!

IMG_4828

I put my wet and dry ingredients in separate bowls.IMG_4830

Then I mix everything together and spread the mixture on my greased cookie sheet.IMG_4833

Next, I used my bash and chop to make squares.IMG_4838
If you want to jazz them up, drizzle a little bit of the homemade pumpkin syrup on them!
IMG_4839
5) Pumpkin Truffles (Refined-sugar-free, gluten-free)
My friend Susie put a picture of these on Facebook and my mouth started watering right away! I asked for the recipe IMMEDIATELY and she sent me the link to My Whole Food Life.
IMG_5006
Ingredients:
  • For the pumpkin:
  • 1 ½ cups pumpkin puree (or 1 can pumpkin)
  • 1 cup coconut butter
  • 3 tablespoons maple syrup
  • 1 ½ teaspoons cinnamon
  • ¼ teaspoon nutmeg
    • For the chocolate coating:
    • 1 ½ cups chocolate chips
    • ¼ cup almond milk

Directions:

1. In the food processor, combine all the ingredients for the pumpkin cream. Blend until smooth.
2. Stick the food processor bowl in the fridge to firm up a little. About 10 minutes.
3. Using a cookie scoop, drop mixture onto a lined baking sheet.
4. Place the baking sheet in the freezer to firm while you make the chocolate mixture.
5. To make the chocolate use a double boiler method. Fill a saucepan with water and bring it to a boil.
6. Place a glass bowl on top of the pot with the water. Add the chocolate chips and almond milk to the glass bowl and gently melt the chocolate.
7. Once all the chocolate is melted, use a spoon to drizzle the chocolate over each truffle.
8. Place in the fridge to firm up the chocolate.
9. Please keep these truffles in the fridge. They should last a couple weeks.
10. You can freeze them for longer storage. Enjoy!
 I put the ingredients for the pumpkin filling in my food processor!IMG_5007I let them sit in the fridge for 10 minutes!
IMG_5008
Then I used an ice cream scooper to make the truffles!
IMG_5009
I then put the truffles in the freezer to harden while I made the chocolate! My first time by the way – not to shabby!
IMG_5012
Next, I used a scoop to “drizzle” the chocolate on. I say “drizzle” but it was actually still quite thick so I used the spoon and my fingers to get the chocolate coating on!
IMG_5014
After sitting in the fridge for a while, they were READY!!
OMG, these were GOOD!!
Pumpkin Truffles collage
Wow I am so excited for Fall! How about you?!
Which of these recipes are you gonna make? Let me know in the comments!!

3 Day Refresh Recap – July 2014

Similar to last year when I was traveling a great deal, it would appear that once again I’ve put on a few “vacation” pounds. Click here to read more about last year’s weight loss journey – Fall 2013 Weight Loss Journey with Team Beachbody.

Before IMG_5215 AfterIMG_5887

Over the past several months, I’ve been fortunate enough to travel to New York, Michigan, Nevada, and California (some of those places more than once) since April. However, since about April 1st, I realized that I’ve put on about 7 of these “vacation” or “too much fun” pounds. So just like last Fall when I saw a post from Corine Green, aka Zucchini Runner, about a challenge group with Beachbody, I jumped at the chance to join in!! The timing is great for me and of course it’s summer (gotta look good when I’m getting my Yoga/SUP on right?!) so I knew I would be able to commit!

As it turns out, we are doing a 60 Day PiYo Challenge (a low impact, high intensity, pilates and yoga inspired workout series created by Chalene Johnson). In order to reap the most benefits though – nutrition is going to be a HUGE factor! Over the past 2 weeks, I have made major changes in my diet including cutting back on – dining out, processed carbohydrates, and calorie-spiking beverages. I have gone back to a much more clean eating lifestyle and have made a variety of healthy meals at home. Don’t get me wrong – I have splurged a bit on the weekends (not every meal on the weekend though)! I think that’s okay because of the 80/20 rule – 80% on track and 20% splurges!

Now when I heard about Beachbody’s new 3 Day Refresh program, I was thoroughly intrigued. The testimonials claimed that the average weight loss is 3 pounds. The program is designed to allow your body to detox or “refresh” and to help you break the cycle of bad eating habits. The program also allows mild to moderate exercise, which meant I could continue to do my PiYo workouts daily! Corine had tried the program herself and was successful, so I thought, “why not?!”

IMG_2449

One of my biggest concerns in scheduling my refresh was whether dining out would fit in. After talking to Corine she explained that it is doable to eat out, but it’s much more preferable to eat in. Based on that, I went ahead and scheduled 3 consecutive days when I knew I could be set up for success!

Here’s a summary of what a day looks like:
Breakfast: Shakeology plus 1 fruit option

IMG_2625
Tea break: Unsweetened green or herbal tea (optional)

Green Tea
Mid-morning: Fiber Sweep Digestive Sweep

IMG_2614
Lunch: Vanilla Fresh Shake + 1 fruit + 1 veggie + 1 healthy fat

IMG_2641      IMG_2642
Snack: 1 veggie option or 1 raw juice option

Green juice
Tea break: Unsweetened green or herbal tea (optional)
Dinner: Vanilla Fresh shake + 1 option from Dinner Recipes list

IMG_2654      Energizing Vegetable Soup

Another great dinner option that fits the plan is homemade Gazpacho. It’s has a blended tomato base with a bunch of freshly chopped veggies added. 

image1

The healthy fat comes from adding avocado. It’s a delicious and very filling dinner option!
FullSizeRender
Tea break: Unsweetened green or herbal tea (optional)

My 3 days consisted of me following the plan, staying home as much as possible, taking time to relax (i.e. baths, reading for pleasure), and drinking LOTS of water! Please note that the Energizing Vegetable Soup is a recipe from Elaina Love. I decided to make it though because it follows the guidelines of a healthy vegetable serving plus a healthy fat (avocado).

IMG_2624

On day 4, when I weighed myself and took my measurements, I was elated to discover that I had lost 3.2 pounds and 3 inches in the waist, hip, and thighs area!!

IMG_2694

I’ve decided that it’s important for me to keep this momentum going! So on day 4, I modeled the program, but the main difference is that I consumed more calories and put back lean proteins into my diet. This includes a salad with wild caught tuna for lunch and baked miso salmon with veggies for dinner.

IMG_2683      IMG_2685

I’m happy to report, that I’ve actually lost another 0.6 pounds since keeping up these good routines! The weekend is coming up so I’m prepared to enjoy a mix of splurges, clean eating, and of course Piyo workouts, and even a hike. I’m sure that over the next few weeks my average weight loss should look more like a 1-2 pounds a week instead of 1 pound lost per day, which is totally fine with me!

I highly recommend the 3 Day Refresh and I’ve already ordered another kit so that I can detox or “refresh” my body again in August! I’ve heard of others using this program as a monthly or quarterly cleanse, and I absolutely love that idea! It’s a very doable program that I think anybody can incorporate into their routine every once in a while for a refresh! 🙂

And don’t shy away if you have a 9 to 5 office type of job! There is no reason why you can’t make the meals ahead and bring your shakes with you! This 3 Day program takes all the guesswork out of your meals and makes eating as simple as possible!

If you want to know more about this program, please feel free to email me or message me on Facebook!

If you are ready to purchase the program, visit my SHOP: Health & Fitness Programs page!

Healthy Shepherd’s Pie!

In honor of St. Paddy’s Day and my very Irish roots I was in the mood for some good ole’ Shepherd’s Pie! I thought of ways of making a healthy version and did some google searching! I found a great recipe (http://www.ovenloveblog.com/shepherds-pie-with-cauliflower-topping-gaps-paleo-grain-free-dairy-free-option/) that I adapted!

images

I thought it was brilliant to substitute cauliflower for the usual potato on top!! I thought about using bison meat but could not find it at the store today so I purchased ground turkey instead.  What a delightful and tasty dish! This will be staple in my house when I’m craving that Shepherd’s Pie taste!

Here is the recipe step by step!

1) Preheat the oven to 400 degrees Fahrenheit. Then boil one head of cauliflower in a large pot. I let it come to a boil and then lowered the heat.

IMG_9067

2) While the cauliflower was in the pot I sautéed carrots, onions, celery, and garlic in a pan with vegetable broth.

IMG_9068


Note: Since writing this original post, I’ve actually added more veggies! Recently I’ve added mushrooms and frozen peas for even more nutrition, flavor, and texture! DELICIOUS!


Shepherd's pie - veggie saute

3) After about 5 minutes I added the ground turkey.

IMG_9069

4) After let the meat brown for a few minutes I added a tablespoon of tomato paste,  2 tablespoons of parsley, Himalayan salt, and pepper.

 IMG_9070        IMG_9072

5) I reduced the pan’s heat to a simmer and then drained with the cauliflower.

IMG_9074

6) Next I added 1 tablespoon of coconut oil, and a sprinkle of Himalayan salt and black pepper to the cauliflower. I then used my immersion blender to blend it all together.

IMG_9075

7) Next I added the turkey meat and veggie mixture to the bottom of my baking dish.

IMG_9076

8) On top of that I spread out the mashed cauliflower.

IMG_9077

9) It then baked in the oven for 30 minutes at 400 degrees Fahrenheit.

IMG_9079

10) Last step – enjoy!!!

IMG_9081I even made it work for the 21 Day Fix portion control program lol! I added a salad for some extra greens. If you are not familiar with the program, it’s based on portion control. For instance, I am allowed 4 red containers for protein and at least 3 green containers for vegetables. If you want more information on that particular Beachbody program then you can find my email on the Contact Me link and message me! 🙂

IMG_9082


If you try this recipe please let me know in the comments! I’d love to hear from you!!

 Here’s a summary of the recipe:

Ingredients:

• 1 large head cauliflower, chopped into florets • 
1 tablespoon coconut oil
 • 1 small onion, diced
 • 2 celery ribs, diced
 • 2 carrots, diced • 
2 cloves garlic, minced
 • 1.5 pounds ground turkey, bison, or beef • 1/4 cup vegetable broth (to sauté) • 1 tablespoon tomato paste • 2 tablespoons chopped parsley • salt and pepper to taste • 1 cup chopped mushrooms (optional) • 1/4 cup or more frozen peas (optional)


Directions: 

1)   Preheat the oven to 400 degrees Fahrenheit. Then boil 1 head of cauliflower in a large pot. Let it come to a boil and then lower the heat.

2)   While the cauliflower is in the pot, sauté carrots, onions, celery, and garlic in a pan with vegetable broth. Optional: add mushrooms and frozen peas.

3)   After about 5 minutes, add the ground turkey.

4)   Let the meat brown for a few minutes and add 1tablespoon of tomato paste and 2 tablespoons of parsley. Add Himalayan salt and black pepper to taste.

5)   Reduce the pan’s heat to a simmer and then drain the cauliflower.

6)   Next, add 1 tablespoon of coconut oil, and a sprinkle of Himalayan salt and black pepper to the cauliflower. Mash the cauliflower by hand or with an immersion blender.

7)   When assembling, add the turkey meat and veggie mixture to the bottom of the baking dish. On top of that, spread out the mashed cauliflower.

8)   Bake in the oven for 30 minutes at 400 degrees Fahrenheit.

9)   Last step – enjoy!!!


4 Ingredient Paleo Pancakes!

Ok, now in the morning I am usually a major smoothie person. Especially because I love my Shakeology so much (it is my daily dose of dense nutrition you know 🙂 ). However after several requests from the hubby, I decided that I needed to change our morning routine and make some pancakes from scratch. Pancakes with real, whole foods ingredients of course – not instant from the box! 🙂

The original recipe can be found here (http://civilizedcavemancooking.com/breakfast/perfect-paleo-pancakes/). To my delight, these 4 ingredient Paleo pancakes turned out amazingly well! One batch calls for 3  bananas, 3 eggs, 1/2 cup nut butter (I used almond butter), and 2 teaspoons cinnamon. All of these ingredients go in a high speed blender or food processor.

IMG_7565

You will want to preheat your skillet and “grease” it with coconut oil. Because coconut oil has a unique composition of fatty acids (90% saturated), it is highly resistant to oxidation at high heats. This makes it an ideal oil for cooking food at higher temperatures.

When purchasing coconut oil, it is best to choose the unrefined or (extra) virgin form. It is even more beneficial to choose a variety that is organic and raw. Refined coconut oils can be compromised during high heat processing and treated with chemicals, destroying the health benefits.

IMG_8100

The trick with these pancakes (and luckily I caught this tip from reading the comments) is to make sure you keep the pan on LOW heat. I cannot stress this enough! Out of 10, I kept my dial between 4 and 5. Now they do take longer to make, but trust me when I tell you it is totally worth it so you get the pancake consistency that you are used with a boxed brand or IHOP lol!

And, just like with typical pancakes, you want to see the bubbles forming before you flip the pancakes.

IMG_7566     IMG_7567

If you want to change up the flavor, you can get creative and add cacao nibs, berries, or nuts. I usually pour the batter in the pan and then slowly sprinkle on my  “extra” so that the base of the batter remains unadulterated and you can make a variety! For example, I added cacao nibs for a chocolatey crunch (seen below on left) and I even tried a chocolate chip/blueberry combination (see below on right). Yum!!

IMG_7568      IMG_4693

They may have taken a few extra minutes to prepare, but they were so worth it! And they tasted so good that I couldn’t get them to the plate fast enough because my husband was gobbling them up!!

IMG_7569

I even stored the leftover pancakes (I managed to sneak 2 away from my husband’s sight lol) in the frig and then we enjoyed them later in the week just by reheating in the toaster oven.

Top them with pure maple syrup, extra cinnamon, fruit or any of your favorite toppings and enjoy!

If it’s the Fall season, try adding pumpkin puree!! I added 3 tablespoons of organic pumpkin puree and they came out wonderful!

IMG_5113


Another Fall season tip, you can add Pumpkin Syrup as a topping! See the recipe for homemade pumpkin syrup in another blog post, “It’s Pumpkin Recipe Time!!

IMG_5114

Or you can get really creative like my best friend Monica, and you can take the same batter and turn them into muffins!!

IMG_2585

Please enjoy and don’t forget to let me know how they turn out if you make them!


Bust the Flu Juice!!

My husband and I are starting off the New Year with the tail end of the flu. But not to worry! We are going to bust it with a flu buster juice that I discovered in an organic cafe in Seattle called Chaco Canyon.

Evan Chaco Canyon Flu Buster           Chaco Canyon

I knew the ingredient list of: apples, oranges, lemon, garlic, ginger, and cayenne pepper based on the menu at the restaurant. So I experimented with the amounts and inputted my new recipe into my MacGourmet App.

IMG_6977

I gathered what I had from the refrigerator and started juicing! Please note the first time I made this I did use 2 apples, but only had 1 available today!

IMG_6975             Flu buster

Normally I drink juices cold, but the restaurant serves this one warm. My husband suggested adding a little bit of hot water!

IMG_6976


The juice was a success! It tasted delicious and I know it will help finish off this flu!

The fruits and herbs used in this recipe have a great deal of benefits! Here’s a list of just some of these benefits that make them helpful for busting the flu:

  • Apple: detoxifying, Vitamin C, B-complex
  • Orange: Vitamin C, potassium (electrolyte mineral)
  • Lemon: detoxifying, Vitamin C, maintain pH levels in the body
  • Ginger: anti-inflammatory, antioxidant
  • Garlic: antibiotic, anti-inflammatory, immune boosting
  • Cayenne: blood purifier


Healthy Thanksgiving Recipes 2013!

This year for Thanksgiving we went over to Evan’s brother’s house for Thanksgiving! All of his relatives made an excellent effort to purchase high quality, organic ingredients for the rest of the dishes so I was excited for a yummy, healthy dinner! We decided to bring a total of 4 homemade dishes to contribute to our healthy holiday meal including cranberry sauce, kale/butter lettuce salad, vegan-gluten-free-dairy-free-no bake pumpkin pie, and a vegan-paleo-dairy-free chocolate pudding! So why am I making cranberry sauce and not just grabbing a can? Well, here’s a brief and to the point article explaining from Food Babe why, discussing BPA (Bisphenol A) and GMO’s.

I decided to get 2 of the dishes done the night before to keep my Thanksgiving day a little less hectic, so I focused on the cranberry sauce and the pumpkin pie. The cranberry sauce consists of organic fresh cranberries, orange juice (I have a juicer so I juiced my own oranges), maple syrup, nutmeg, cinnamon, ginger (optional). Here’s the original recipe from Multiply Delicious.

IMG_6155 IMG_6154 IMG_6160


Once you have all of your ingredients ready, simply add to a pot, bring to a boil, and let simmer!

IMG_6156 IMG_6157


The recipe recommends a simmer of a least 20 minutes or when the cranberries start to burst open. I made sure to keep stirring and to do frequent taste tests. I will admit that I upped the maple syrup to about 3 1/2 tablespoons because I thought it was a little too tart. Could have to do with the fact that I made my own orange juice so the sugar content would be much lower than a store-bought brand. In the morning, I tasted it one more time and decided to add more sweetener – but I turned to coconut palm sugar (1 tablespoon) because it is low glycemic.

IMG_6173


After another quick boil and about a 20 minute simmer – I thought it was finally just right!!

So, on to the pumpkin pie! Evan gave me the idea of using the homemade larabars as a crust for the pie! I thought it was an awesome idea and decided to give it a try! They are simply made with dates, almond butter, and nuts (in this case I used soaked walnuts). I made about 2 batches worth to make sure I’d have enough and it worked out great! I even had leftovers to make 5 bars lol!

IMG_6161 IMG_6165 IMG_6172


After smoothing my crust onto the pie plate, I moved on the pumpkin filling! I used 2 containers of pumpkin puree, 1 ripe persimmon, about 2 1/2 cups of dates, a scrape of vanilla bean, and a dash of ground ginger and cinnamon. For the pumpkin puree, I prefer to used boxed instead of canned – again for the same concern about BPA.

Organic Pumpkin Puree box         IMG_6167

I wound up filling the Vitamix to the top lol, so not gonna lie, it struggled a bit to blend everything properly so I had to take the lid off quite a few times to mix stuff around. Not to worry though – after the 4th or 5th time it all blended just fine!

IMG_6168 IMG_6169

Once the pie was complete I put it in the freezer since we weren’t going to consume it until the next day. After a long night of cooking and washing dishes, I finally got myself to bed around 2am (Evan and I are such night owls, so it’s actually easier for me to work late into the evening then to get up early lol)!

On Thanksgiving day, I decided to go to the gym in lieu of a turkey trot (gotta love the flexibility with sleeping in longer!) and then spent afternoon making my salad! By 3pm I had all of my dishes completed!

IMG_6174


And of course, Evan made his famous chocolate pudding! It’s made with bananas, avocados, honey, cacao powder, a few pieces of dark chocolate bark, almond milk, and almond butter. It’s soooo delicious – hands down our favorite homemade dessert!

IMG_6175

All in all, it was a healthy, happy Thanksgiving! I’m thrilled to say that all of my dishes had rave reviews  – but I think the pumpkin pie was one of the top favorites!!

Another one of my favorites from Thanksgiving (well in addition to the turkey) had to be my brother-in-law’s simple sweet mashed potatoes! All he did was bake them in the oven, and sprinkle on cinnamon! They tasted like candy! Unfortunately they went so fast I couldn’t snap a photo in time lol!

Here’s to wishing all of you a healthy, happy Holiday Season! 🙂

IMG_6187

Dairy-Free Tuna Salad

Dairy-Free Tuna Salad!

IMG_6117

I love having this homemade dish for lunch! As long as I have a 3 oz package of Wild Albacore Tuna in my pantry, this is a guaranteed easy and delicious meal! For all of these ingredients I’d like you to use organic and local whenever possible.

IMG_6145

Ingredients:

  • 3 oz package of Wild Albacore Tuna
  • 1 celery stalk, deveined, chopped
  • 4 tablespoons olive oil (divided)
  • 2 tablespoons vinegar (i.e. champagne, rice, white balsamic)
  • fresh lemon Juice from 1/2 of a lemon
  • 1 teaspoon mustard
  • himalayan salt
  • black pepper
  • lemon pepper (or substitute another seasoning of your choice)
  • 4-6 leaves of kale (or any leafy greens of your choice, i.e.  spinach, butter lettuce, romaine, etc)
  • 2 -3 medium sized heirloom tomatoes (feel free to change the amount based on much you want!), chopped
  • 1/2 of a cucumber, peeled and chopped
  • sauteed mushrooms (I like to sauté about 4 ounces with a little broth in a pan for a few minutes on medium heat)
  • 3 – 4 tablespoons (and more as needed) of low sodium broth
  • 6-8 marcona almonds

Directions:

  • Using low sodium broth (or even water) saute about 4 ounces of mushrooms in a pan over medium heat for approximately 6 – 8 minutes. If you like to multi-task then go ahead and get this started while you prepare the rest of the salad.
  • Open the package of tuna and use a fork to scrape it out into a large bowl. Then squirt lemon juice, about 1 tablespoon of olive oil, and a dash of himalayan salt and pepper onto the tuna and mash it altogether.
  • Next, add the chopped and deveined celery to the tuna mixture. A simple way to devein the celery is to use a peeler to peel off the top layer of the stalk. This step is particularly helpful for people who do not care for the taste of raw celery.

IMG_5223

  • Either make space in the bowl or remove the tuna and set aside to make room to whisk together my favorite dressing! The dressing is made with the following ingredients: 3 tbs. olive oil, 2 tbs. vinegar, a few squeezes of fresh lemon juice, 1 tsp. mustard, and a sprinkle of himalayan salt and lemon pepper seasoning. I simply use my  fork and whisk away!
  • Next I like to add my greens to the bowl, typically kale. The sooner the kale is in the dressing the better, so the bitterness can be broken down. If you are using kale, remove the leafy part from the stems (either discard or save for another use). As I’m adding more chopped kale to the bowl I like to constantly whisk it around to coat it thoroughly with the dressing.
  • Next I tend to chop up the more water-based veggies to the salad  (again I feel like it helps to break down the bitterness of the kale). So I would typically add the heirloom tomatoes, and then cucumbers before adding root vegetables like carrots or radishes.
  • Before serving I like to sprinkle on a handful of marcona almonds for some crunch! Feel to substitute any nut or seed that you prefer or of course you can omit this step altogether!
  • Serve and enjoy!!!

Servings: 1


How to Make Nut Milk!

Make your own milk at home!! I make nut milk about 2-3 times a week so it’s become routine. I’ve been avoiding store-bought brands because of the preservatives they add! Always use organic, raw nuts (not roasted)!
Step 1) Soak your nuts! Use clean, purified water because the water gets absorbed into the nut. I have walnuts in this picture. They need at least 4 hours to soak in water. Almonds and pecans should soak for at least 8.
At the beginning of the soaking process I add about a capful of Food Grade Hydrogen Peroxide! The nuts immediately foam (reminds me of when I put peroxide on a cut!). I like to make sure they soak in the peroxide for at least 20 minutes. This helps to kill germs and bacteria, and a as result your milk will be better for you and should last longer in the fridge! I must emphasize that you stick to Food Grade. Don’t buy the stuff in the brown bottle as it may contain metals that are not good for you! I found this particular bottle at Whole Foods, but feel free to shop online for better deals!

image1

After about 20 minutes, I rinse off the foamy water in the sink and put clean, purified water back in the bowl. Note: I put enough water in the bowl to just cover the nuts.
You can decide to soak your nuts in bulk (i.e. if I purchase about 2 pounds from the grocery store, I’ll come home and soak all 2 pounds at once) or you can decide to just soak enough to make your milk. Once you soak the nuts, the clock starts ticking on when they will go bad (so store in the fridge for about a week).

image2

When I do soak my nuts in bulk, I preserve them by putting them in my dehydrator at 105F for 24 hours. then I put them in a jar for storage!
Walnuts in dehydrator
Almonds in jar
Step 2) Rinse off the nuts in a colander to remove the digestive inhibitors. The water will turn from brown to clear.

step2

Step 3) Put the nuts in a Vitamix blender (or other high-powered blender of your choice) to pulverize them. I originally had soaked 2 cups of walnuts which turned into about 3 cups post-soaking!
step3
Step 4) Add water to the Vitamix. (for every 1 cup of nuts that have been soaked, I add 4 cups water).
step4
Step 5) Blend in Vitamix for 30-45 seconds. I discovered that I can hit the Smoothie button and it will run for itself for about 45 seconds.
step5
Step 6) After blending strain the liquid through a nut milk bag in a bowl. I got my nut milk bag for $10 plus free shipping from Elaina Love’s Pure Joy Planet! http://www.purejoyplanet.com/?Click=4989
step6
Step 7) Squeeze the nut milk bag over a bowl. I got my nut milk bag for $10 plus free shipping from Elaina Love’s Pure Joy Planet! http://www.purejoyplanet.com/?Click=4989
Step7
Step 8 ) Pour the nut milk into a jar/container! I save jars glass jars from sauces and peel off the labels!
step8
Step 9) You will have walnut or almond “pulp” left. You can choose to discard the pulp or save it in a bag and store in the freezer for other recipes. I got my nut milk bag for $10 plus free shipping from Elaina Love’s Pure Joy Planet! http://www.purejoyplanet.com/?Click=4989
step9
Step 10) Rinse off the bag in order to finish straining your nut milk. I got my nut milk bag for $10 plus free shipping from Elaina Love’s Pure Joy Planet! http://www.purejoyplanet.com/?Click=4989
step10
Step 11) Store your nut milk in a glass jar in the fridge for up to 5 to 7 days.
step11
Optional: You can flavor or sweeten your nut milk with xylitol, dates, vanilla extract, or stevia. Also, you can add raw cacao when you blend to make chocolate milk!
step12
To make your nut milk truly from scratch you can even add homemade vanilla extract! Thanks Jennifer!
step13
Sometimes I even get creative and do a combination milk! Here I have 1/2 cup almonds, and 1/2 pecans (both already soaked)!
Almond Pecan Milk