Make your own milk at home!! I make nut milk about 2-3 times a week so it’s become routine. I’ve been avoiding store-bought brands because of the preservatives they add! Always use organic, raw nuts (not roasted)!
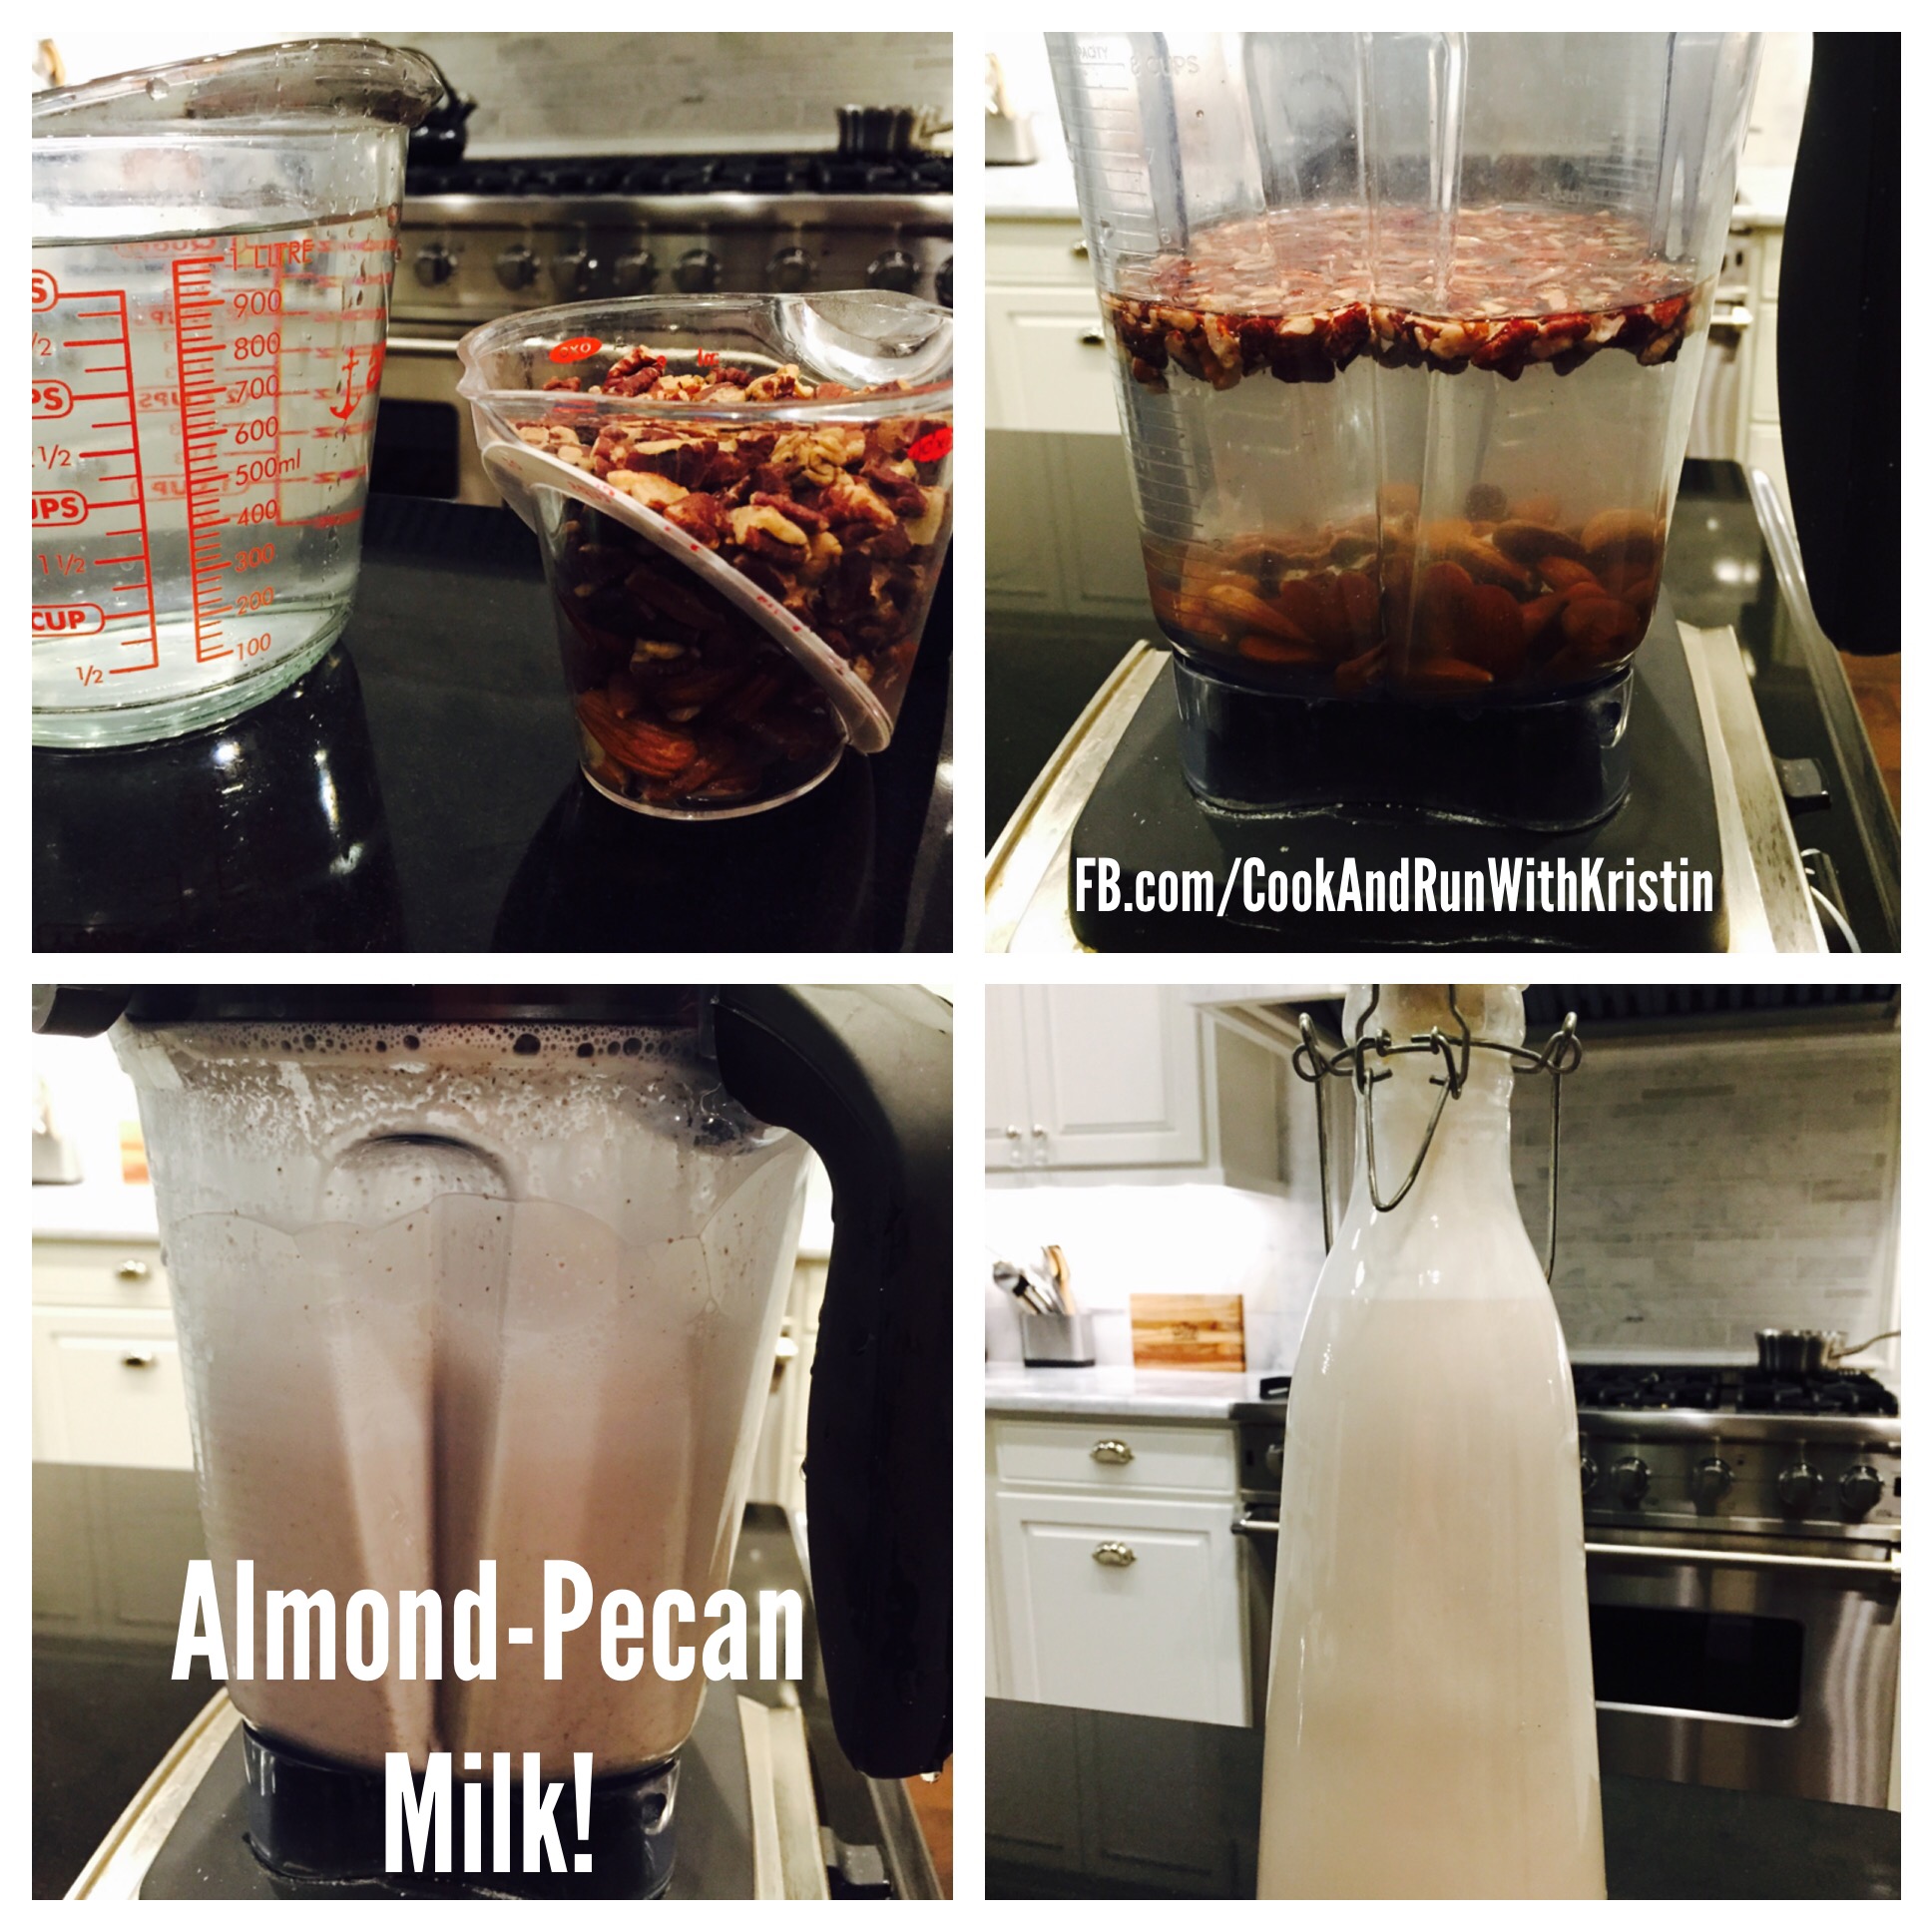
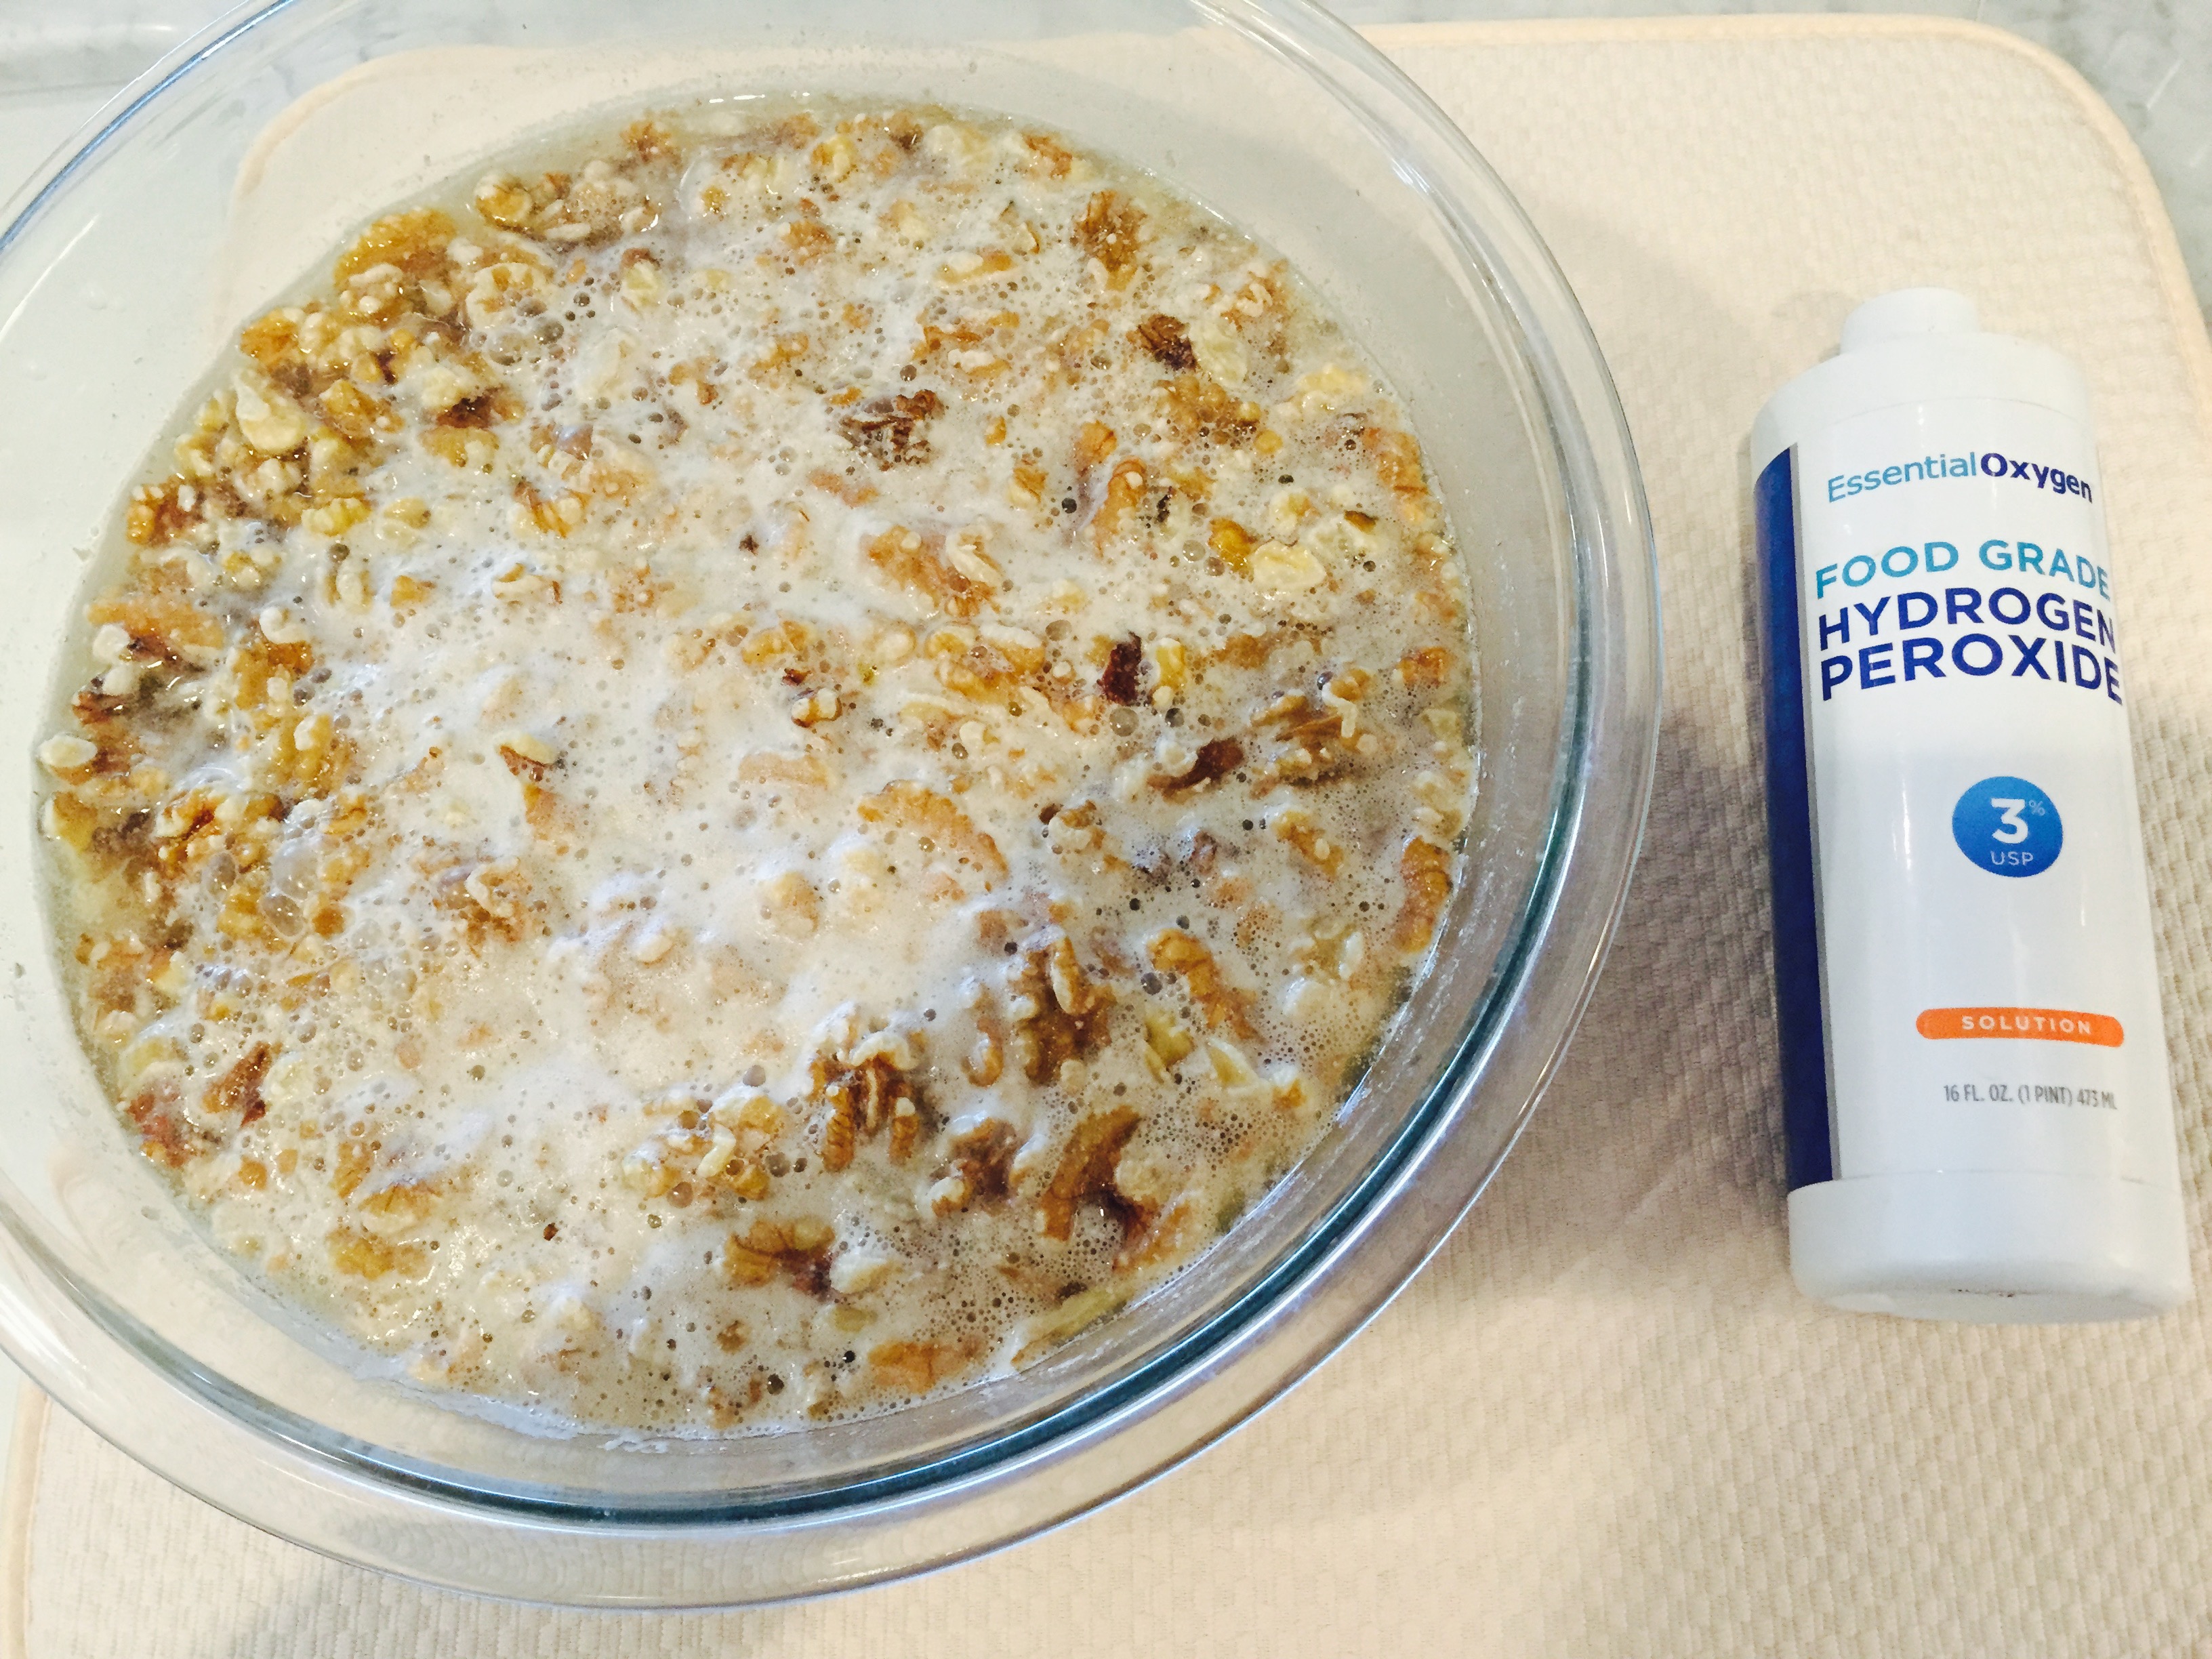
Step 1) Soak your nuts! Use clean, purified water because the water gets absorbed into the nut. I have walnuts in this picture. They need at least 4 hours to soak in water. Almonds and pecans should soak for at least 8.
At the beginning of the soaking process I add about a capful of Food Grade Hydrogen Peroxide! The nuts immediately foam (reminds me of when I put peroxide on a cut!). I like to make sure they soak in the peroxide for at least 20 minutes. This helps to kill germs and bacteria, and a as result your milk will be better for you and should last longer in the fridge! I must emphasize that you stick to Food Grade. Don’t buy the stuff in the brown bottle as it may contain metals that are not good for you! I found this particular bottle at Whole Foods, but feel free to shop online for better deals!
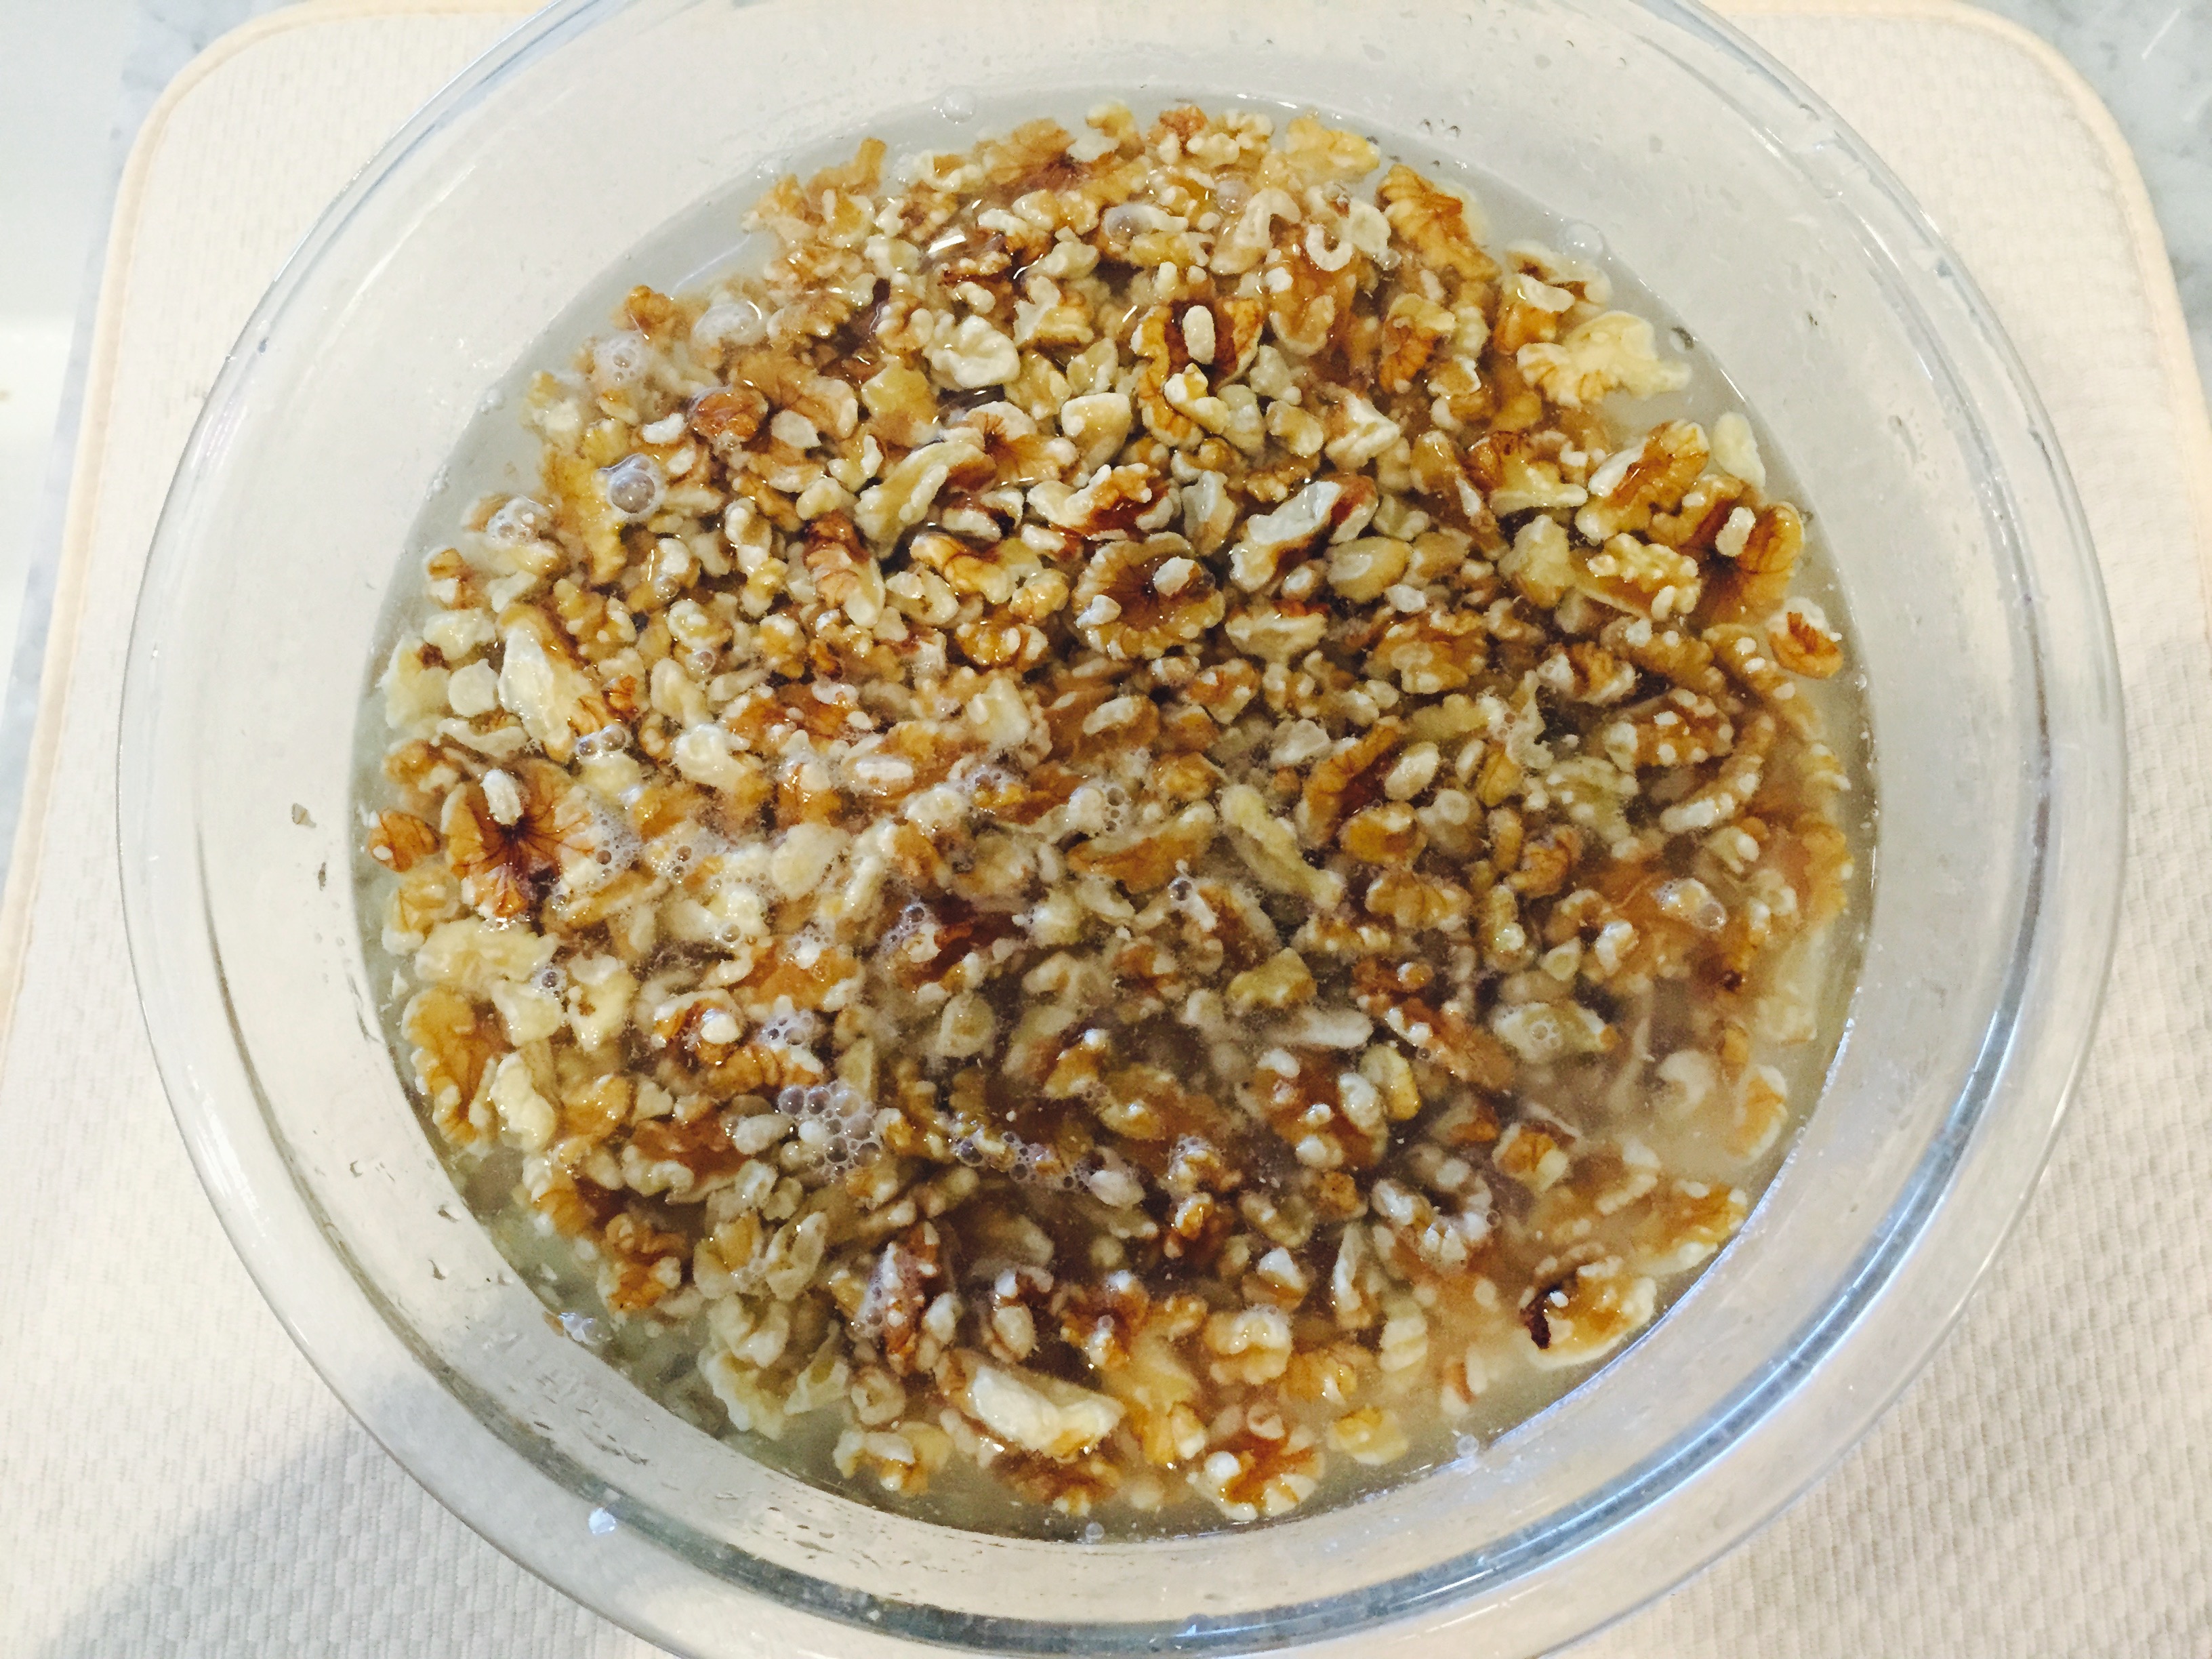
After about 20 minutes, I rinse off the foamy water in the sink and put clean, purified water back in the bowl. Note: I put enough water in the bowl to just cover the nuts.
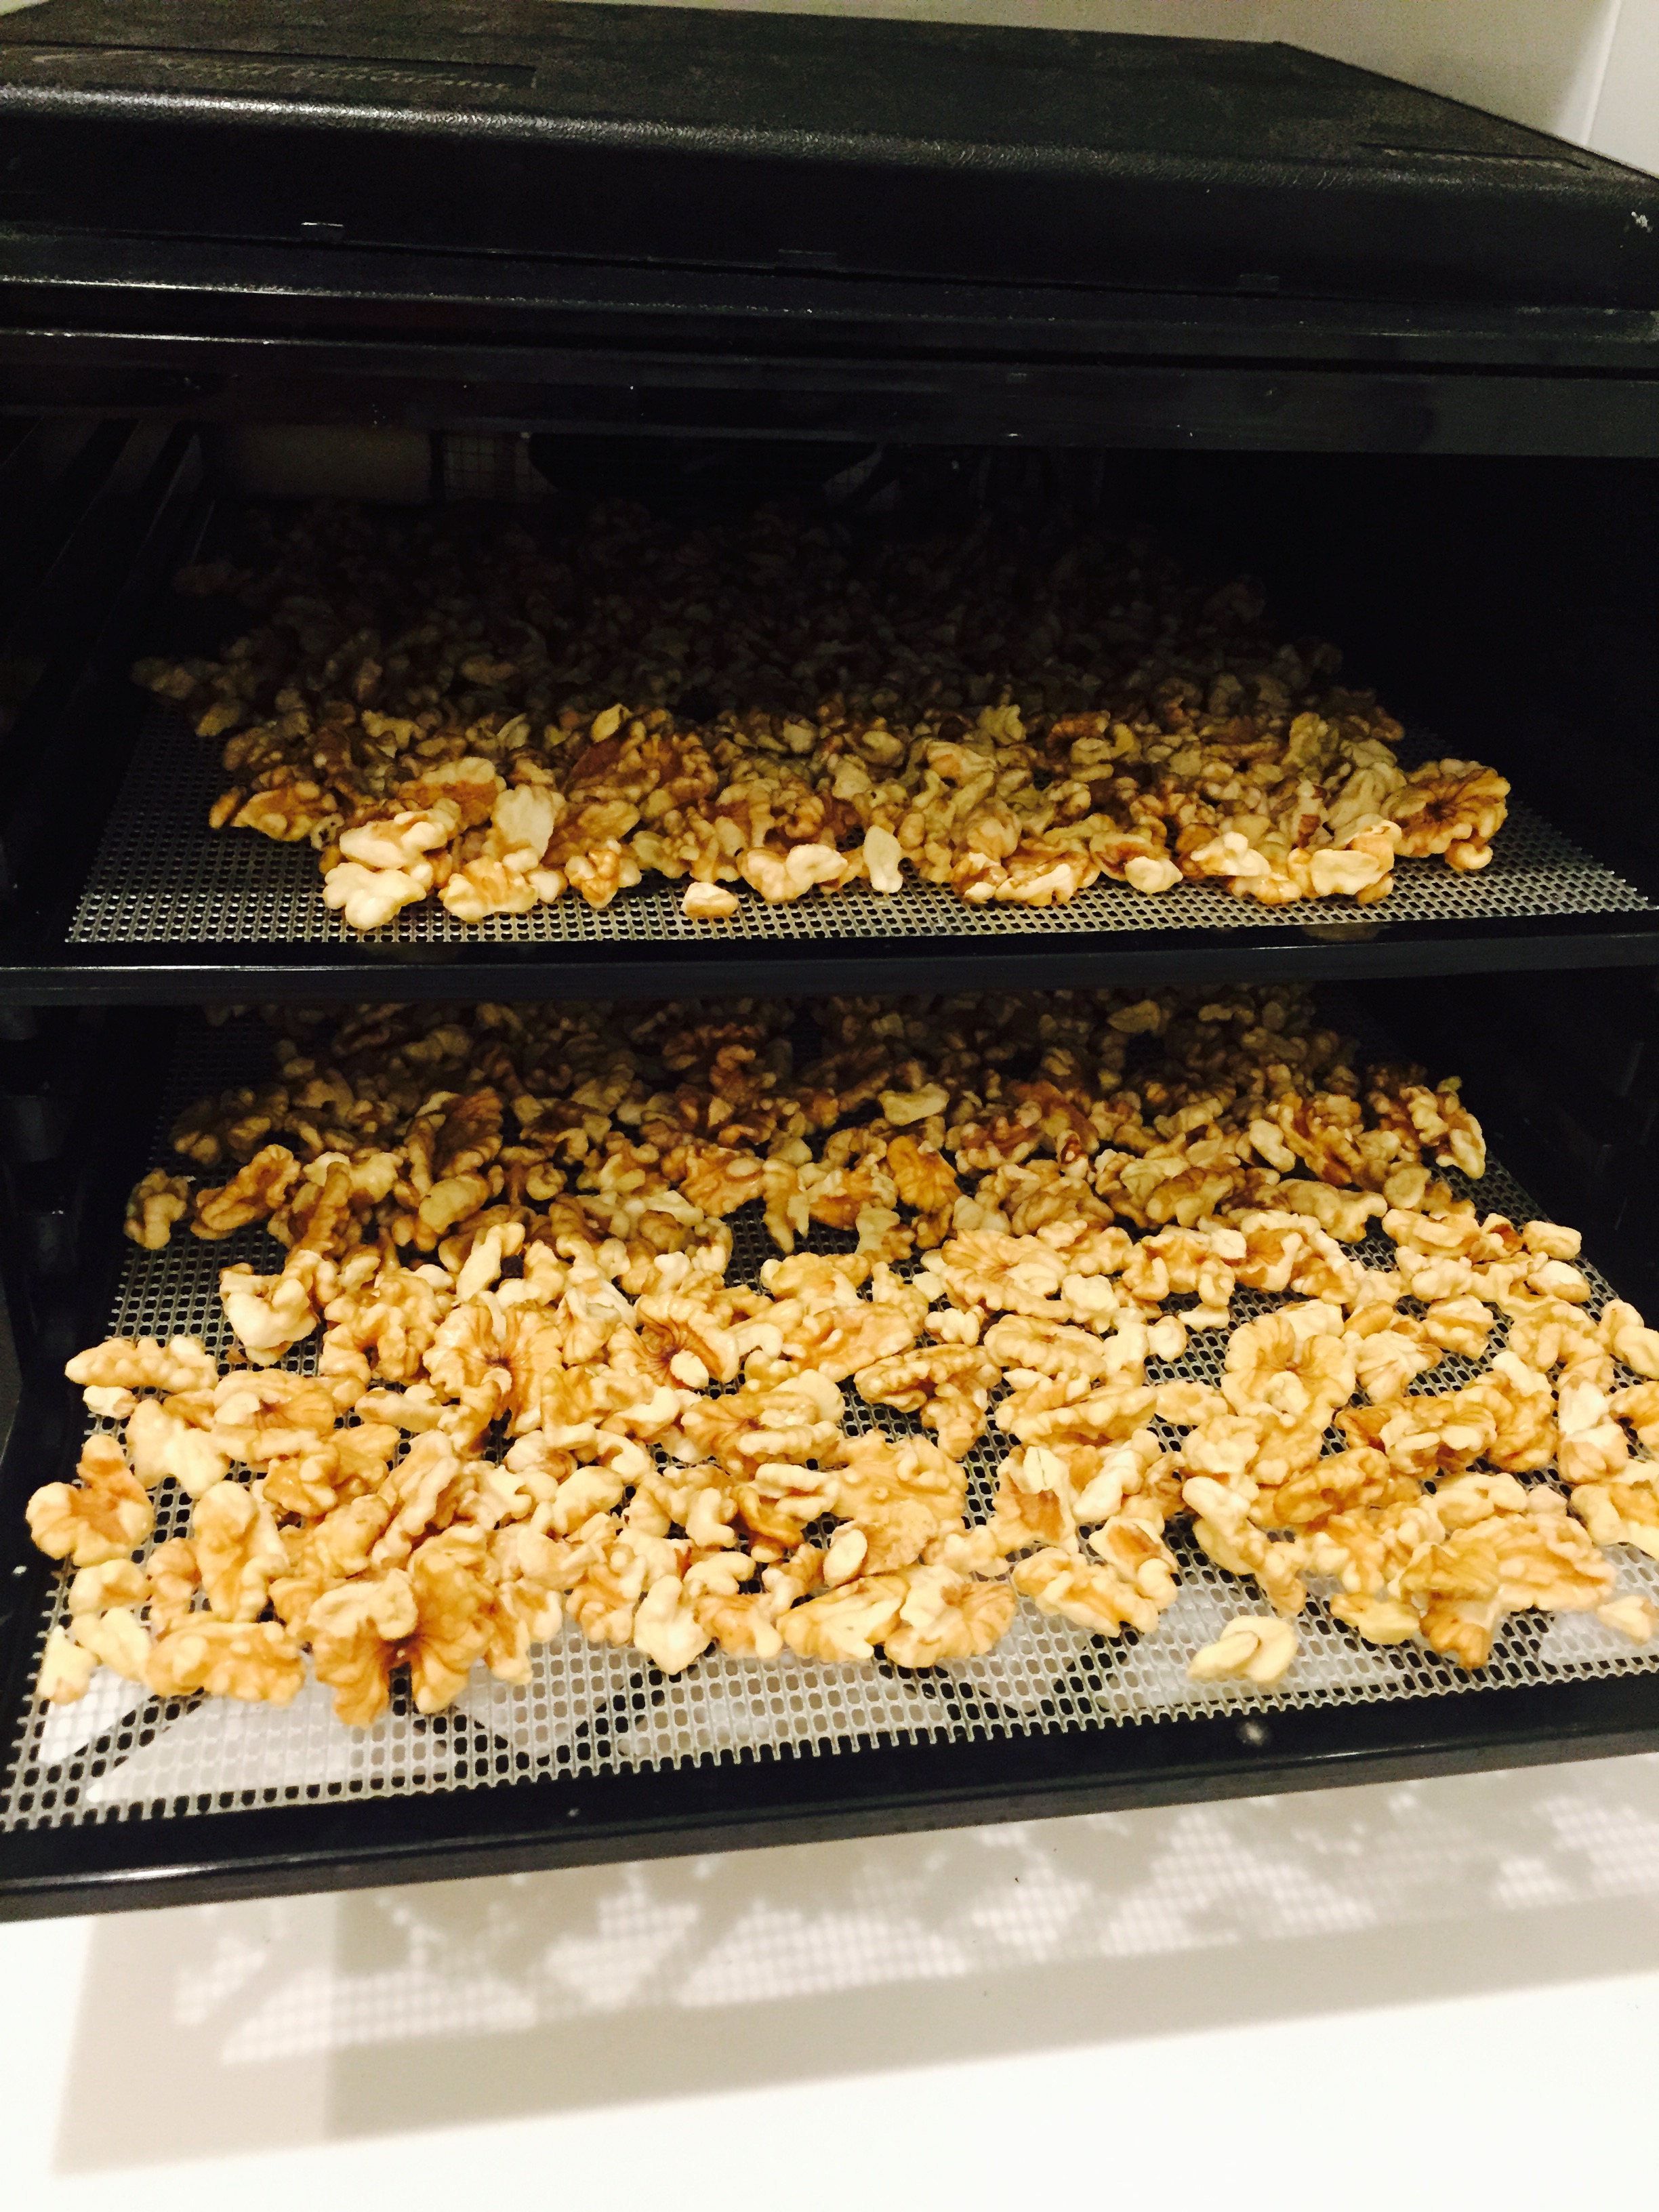
You can decide to soak your nuts in bulk (i.e. if I purchase about 2 pounds from the grocery store, I’ll come home and soak all 2 pounds at once) or you can decide to just soak enough to make your milk. Once you soak the nuts, the clock starts ticking on when they will go bad (so store in the fridge for about a week).
When I do soak my nuts in bulk, I preserve them by putting them in my dehydrator at 105F for 24 hours. then I put them in a jar for storage!

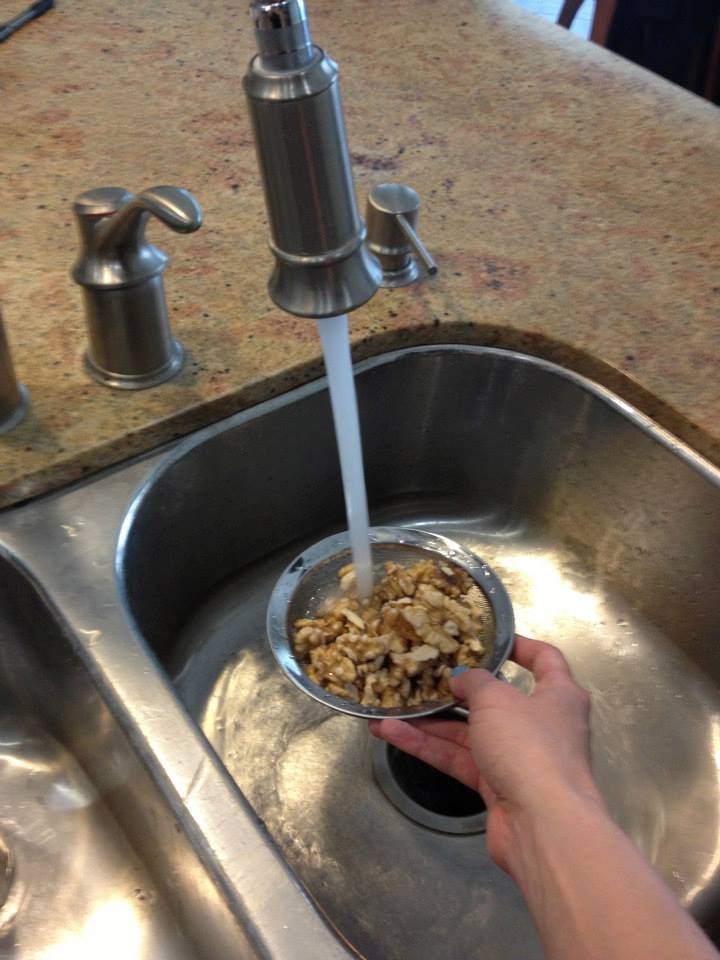
Step 2) Rinse off the nuts in a colander to remove the digestive inhibitors. The water will turn from brown to clear.
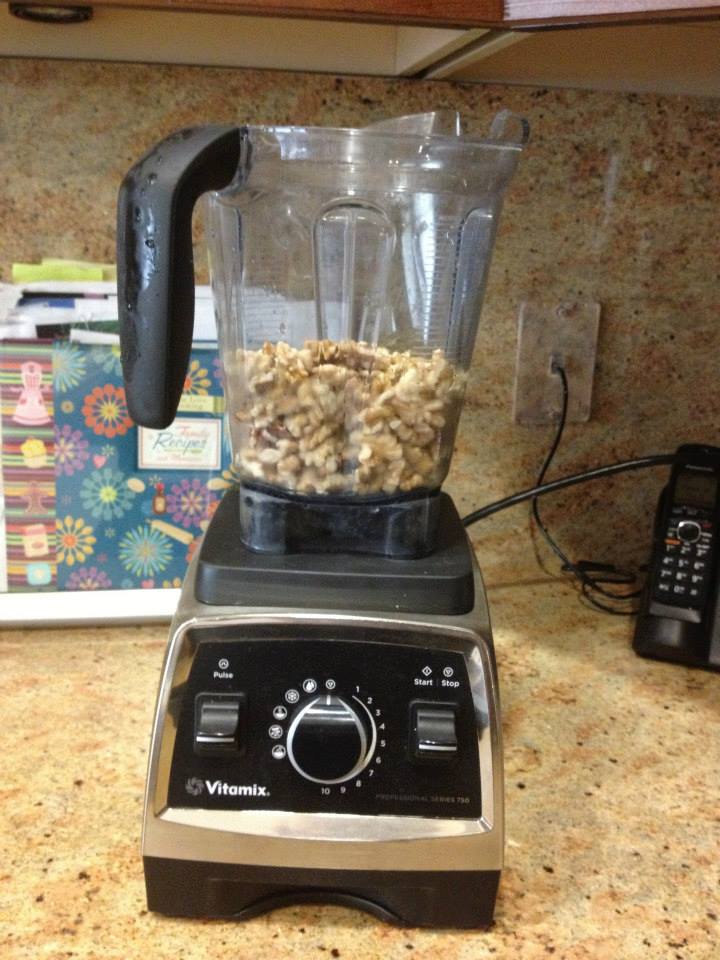
Step 3) Put the nuts in a Vitamix blender (or other high-powered blender of your choice) to pulverize them. I originally had soaked 2 cups of walnuts which turned into about 3 cups post-soaking!
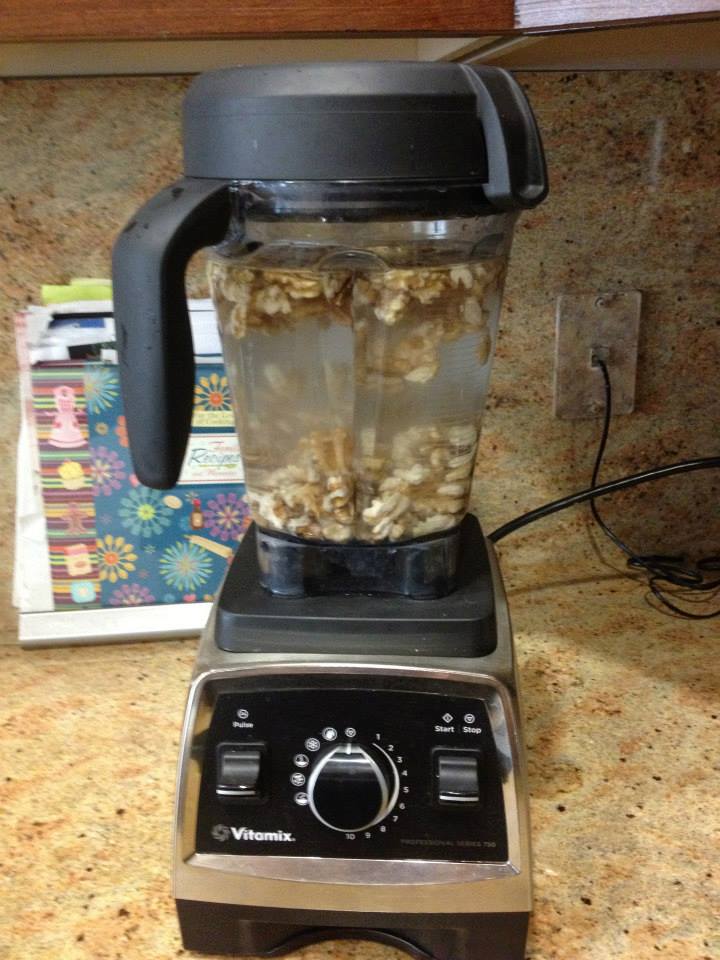
Step 4) Add water to the Vitamix. (for every 1 cup of nuts that have been soaked, I add 4 cups water).
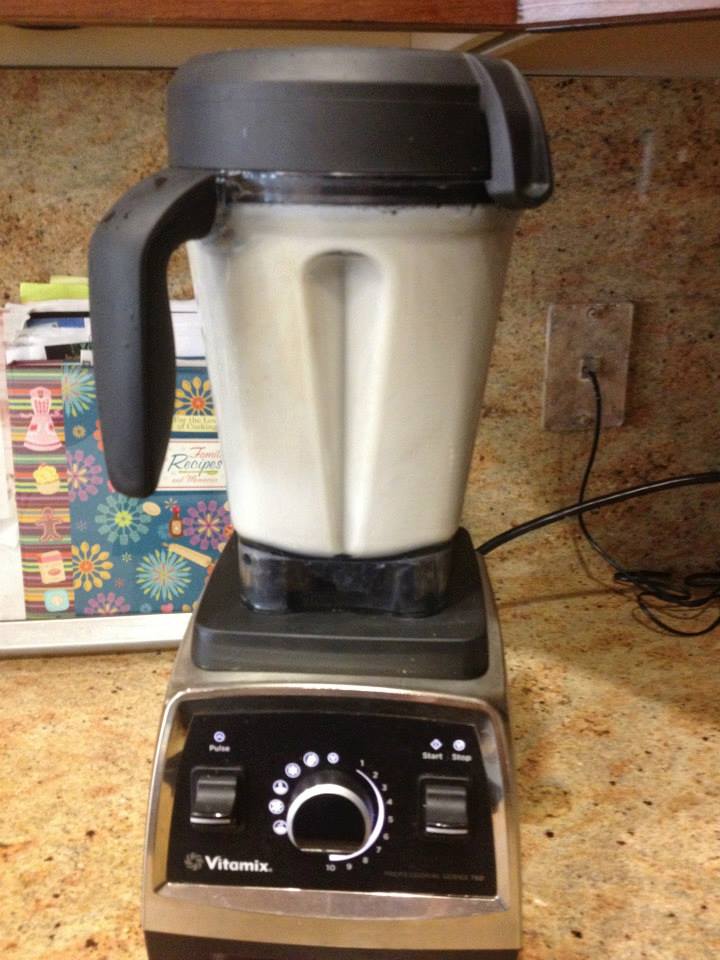
Step 5) Blend in Vitamix for 30-45 seconds. I discovered that I can hit the Smoothie button and it will run for itself for about 45 seconds.
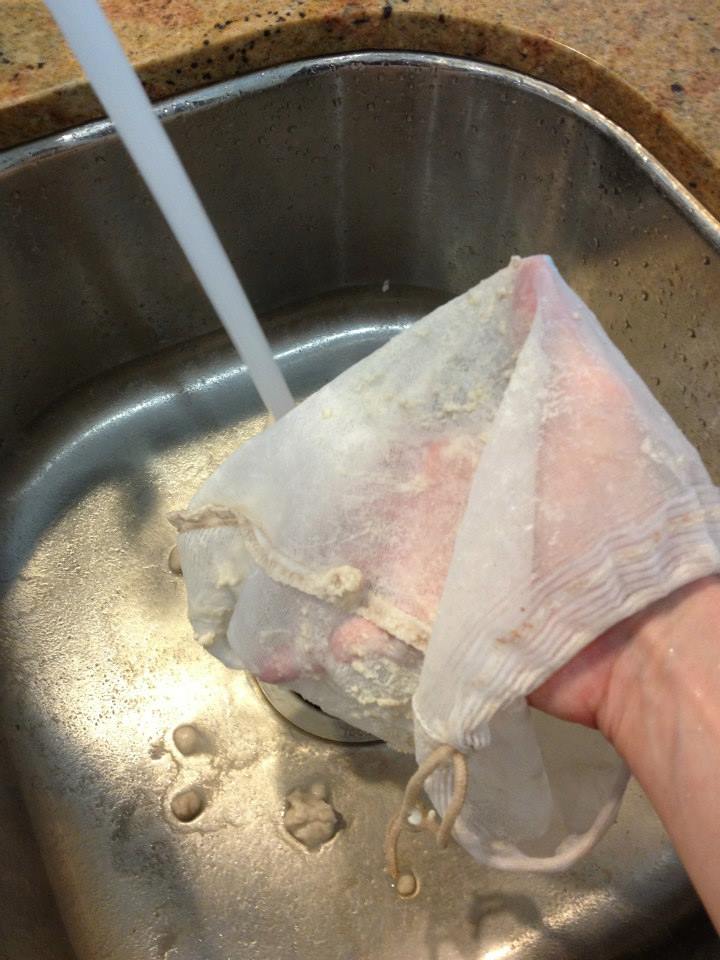
Step 6) After blending strain the liquid through a nut milk bag in a bowl. I got my nut milk bag for $10 plus free shipping from Elaina Love’s Pure Joy Planet! http://www.purejoyplanet.com/?Click=4989
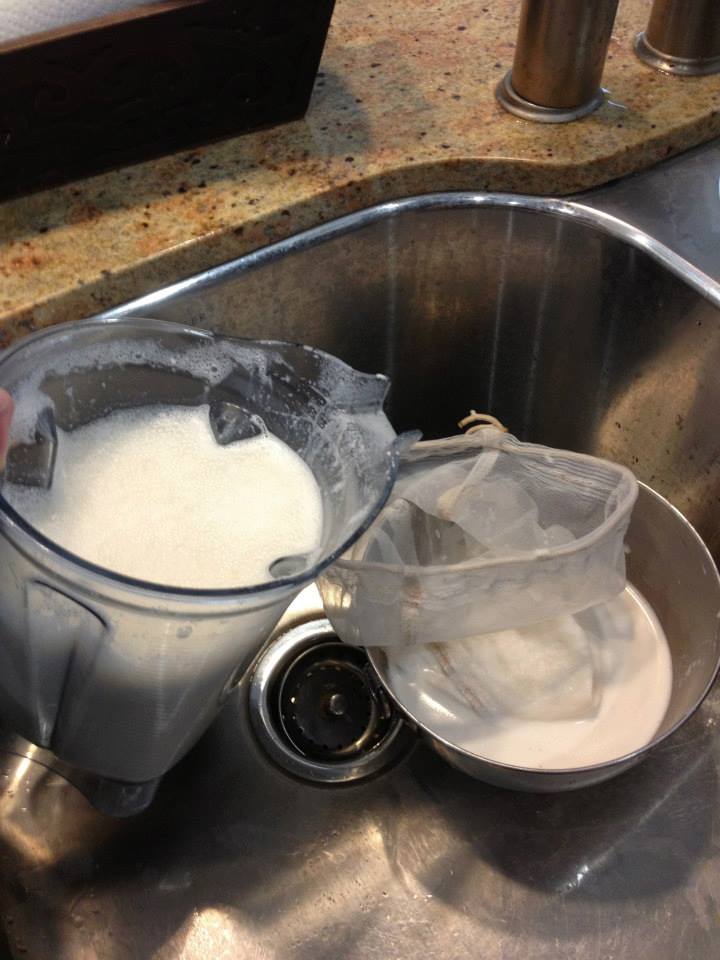
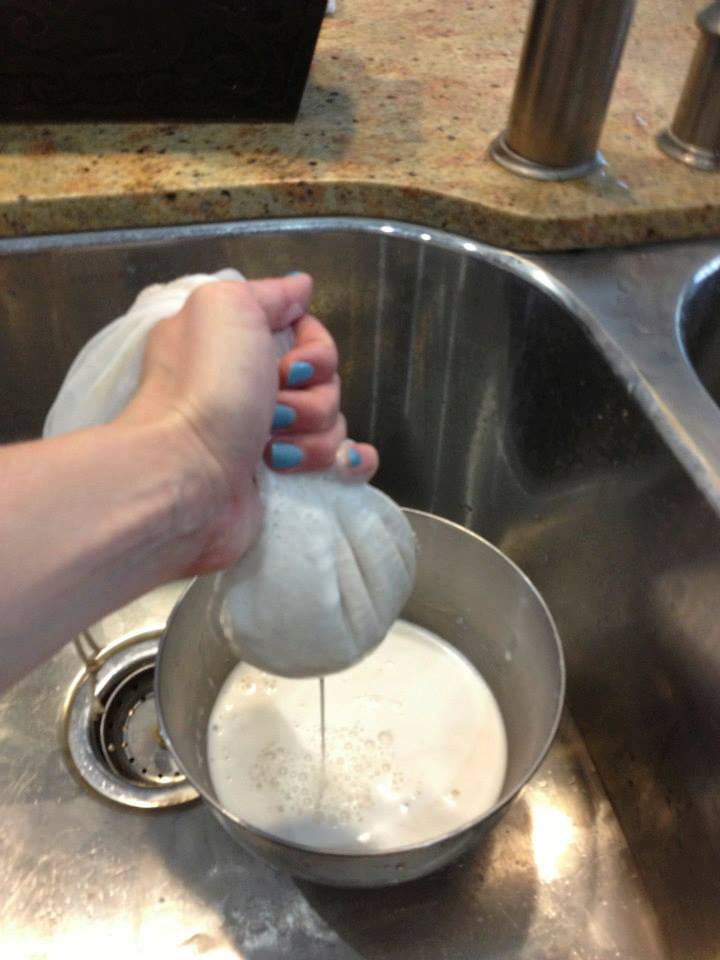
Step 7) Squeeze the nut milk bag over a bowl. I got my nut milk bag for $10 plus free shipping from Elaina Love’s Pure Joy Planet! http://www.purejoyplanet.com/?Click=4989
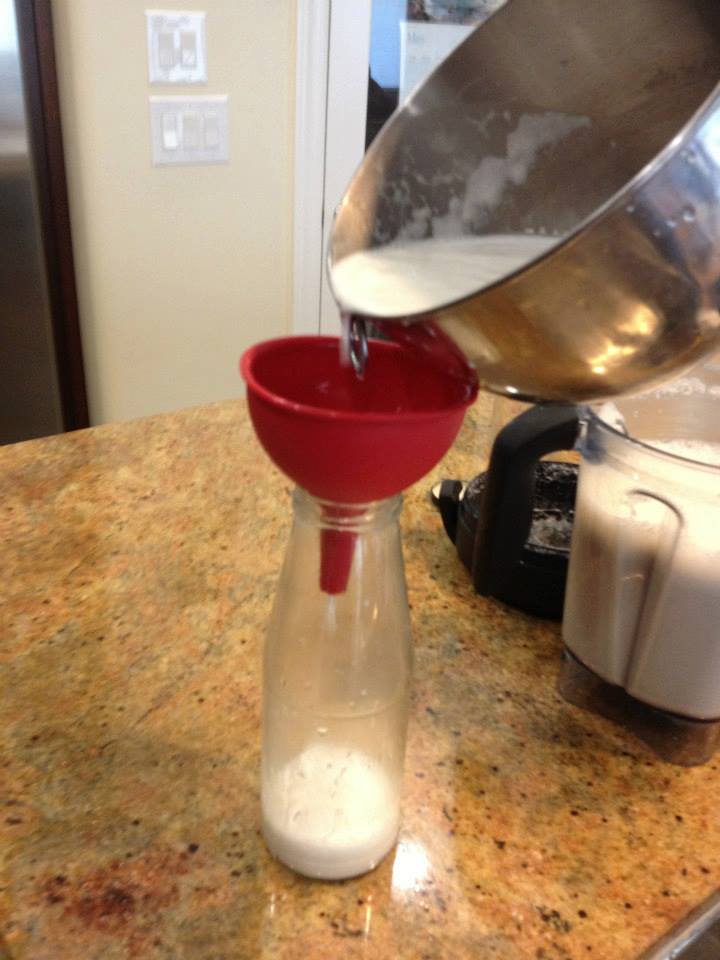
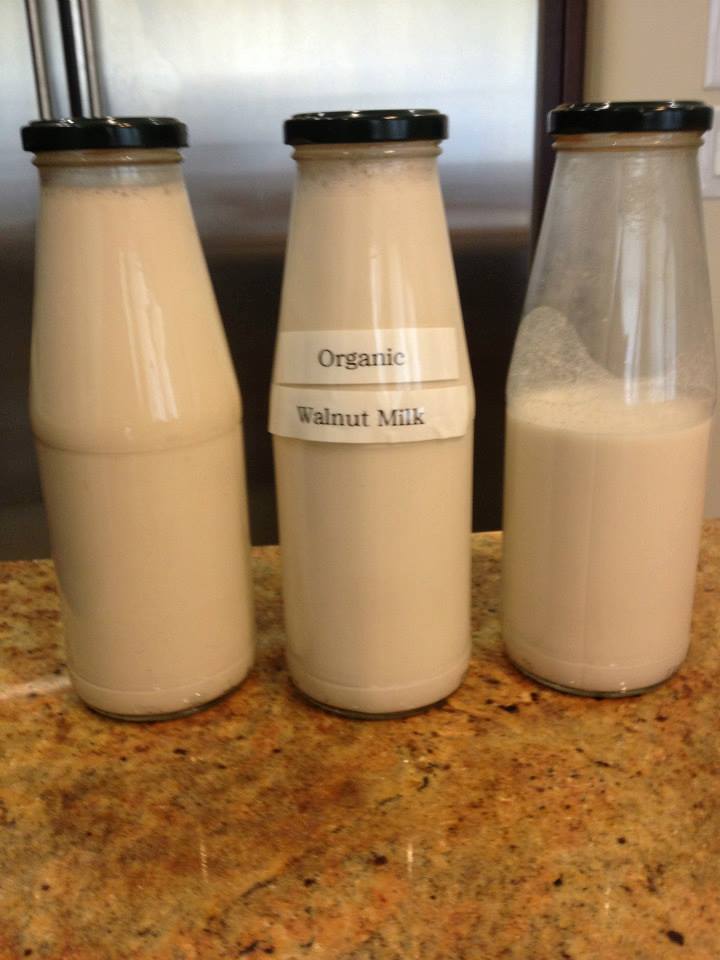
Step 8 ) Pour the nut milk into a jar/container! I save jars glass jars from sauces and peel off the labels!
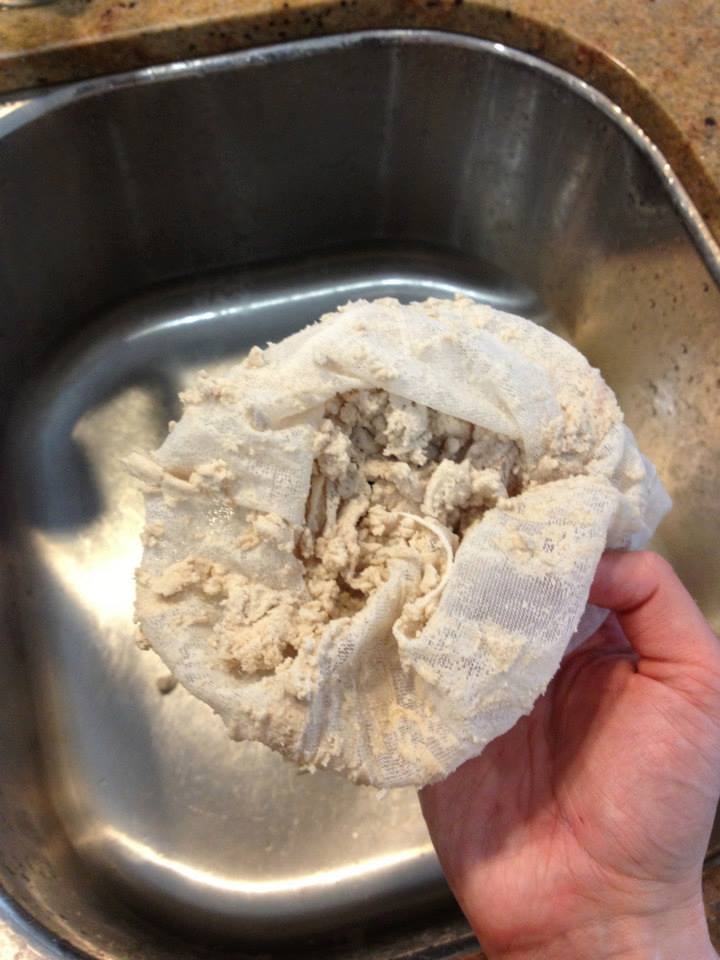
Step 9) You will have walnut or almond “pulp” left. You can choose to discard the pulp or save it in a bag and store in the freezer for other recipes. I got my nut milk bag for $10 plus free shipping from Elaina Love’s Pure Joy Planet! http://www.purejoyplanet.com/?Click=4989
Step 10) Rinse off the bag in order to finish straining your nut milk. I got my nut milk bag for $10 plus free shipping from Elaina Love’s Pure Joy Planet! http://www.purejoyplanet.com/?Click=4989
Step 11) Store your nut milk in a glass jar in the fridge for up to 5 to 7 days.
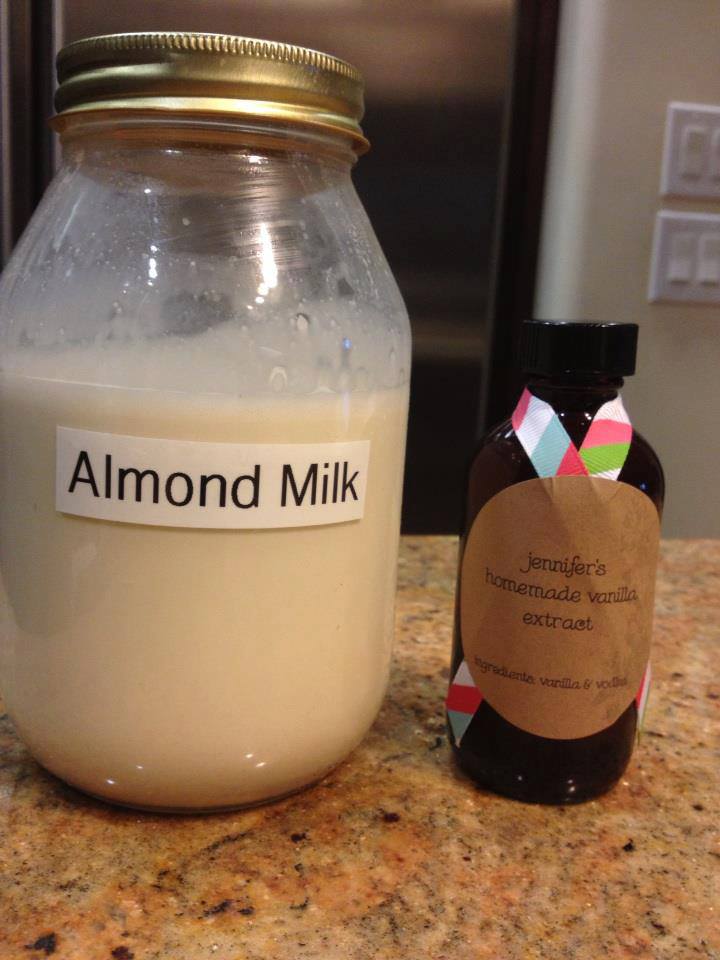
Optional: You can flavor or sweeten your nut milk with xylitol, dates, vanilla extract, or stevia. Also, you can add raw cacao when you blend to make chocolate milk!

To make your nut milk truly from scratch you can even add homemade vanilla extract! Thanks Jennifer!
Sometimes I even get creative and do a combination milk! Here I have 1/2 cup almonds, and 1/2 pecans (both already soaked)!